Lesson 6 - Installing Your Invisible Zip
We are on the home stretch!
Here's What You'll Achieve Today
- installing an invisible zip into your unlined & lined dress
- finishing the facing for the unlined dress
- finishing the facing for the lined dress
- sewing the CB seam for the unlined & lined dress
- sewing the CB lining
|
You'll need:
|
|
Installing an Invisible Zip into Your Unlined & Lined Dress
|
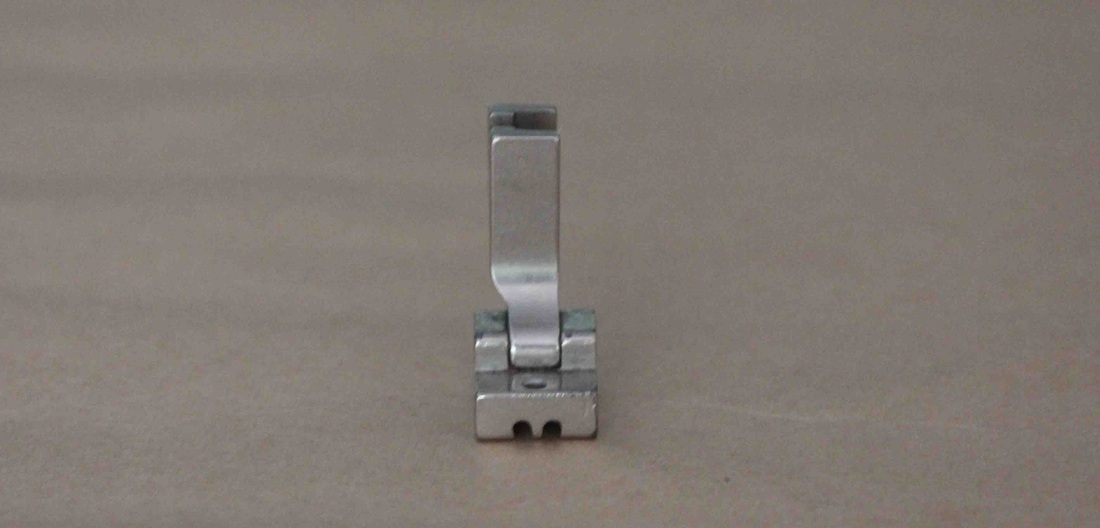
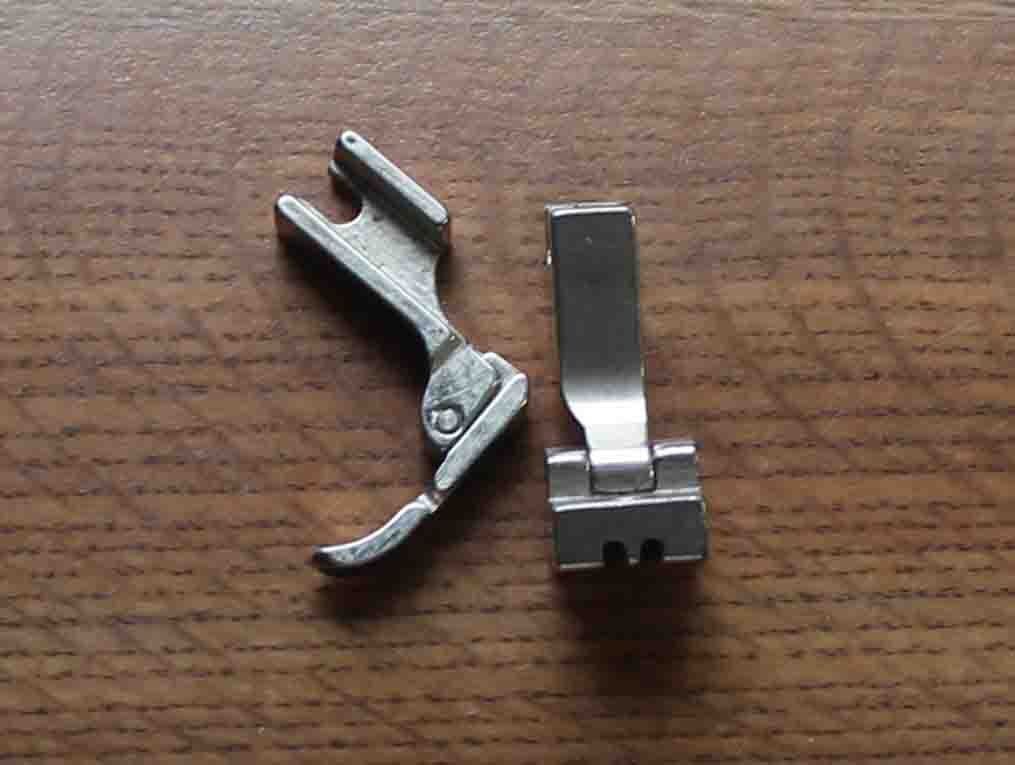
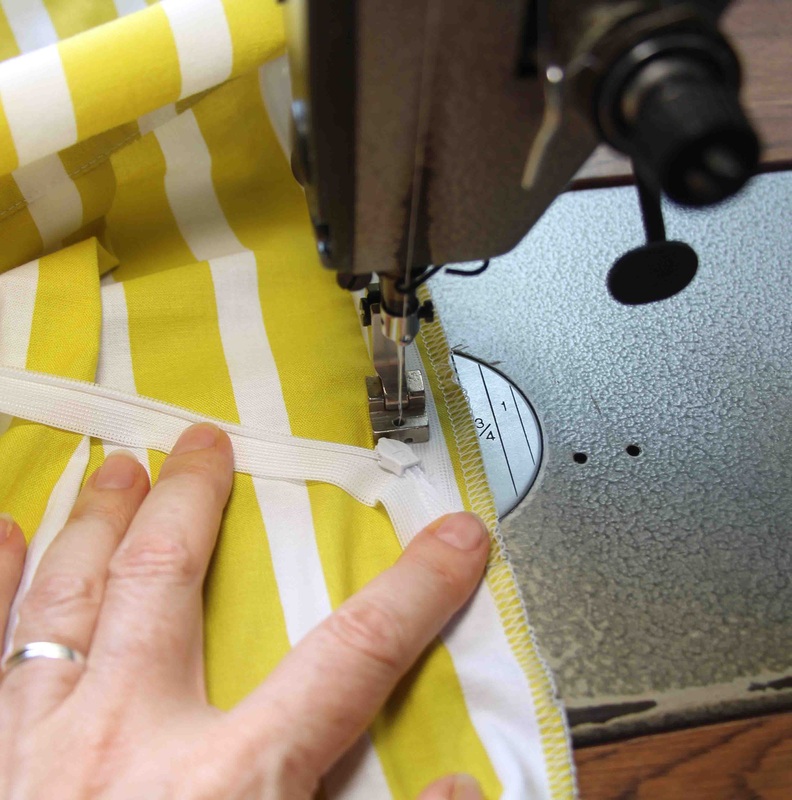
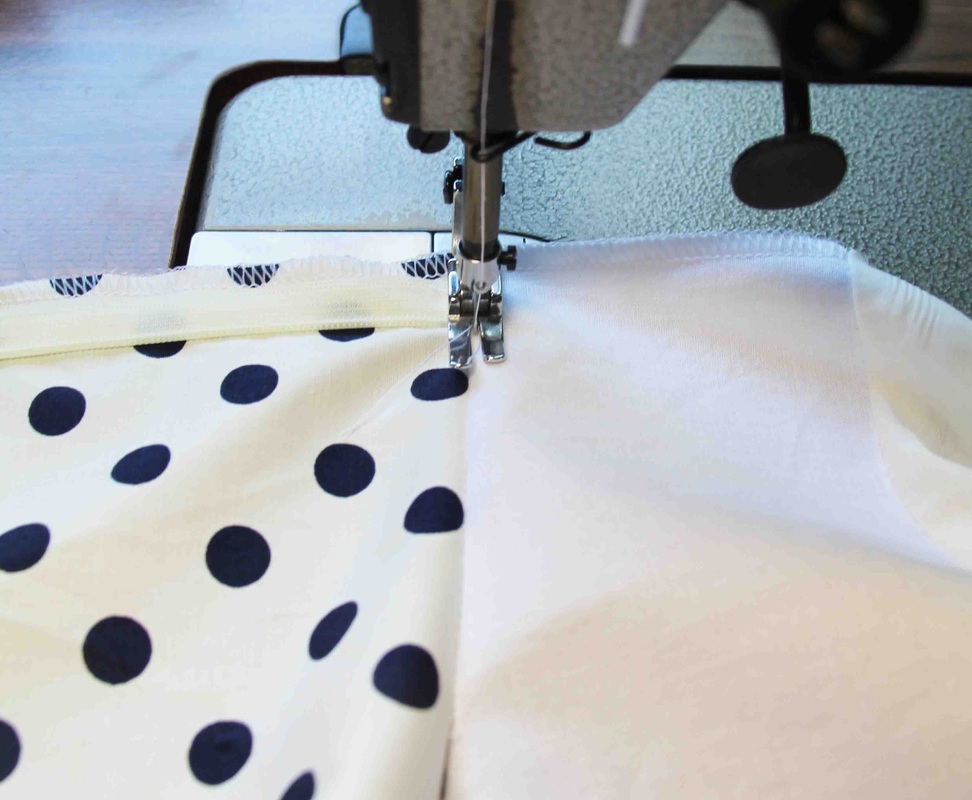
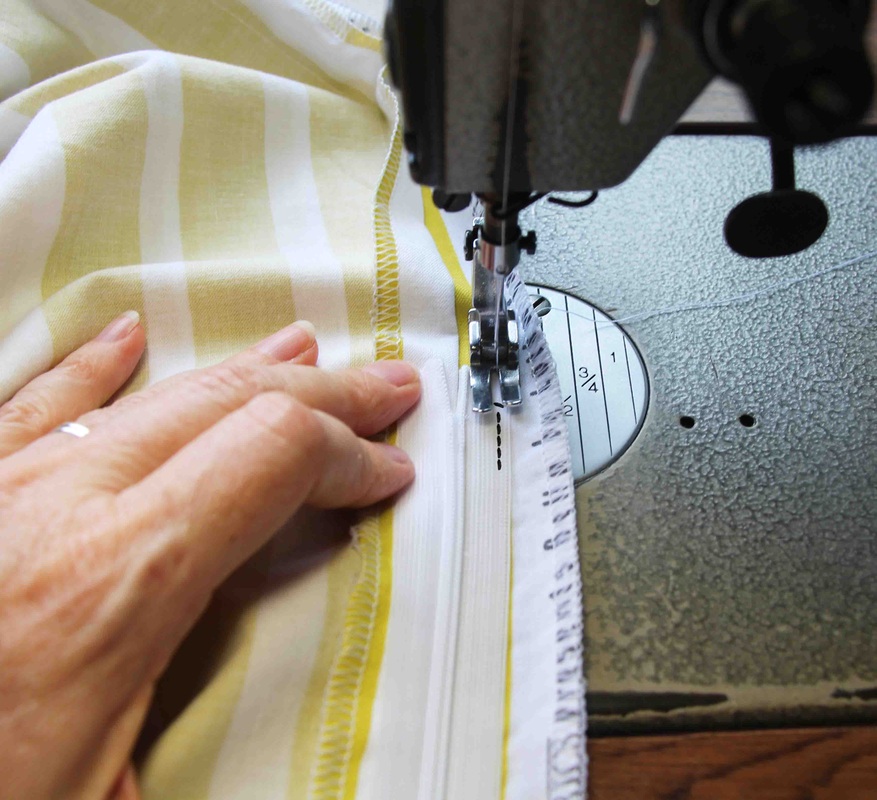
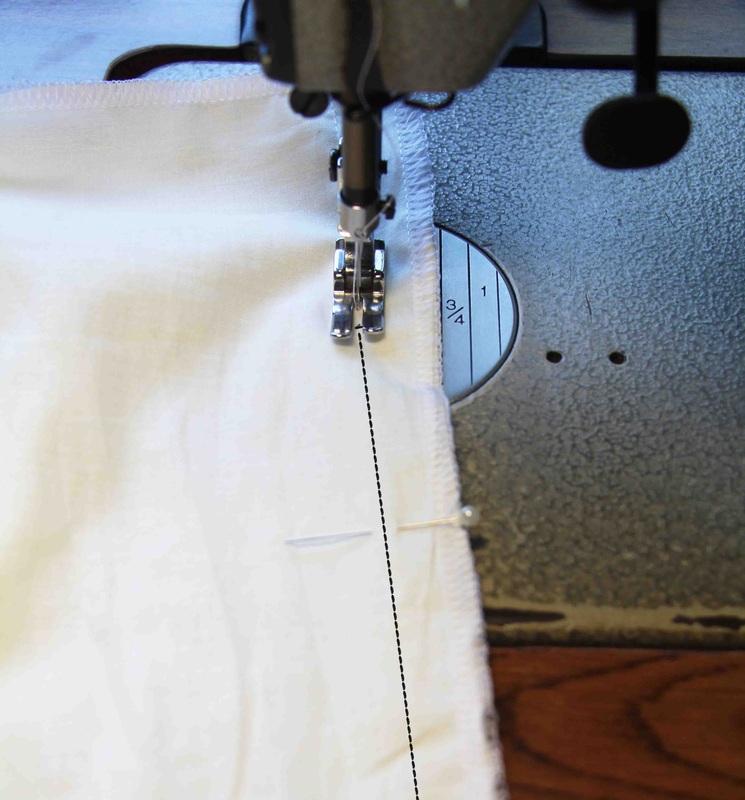
Change to your Invisible Zipper Foot
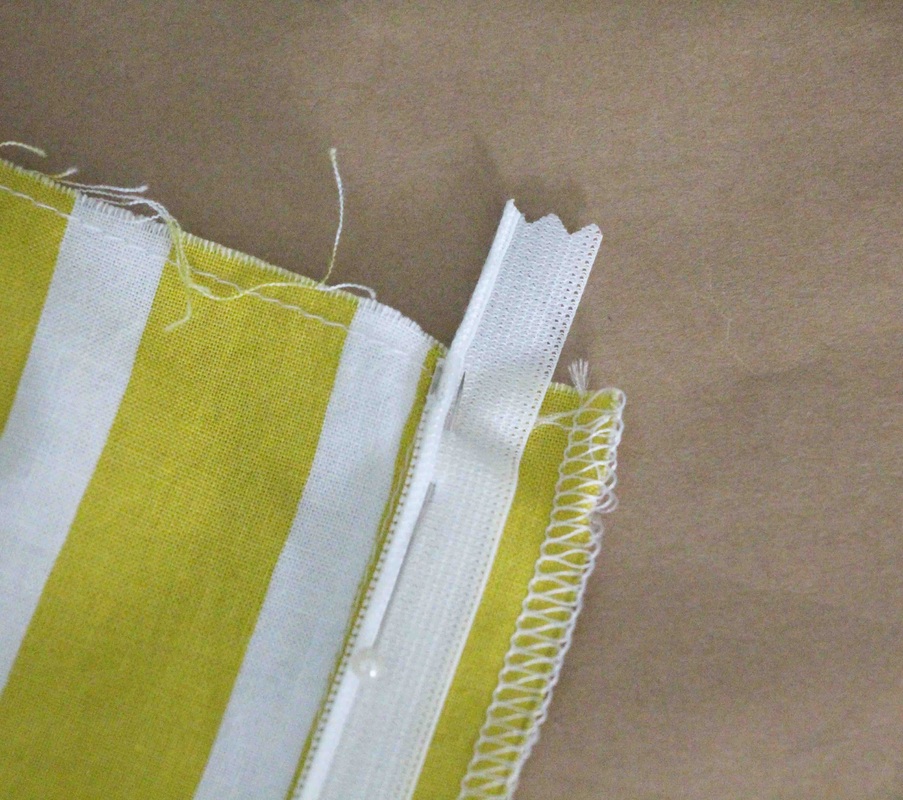
1. Start with the left back. Place the plastic stopper at the top of the zip in line with the neck edge and on the CB notch. 2. Pin (and baste - optional) the zip in place over the stay stitch down the CB seam. |
|
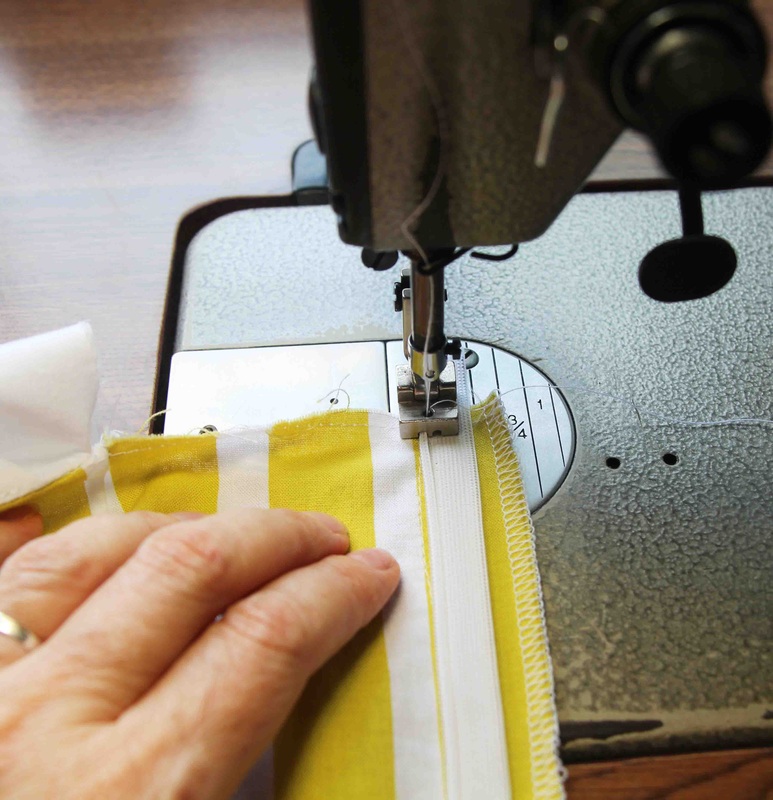
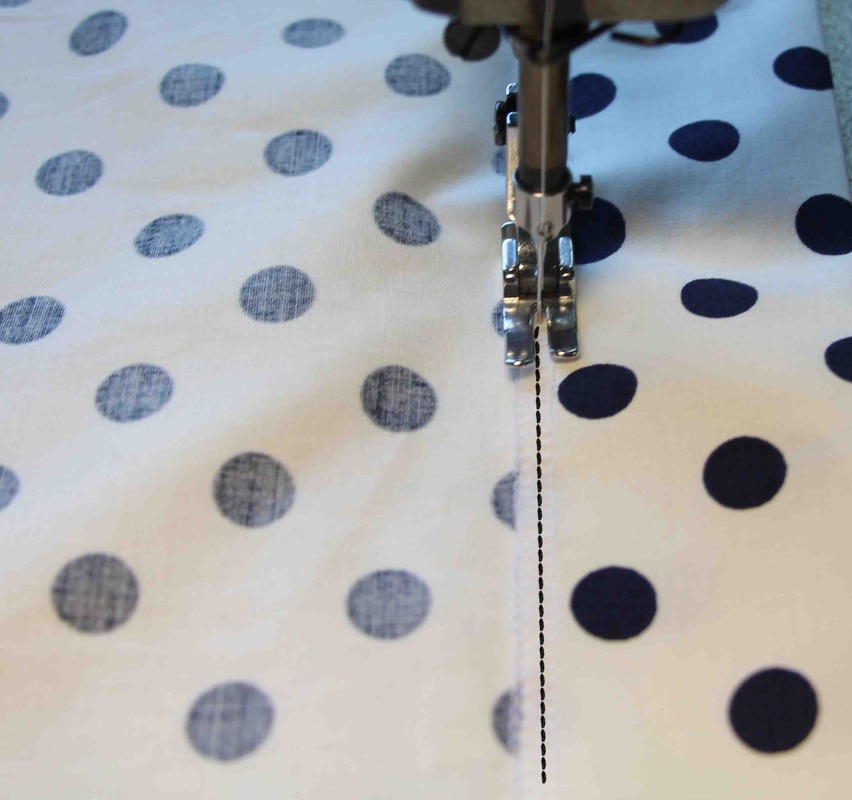
3. Sew down the zip slowly so that the fabric underneath doesn't pucker or stretch.
|
|
|
4. Sew as close as you can to the end of the zip.
|
|
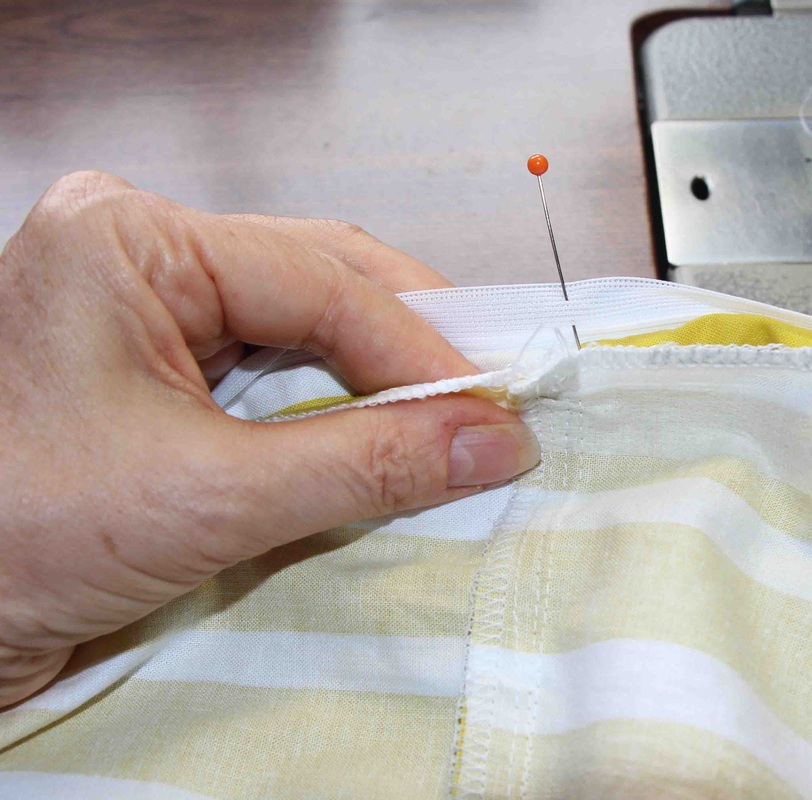
5. Now do the zip up past the waist seam and mark the waist seam with a pin. This will help you with the placement of the zip on the other side.
|

|
|
6. Line up the waist seam on the other side with the pin in the zip tape.
|
|
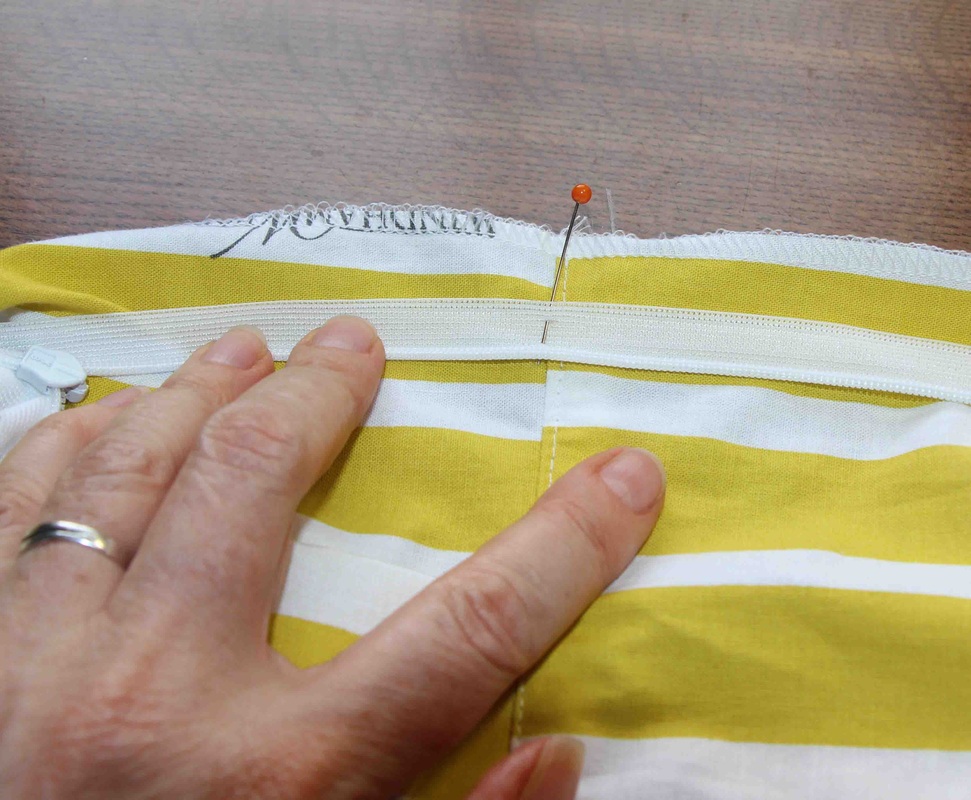
7. Now pin the zip in place to the right back bodice and skirt.
Make sure the the plastic stopper on the top of the zip is in line with the neck edge and placed on top of the CB notch. |
|
|
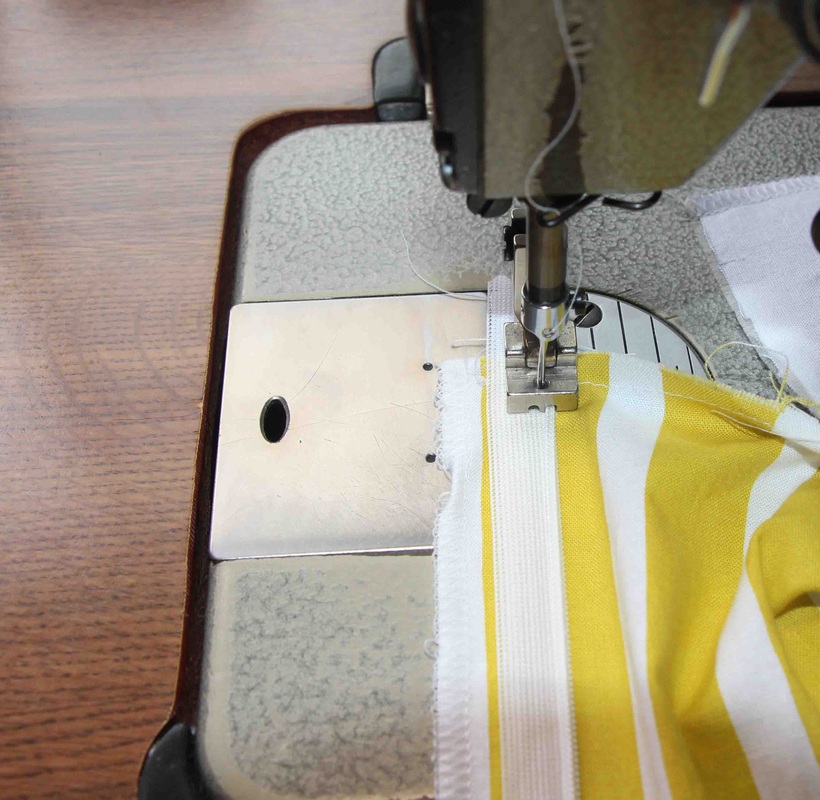
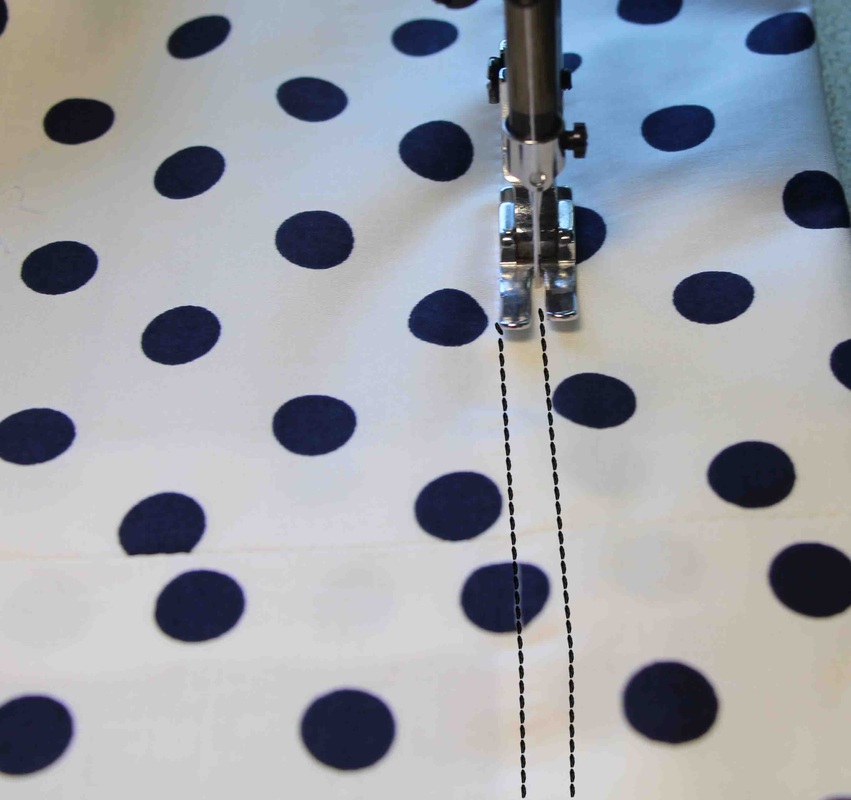
8. Sew down the zip tape slowly so the fabric underneath doesn't pucker or stretch. Sew as far as you can go to the end of the zip.
|
Finishing the Facing for Unlined Dress
|
Change back to your regular sewing foot.
1. Turn the back facing over the back bodice so that the right sides are together. 2. Sew together the neck seam of the bodice and facing that was left open. |
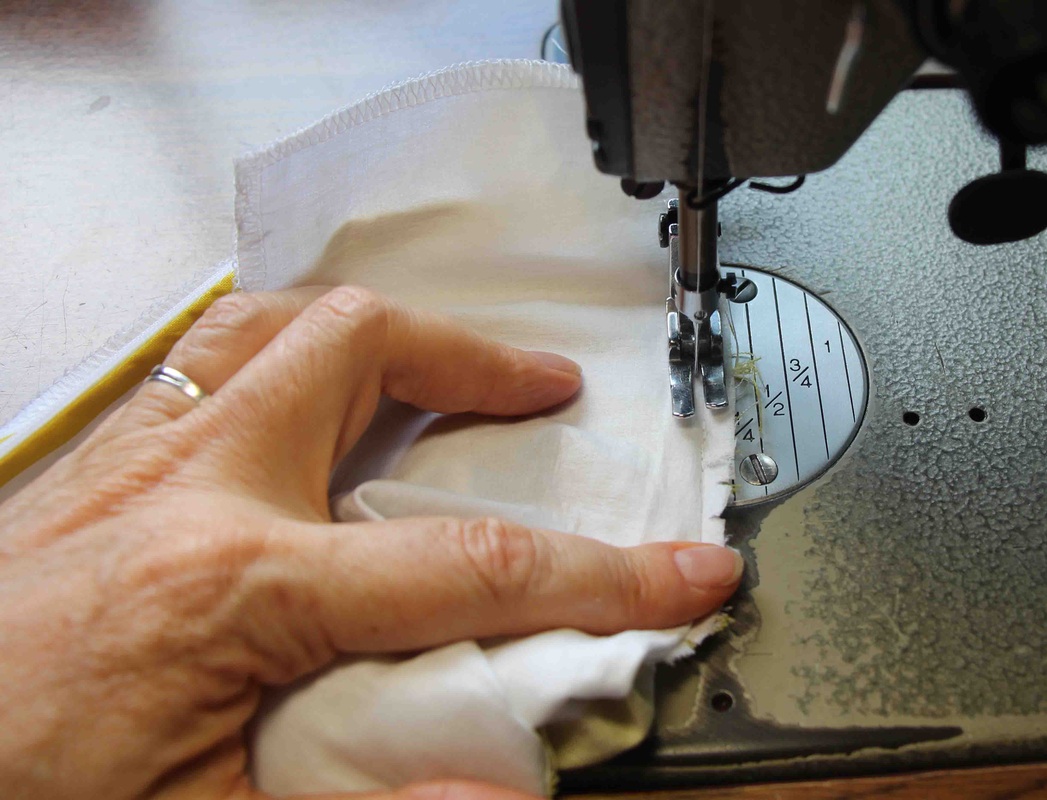
|
|
3. Open the facing and bodice to the right side and understitch the rest of the facing seam.
|
|
4. Repeat steps 1 and 2 then make sure the neck seams line up before proceeding with the understitch.
|
|
|
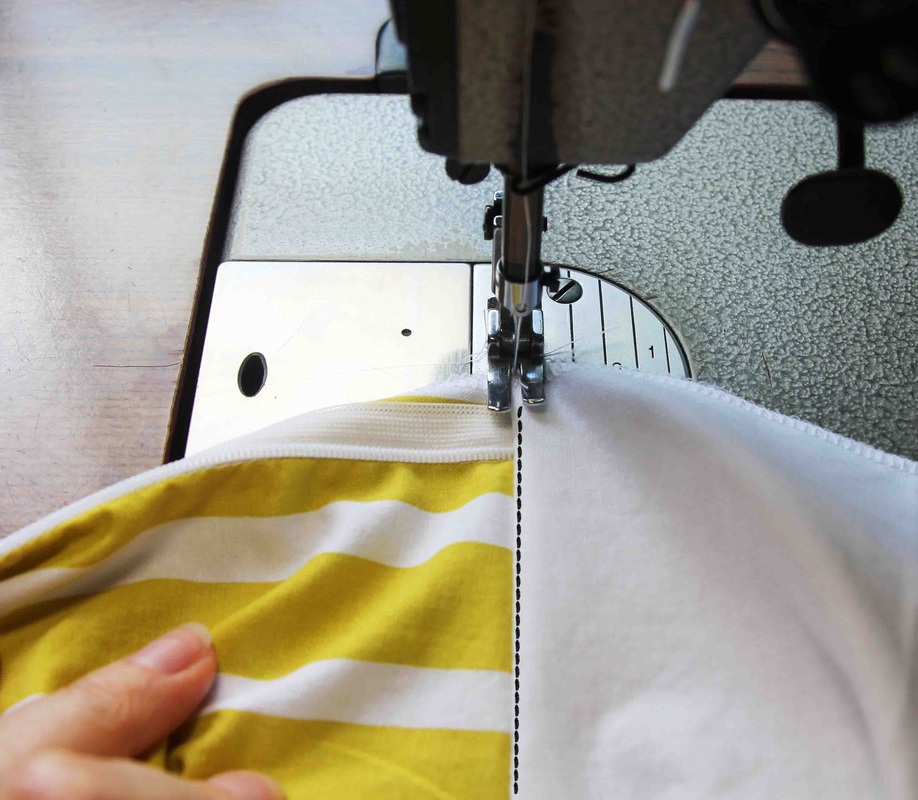
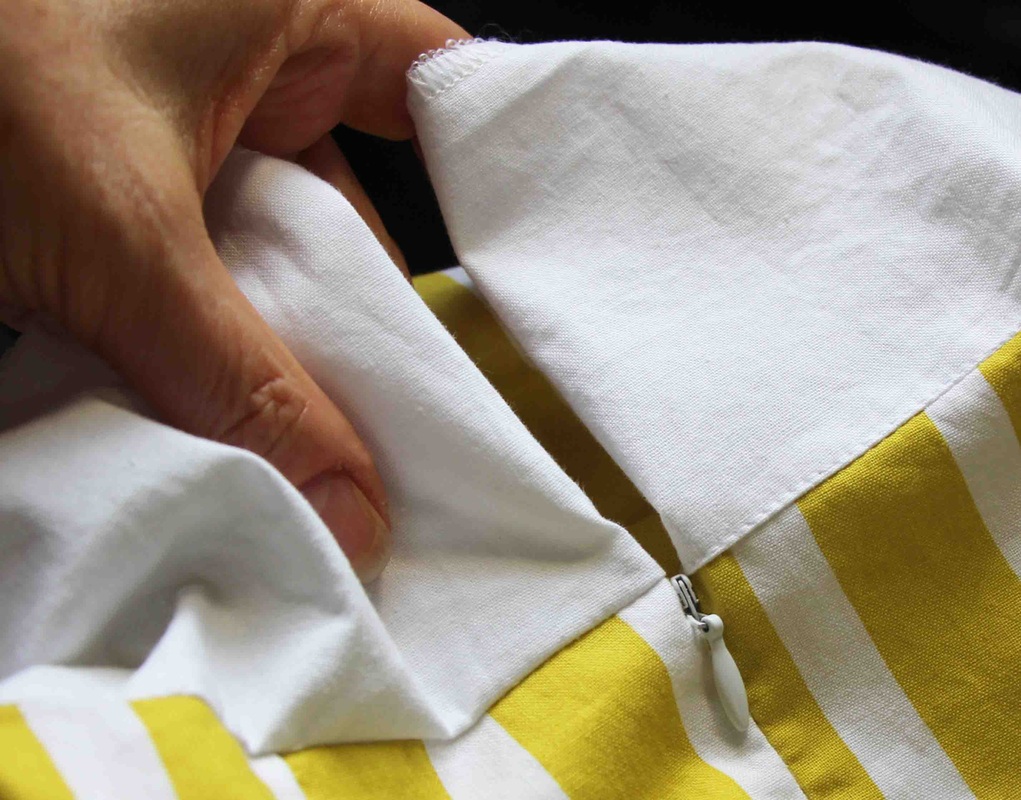
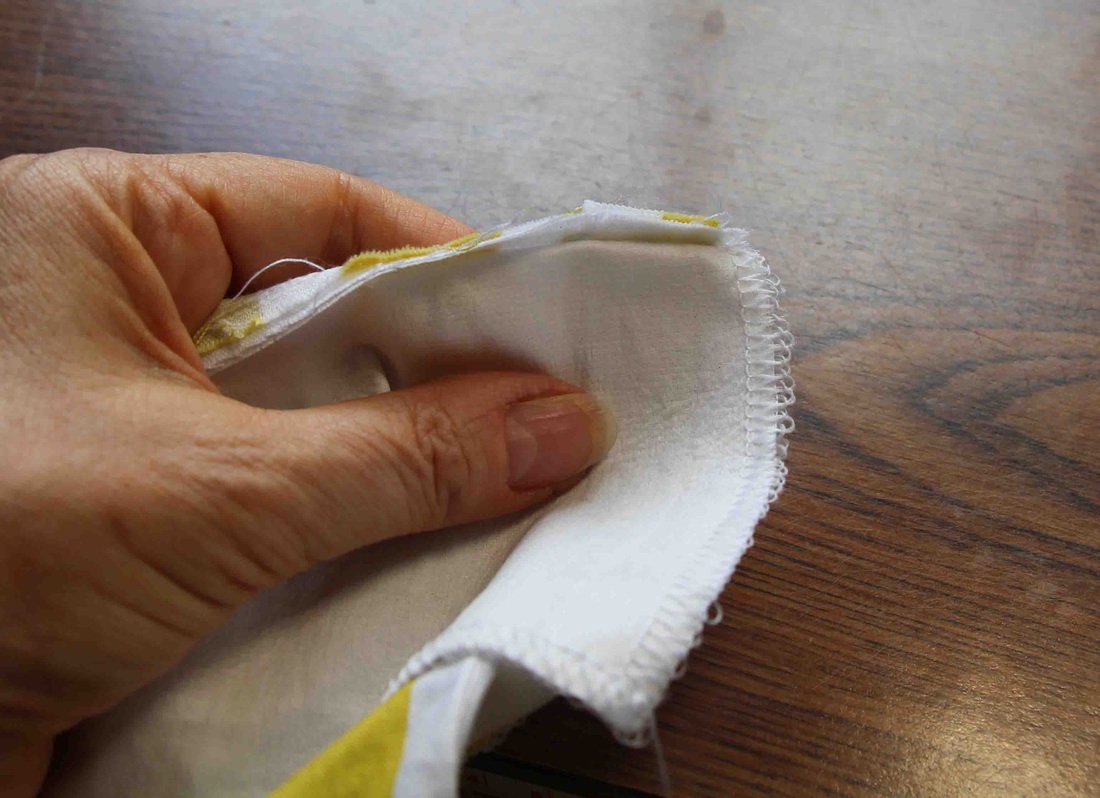
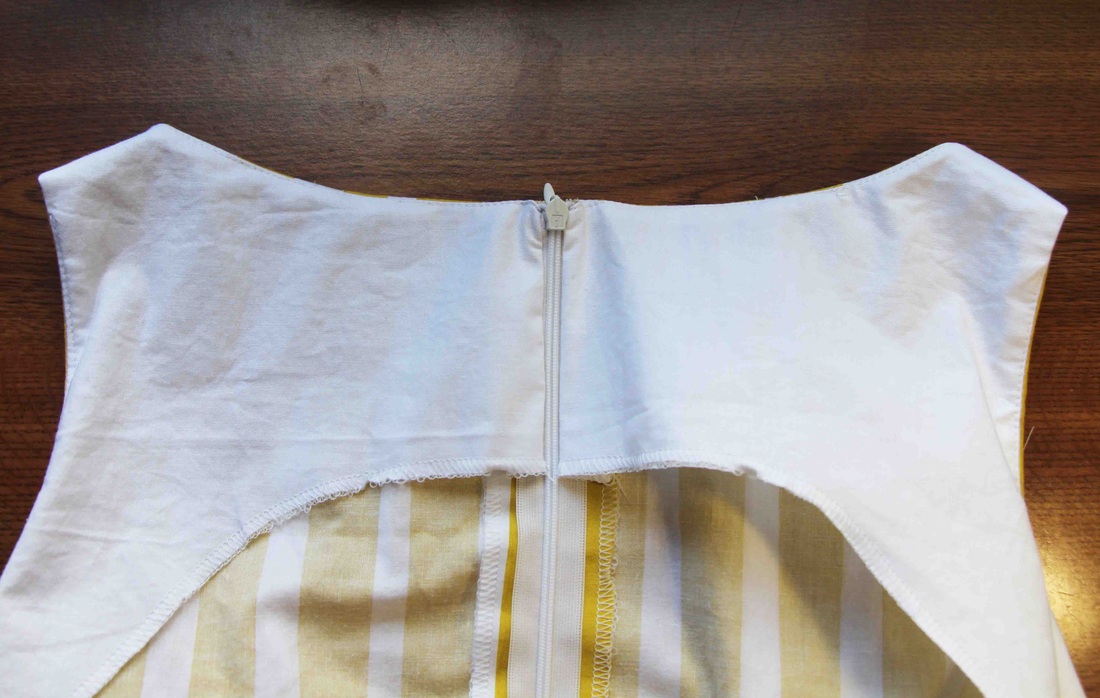
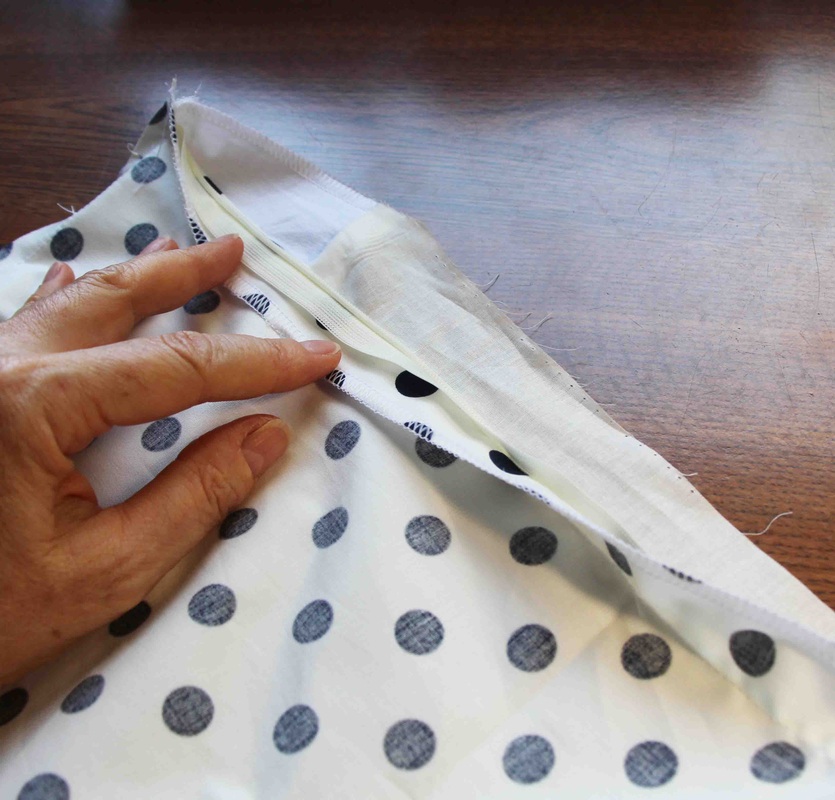
5. Turn the facing back over so it's right sides with the back bodice and trim off the zipper tape.
|
|
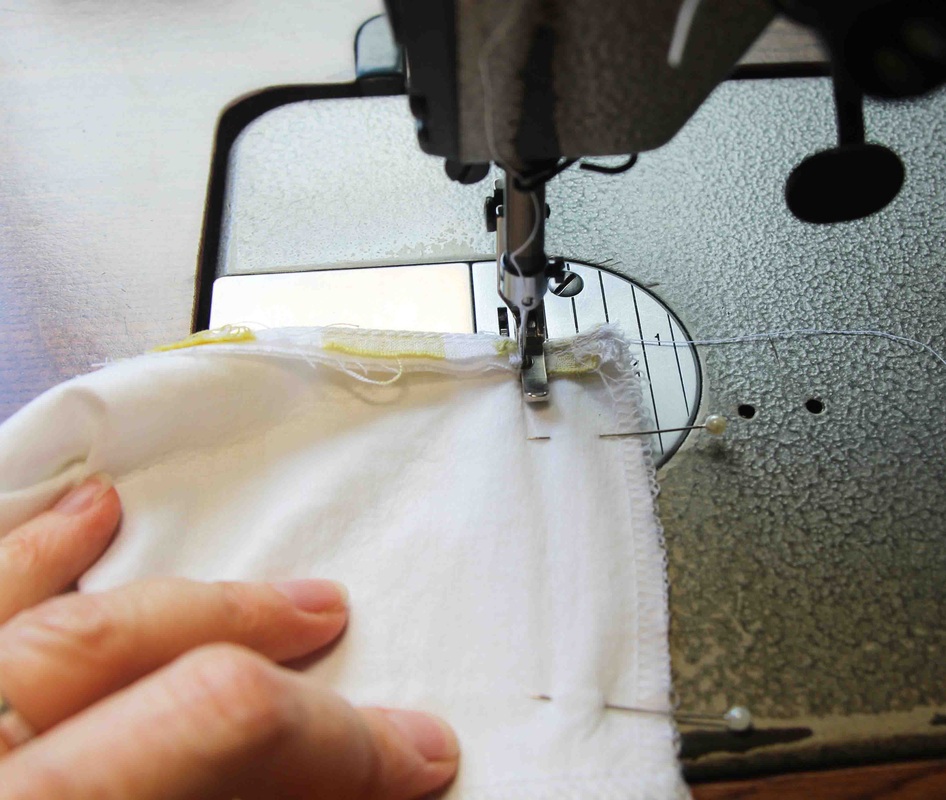
Change back to your regular zip foot.
6. Now pin and sew down the right of the zip - as close as you can get to the zipper teeth - to the end of the facing. You can feel the zipper teeth underneath to guide you. |
|
|
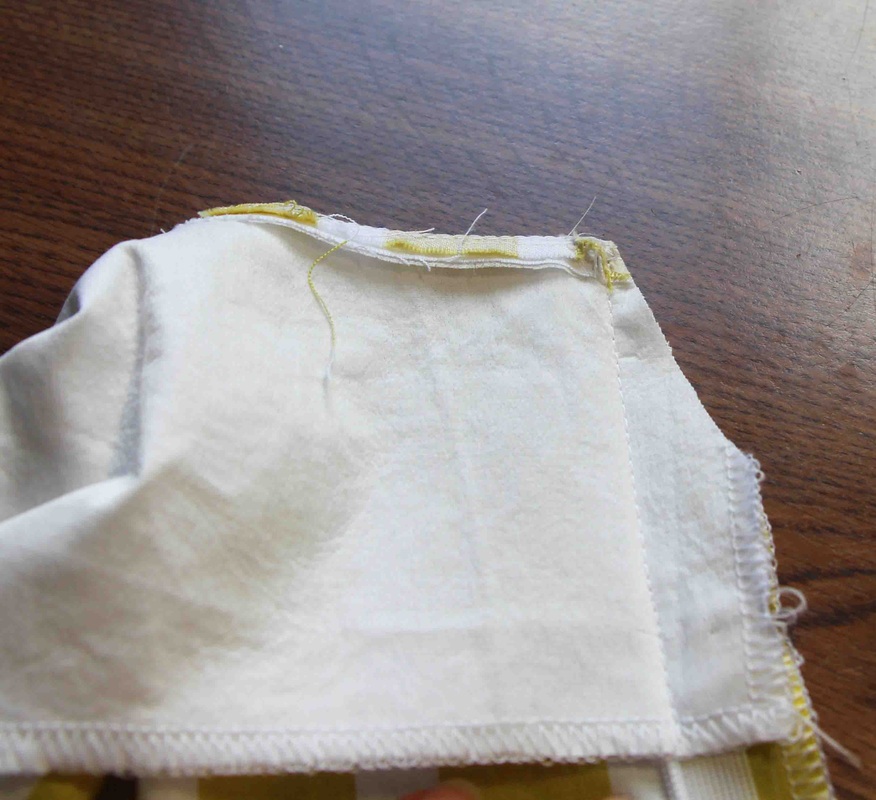
7. Trim away the excess fabric close to the seam and repeat Step 6 on the other side.
|
Finishing the Facing for the Lined Dress
|
This step is done exactly the same way as the Unlined version except it has the lining attached.
1. Open the facing and bodice to the right side and understitch the rest of the facing seam |
|
2. Fold the lining over so that the right sides are together. You are going to be sewing the lining to the dress at the CB with the invisible zip sandwiched between.
|
|

|
3. Pin the dress to the facing making sure your line up the waist seams.
|
|
Change to your regular zipper foot.
4. Starting at the top of the zip stitch down close to the zip. You can feel the zipper teeth underneath as a guide. Sew down as far as you can go to the end of the zip. 
Sewing the right side of the zip
|
Sewing the left side of the zip
|
|
5. Trim off the excess fabric at the top of the seam.
|
|
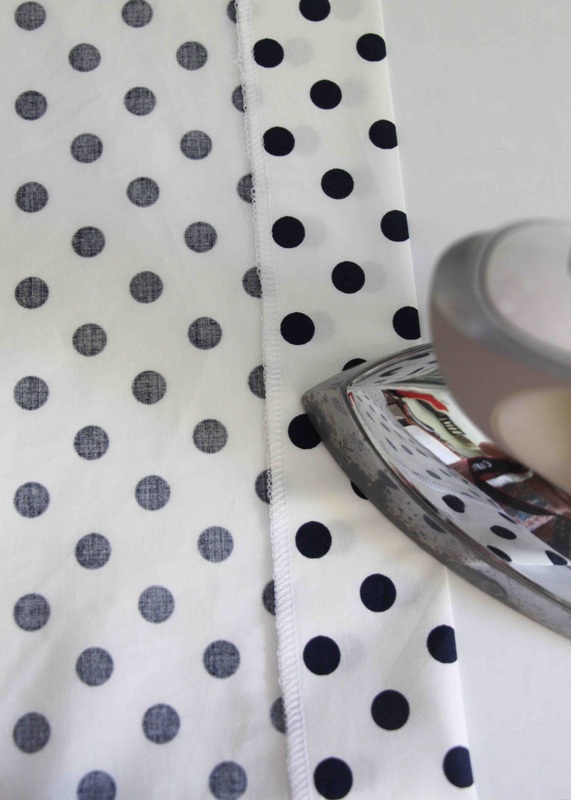
6. Turn to the right side and press.
|
|
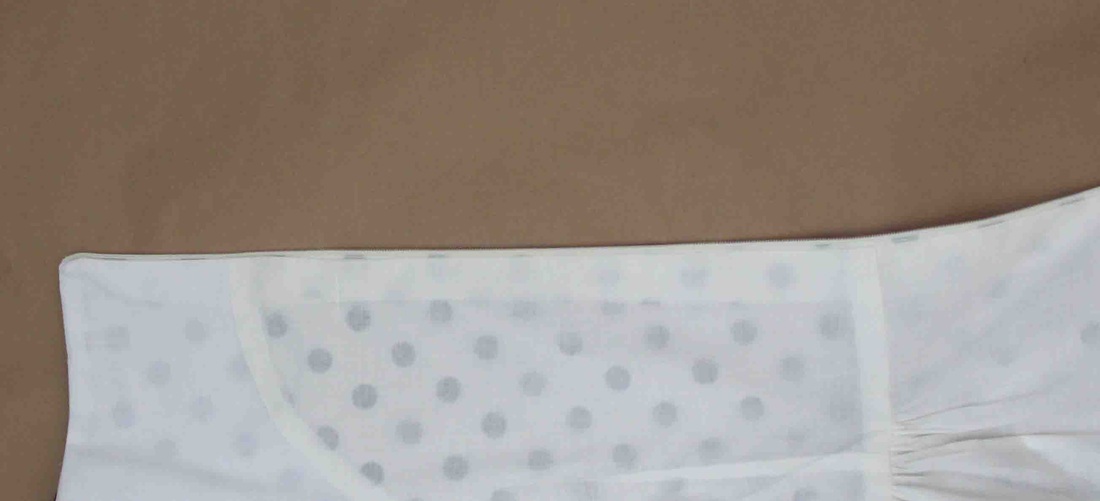
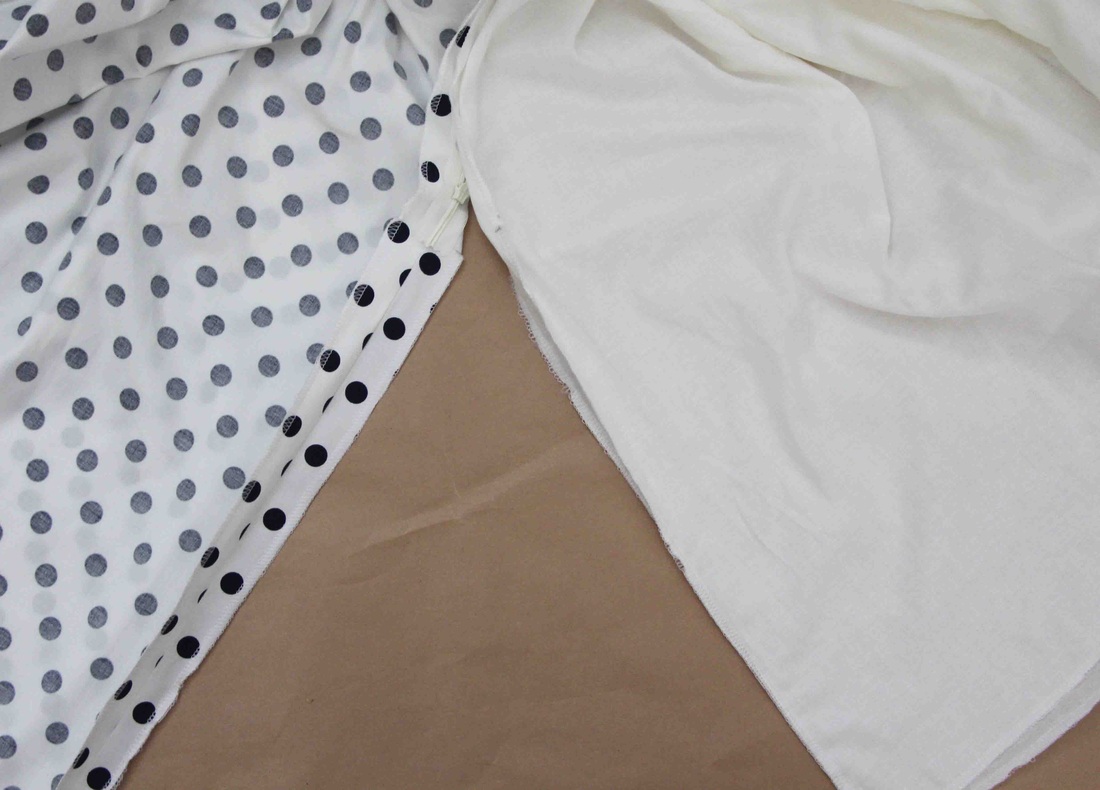
7. The back of your skirt lining should now look like this.
Finishing the Back Seam for the Unlined and Lined Versions
|
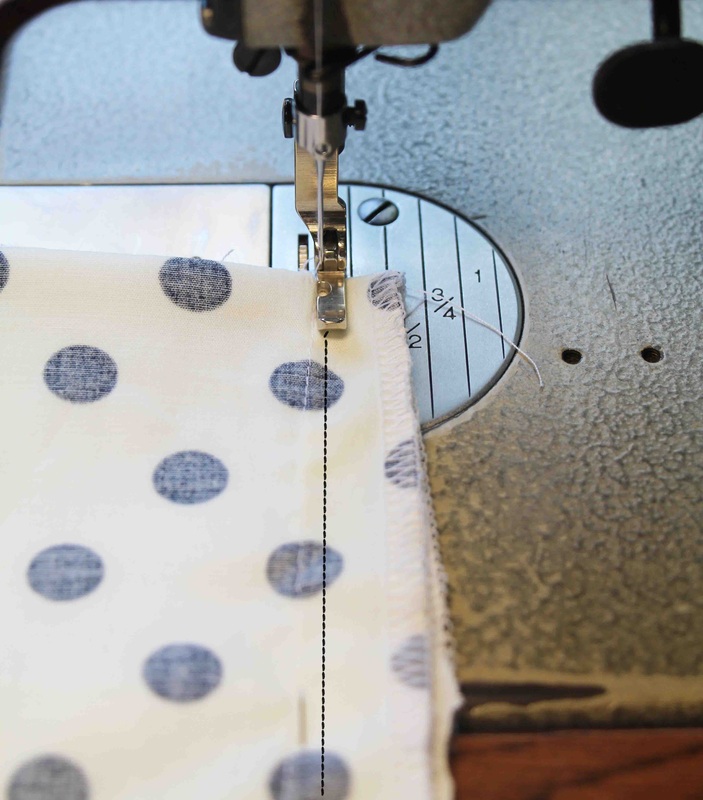
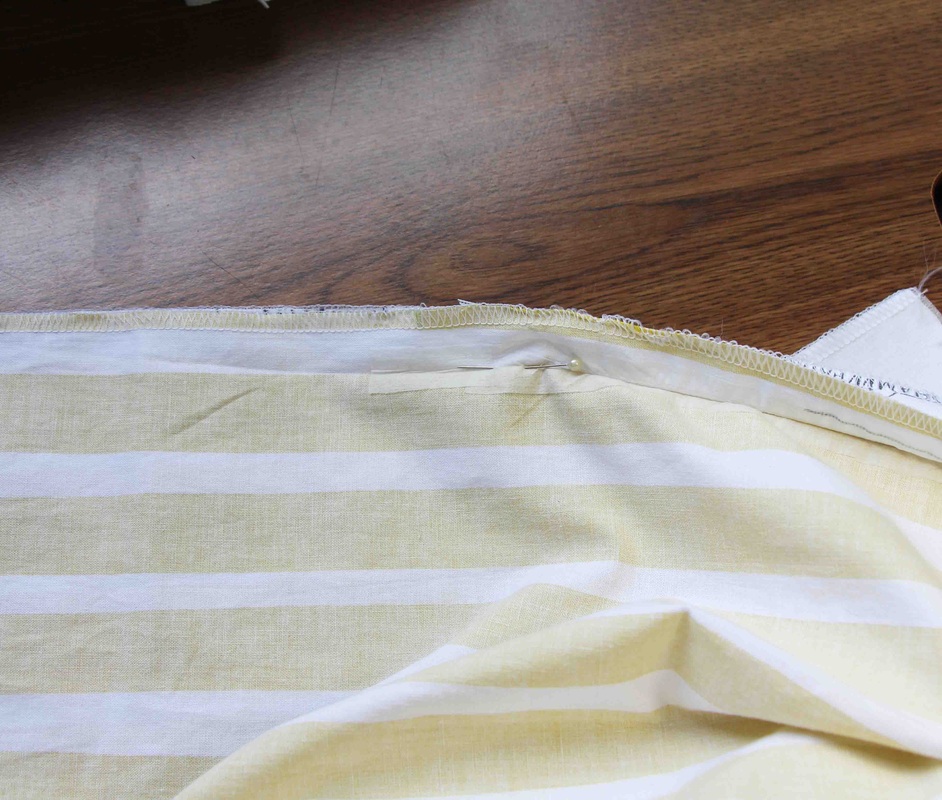
1. With right sides together of the back skirt seam pin the seam just below the end of the zip. This is to hold it in place.
Make sure the zip end is out of the way. |
|
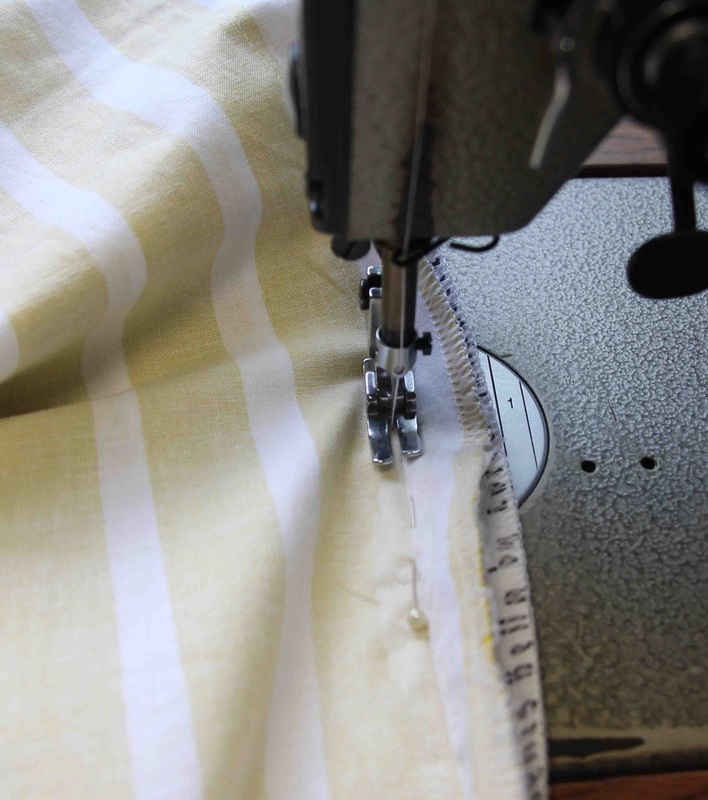
Change to your regular sewing foot.
2. Pin the rest of the seam down to the hem. 3. Starting from the hem sew a far as you can go to the end of the zip. |
|
|
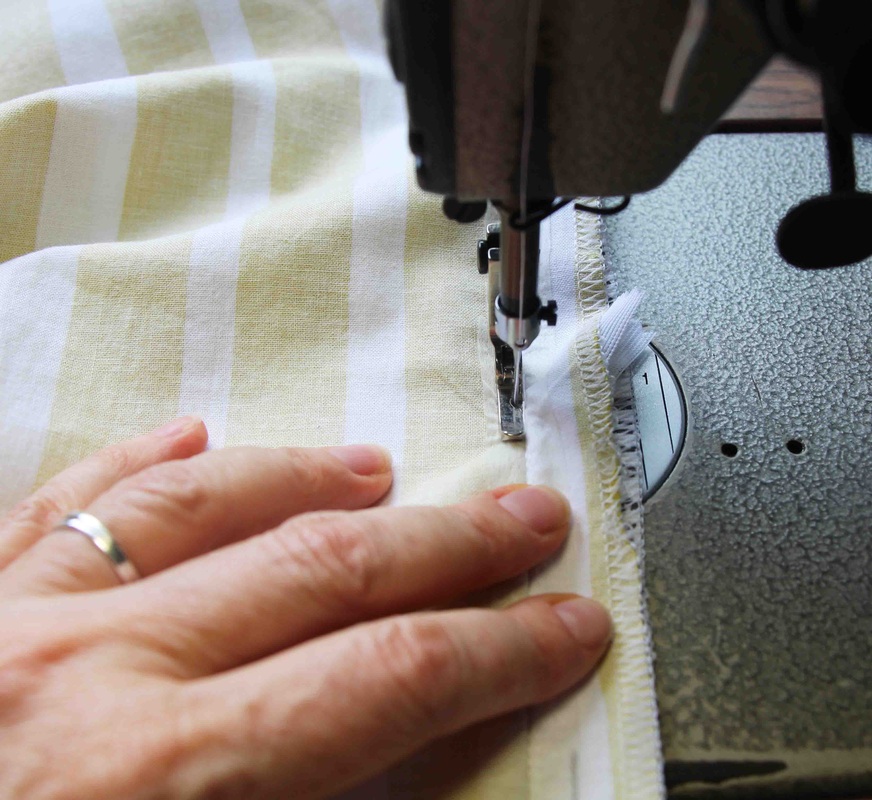
Change to your regular zipper foot.
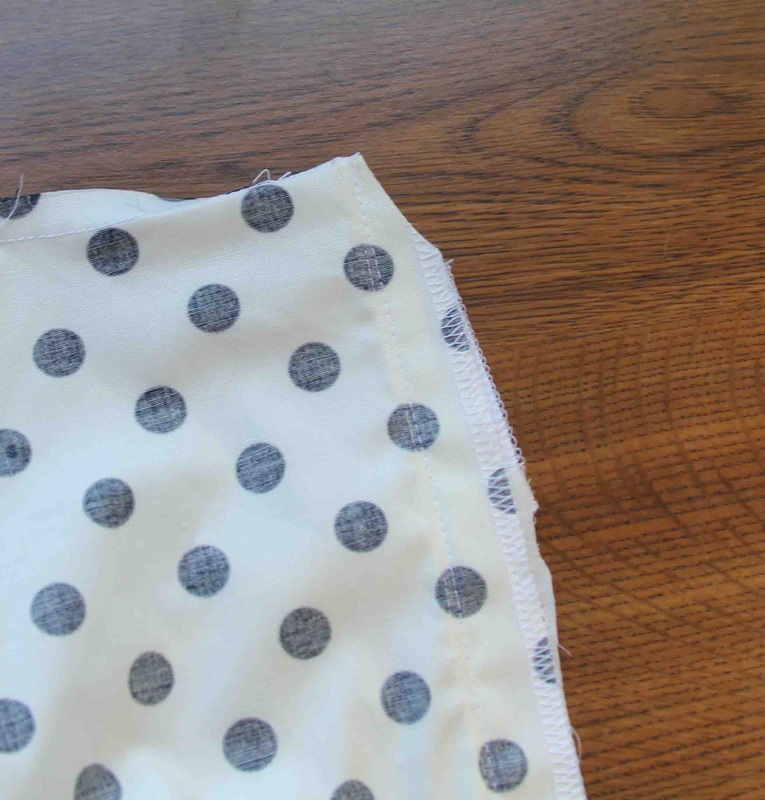
4. Finish off the rest of the seam and sew as close as you can go to the end of the zip. |
|
5. For added strength on the bottom of the zip sew each side of the zip at the bottom only to the seam. Sew about 2.5cm/1".
|
|
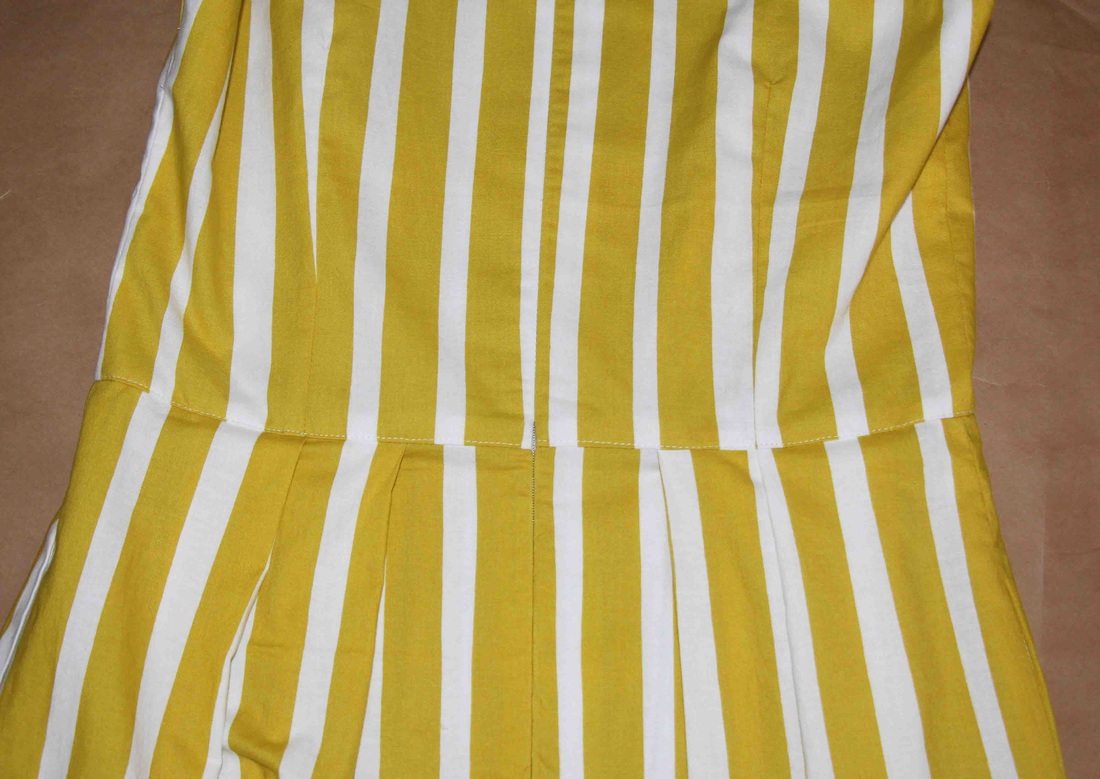
Sewing the Lining CB seam
|
This is how your lining should be now. The lining has been sewn to the zip and the CB is left open which is now to be sewn up.
|
|
|
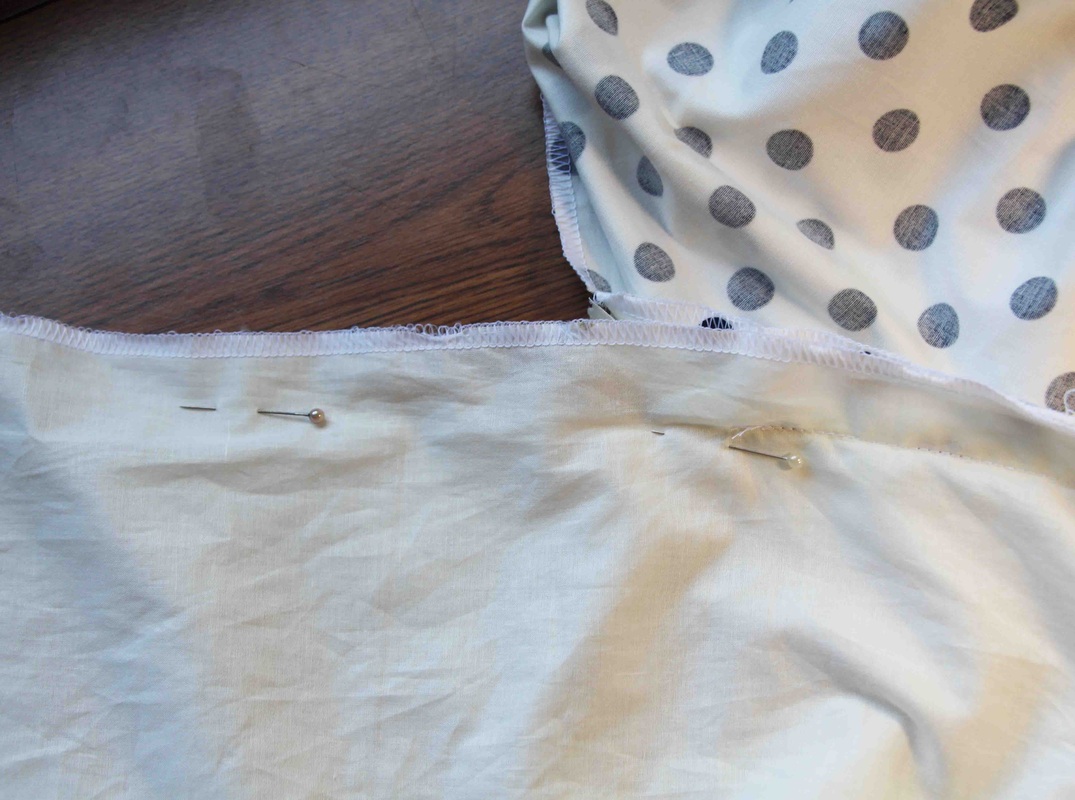
1. Pin the lining CB seam to the zip.
|
|
|
Change to your regular sewing foot
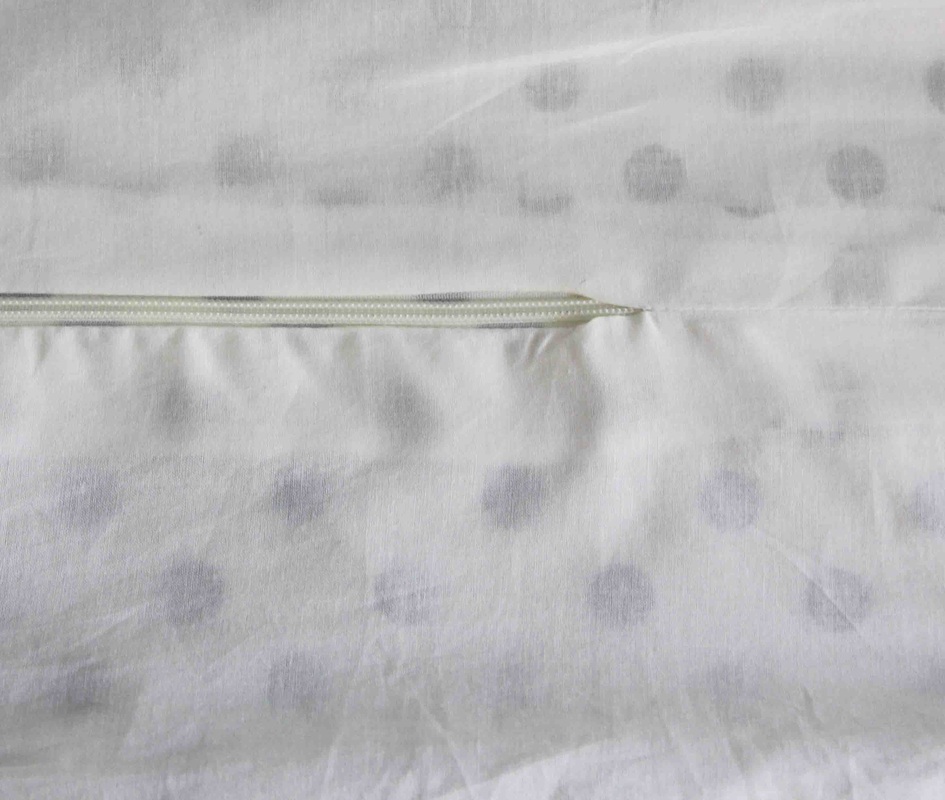
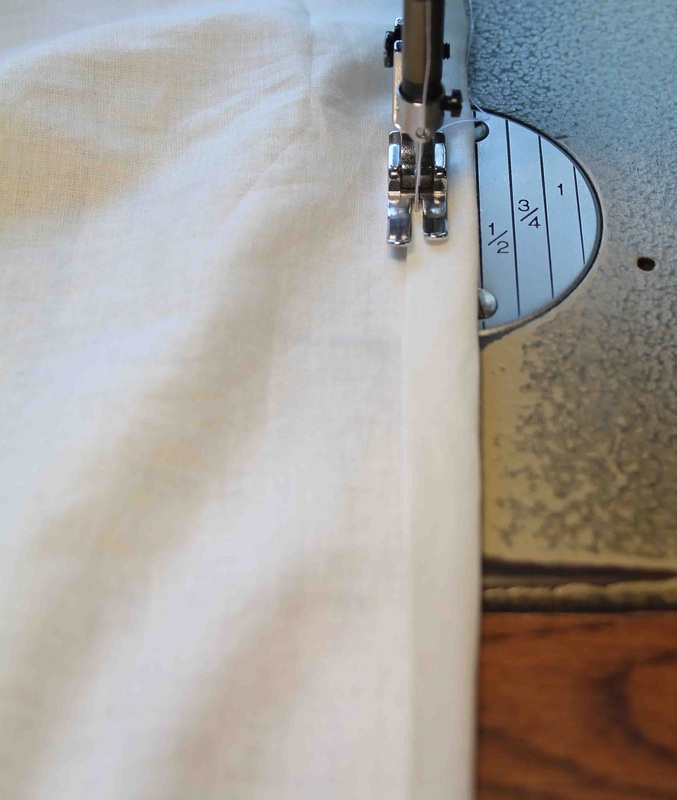
2. With right sides together of the lining pin and sew from the hem to the bottom of the zip stopping about 2.5cm/1" from the end of the zip. If you need to change to your regular zipper foot to finish off the seam. 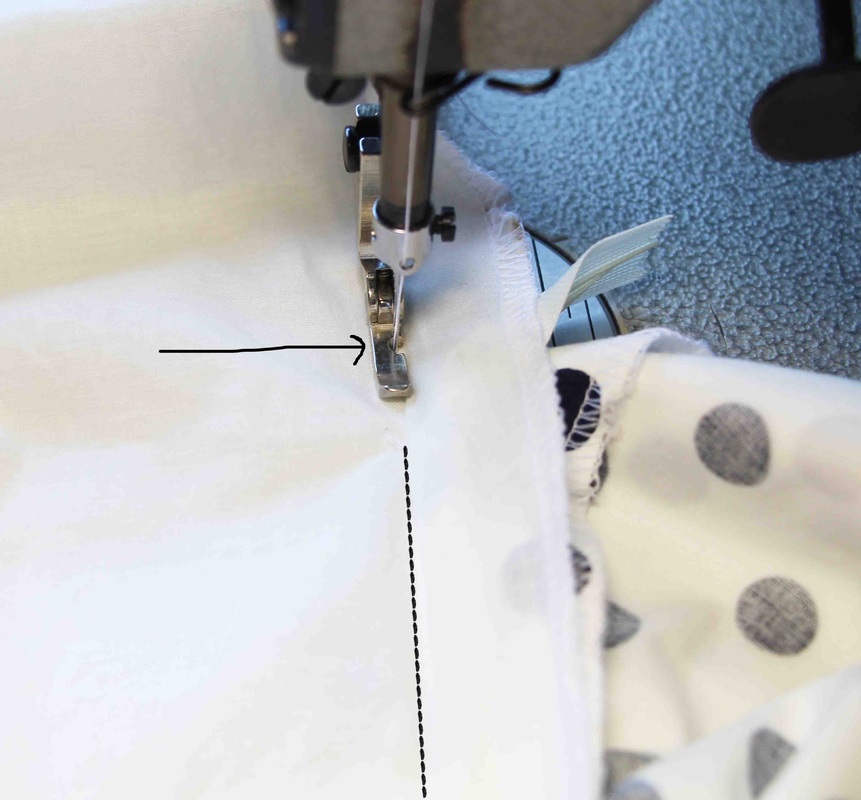
|
|
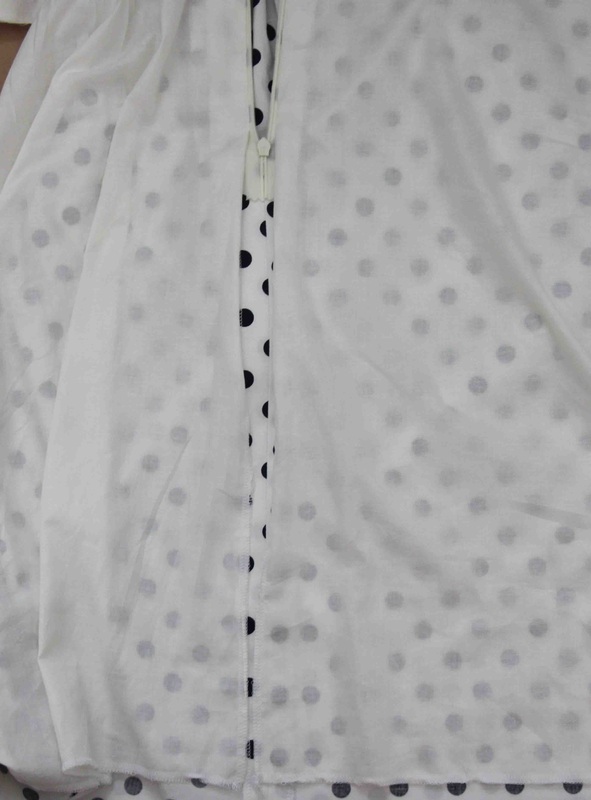
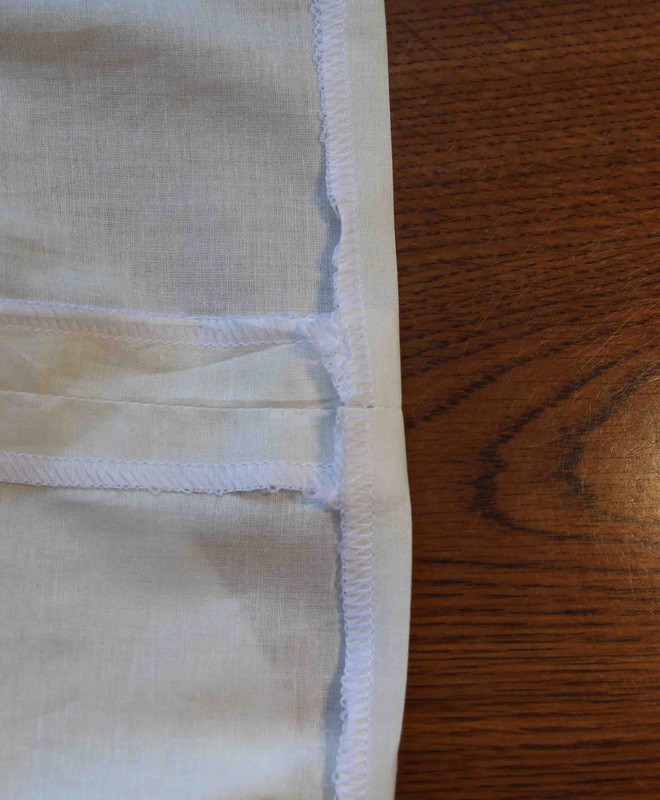
3. This is how the lining should look at the end of the zip.
|
Sewing the Hem
There are many different ways to sew your hem:
- blind hem by hand
- blind hem by machine
- decorative double stitch in contrasting or matching thread
|
1. With the skirt on the wrong side turn up 5cm/2" and press.
|
|
|
2. Sew your first row of stitching on the overlocked/serged edge.
|
|
3. For the second row of stitching turn the dress to the right side and sew the second row of stitching 6mm/1/4" away to the right of the first row.
|
|
Sewing the Hem of the Lining
|
1. On the wrong side of the lining turn up 12mm/1/2" and press.
|
|
2. Then turn up another 12mm/1/2". Pin in place a sew a row of stitching.
|
|
And that, Ladies, is it!
You made it! Well done!
Now it's time to sit back with a celebratory beverage of your choice and admire your clever handiwork. And be prepared for friends, family and even strangers to say "Wow your dress is beautiful" and you can say "Why thank you. Actually, I made it myself with the help from Ann from 1 Puddle Lane" lol!
Thank you so much ladies for following along with my very first sew-a-long. I hope you enjoyed it and learnt a lot from it.
The MiSS AUDREY DRESS SEW-A-LONG will be left up on my website for you to revisit any time you want.
Also, I'll be having more Sew-A-Longs as I produce more beautiful patterns for you.......but I will let you know.
All I need now is to be inundated with beautiful photos of yourselves in your beautiful MiSS AUDREY DRESS.


The MiSS AUDREY DRESS SEW-A-LONG
- Welcome to the MiSS AUDREY DRESS SEW-A-LONG - posted 1/12/14
- Cutting Out and Sewing Up Your Calico Toile/Muslin - posted 2/12/14
- Fitting Your Calico Toile/Muslin - posted 4/12/14
- Transfer Your Toile/Muslin alterations to your pattern - 6/12/14
- Cutting Out and Sewing Up Your Bodice - Unlined/Lined version - 8/12/14
- Attaching the Skirt - Unlined/Lined - Pleated/Gathers - 13/12/14
- Attaching the Invisible Zip - Unlined/Lined versions and sewing the hem - 16/12/14
- Finale! Showing off your Beautiful Dresses - 23/12/14
