Module 2:1 - Cutting out and Sewing your Bodice Toile (with a sleeve)
Your bodice with a sleeve is slightly different to the bodice without a sleeve that you did in Module 1.
The bodice with a sleeve needs to have a bit more room around the armhole and the sleeve needs to sit more out on the shoulder point, across chest and across back. We will be using the shoulder to shoulder measurement to determine how far out the shoulder seam needs to come.
Also, we may have to alter the sleeve to fit the armhole........that's if you had alterations to the bodice in Module 1.
You will see what I mean as we go along in this Module.
Ok, so let's get started!
Here's What You'll Achieve in this Module
- Adjusting your Sleeveless Bodice pattern
- Work out what size sleeve to use (download the sleeve pattern here)
- How to Sew up your Calico Toile/Muslin for the Fitting Stage
Adjusting your Sleeveless Bodice Pattern
|
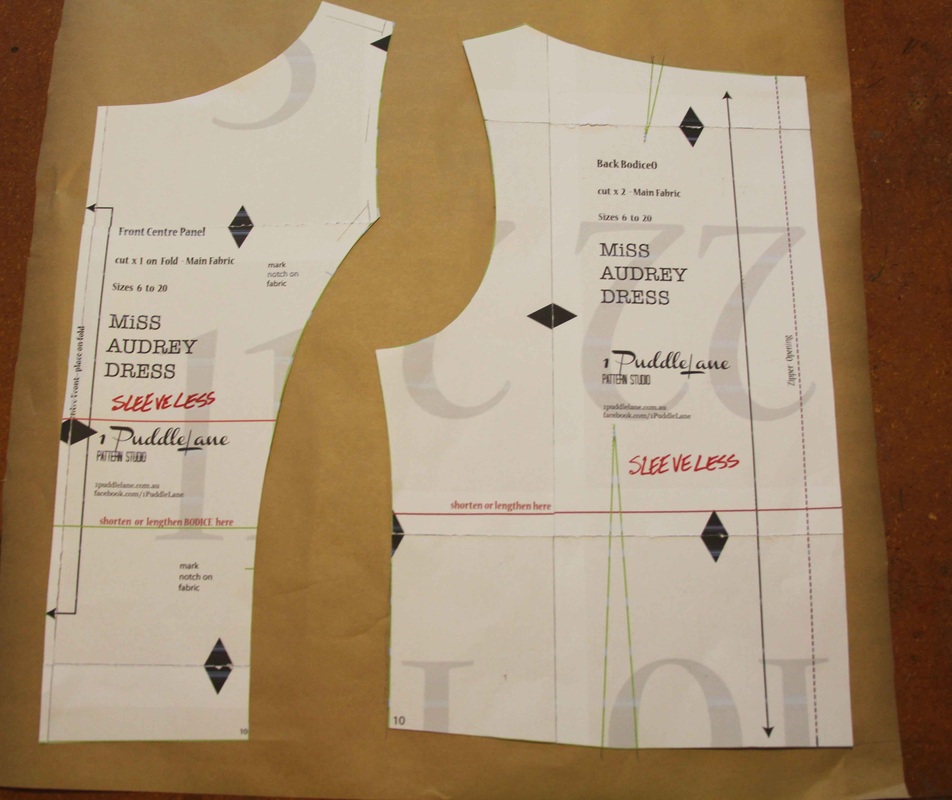
1. First thing you need to do is mark all your bodice patterns from Module 1 with 'SLEEVELESS'. As you are going to trace these patterns and adjust them for this Module.
|
|
|
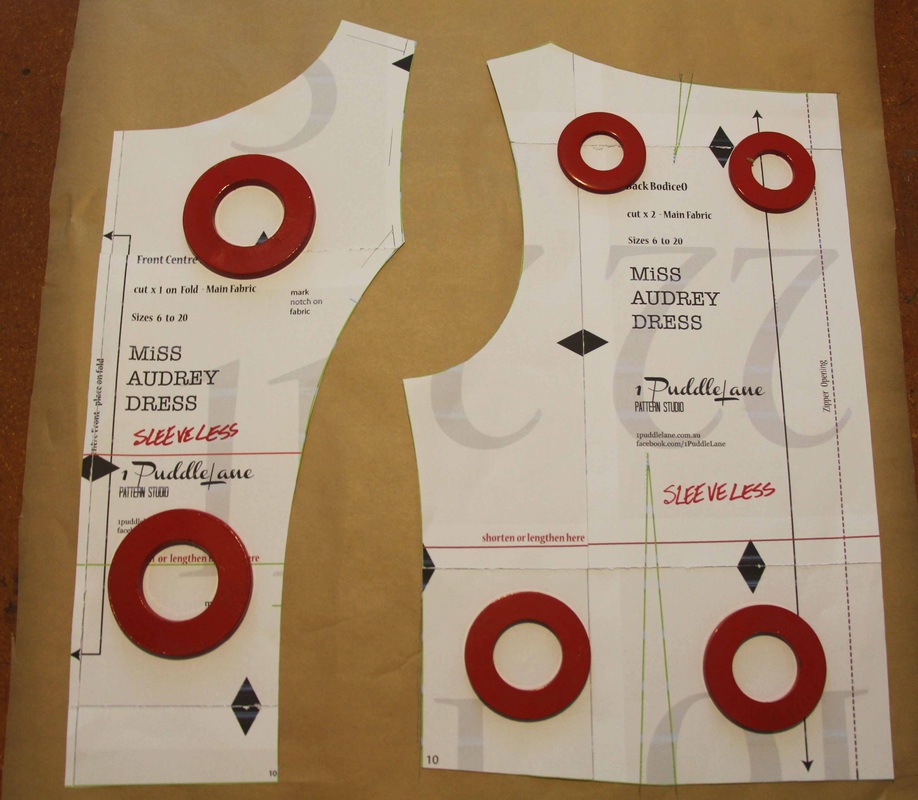
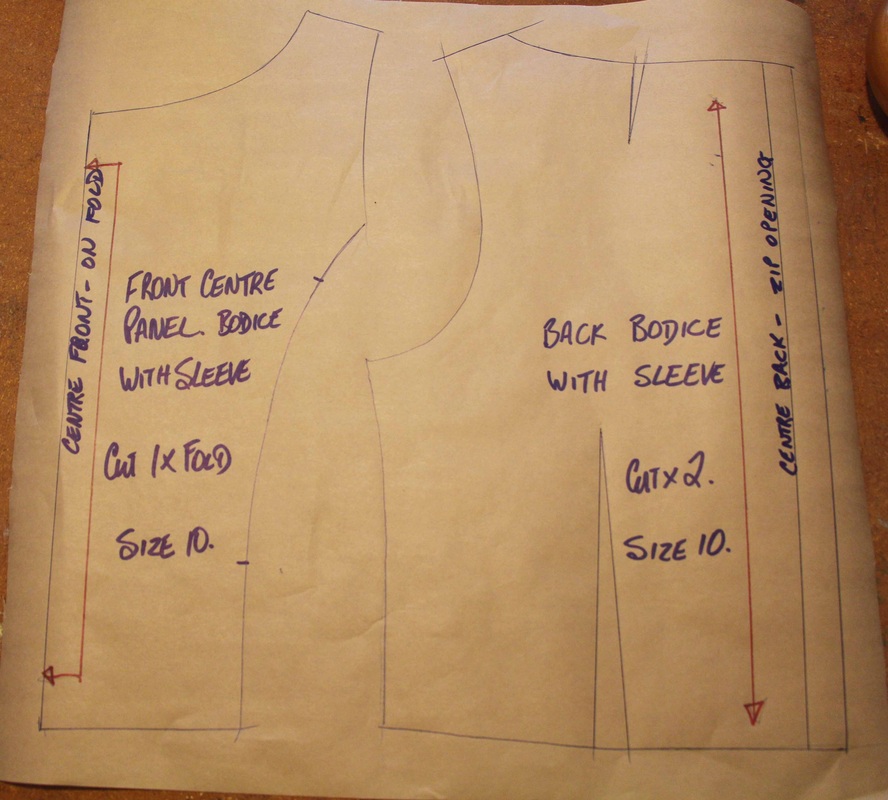
2. Pin or put weights on your pattern and start tracing around your front, back and side front pattern. Make sure you put in your back darts and grain lines. 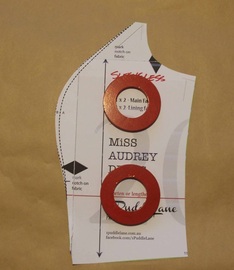
|
|
3. Now mark your pattern pieces:
Also, mark in your grain lines, the size you used and how many pattern pieces to cut. 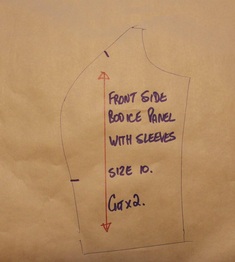
|
|
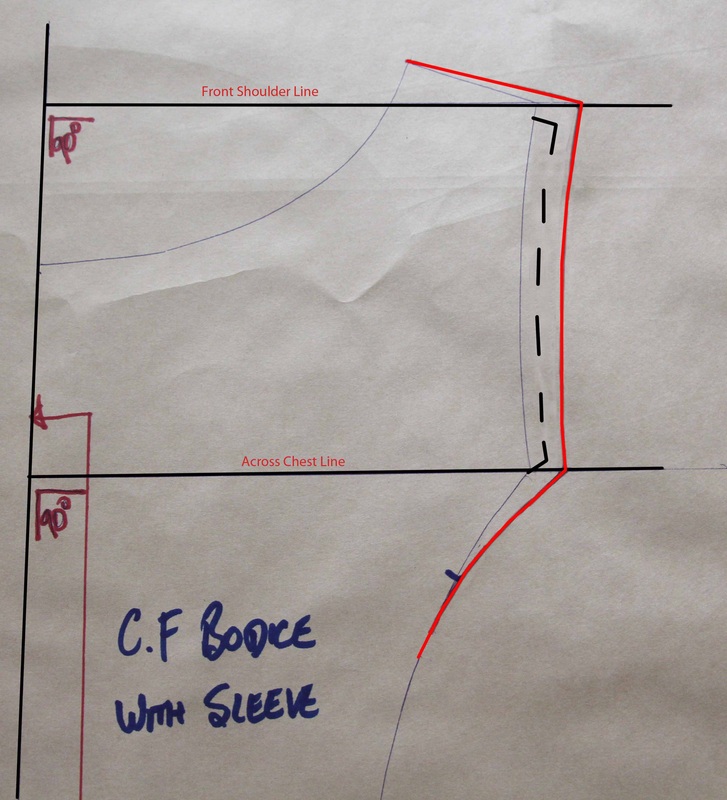
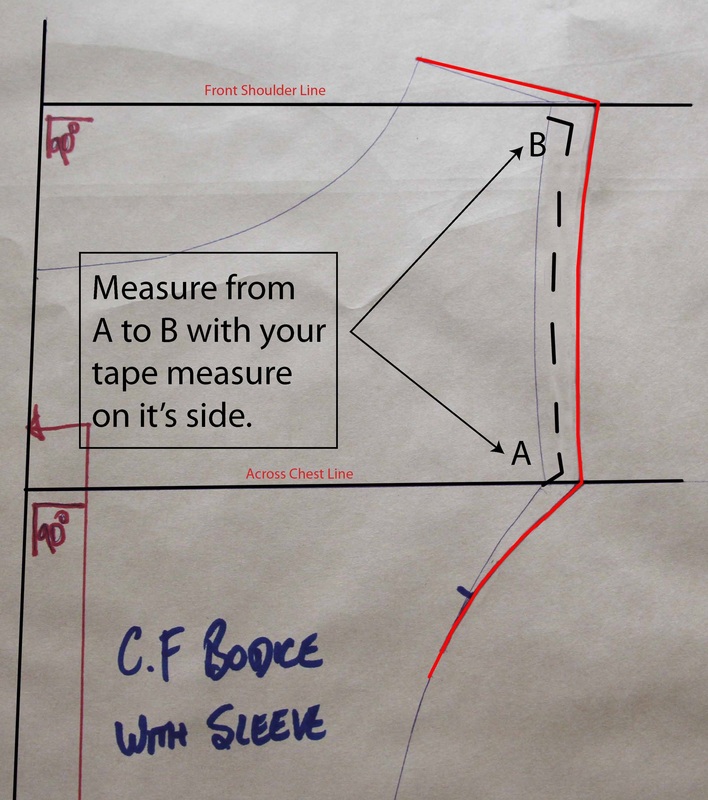
Altering the CF Bodice pattern piece
|
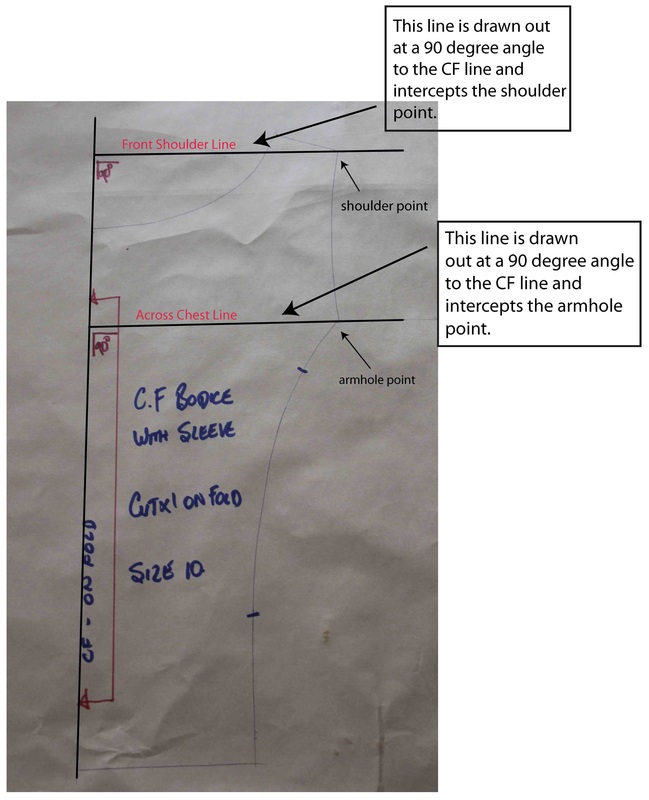
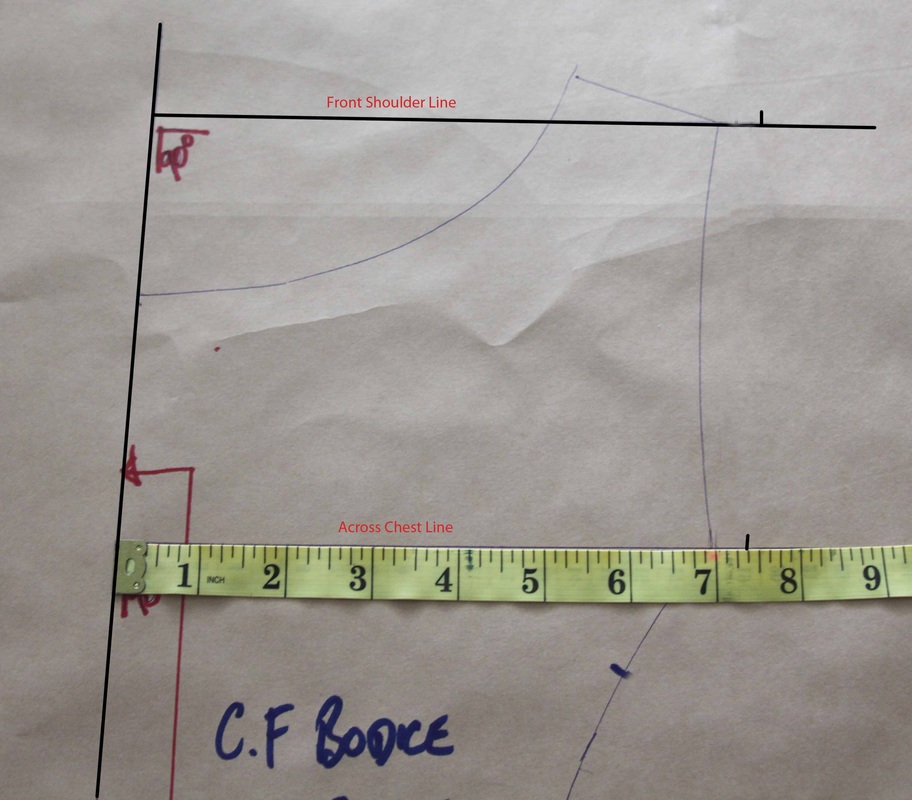
1. On the CF Bodice rule out a line at a 90 degree angle from the CF line.
The top line needs to intercept the outside shoulder point and the second line needs to intercept the outside point at the armhole. The top line is the Front Shoulder Line. The second line is the Across Front Line. 2. On the armhole seam only, measure out 1cm|3/8". |
|
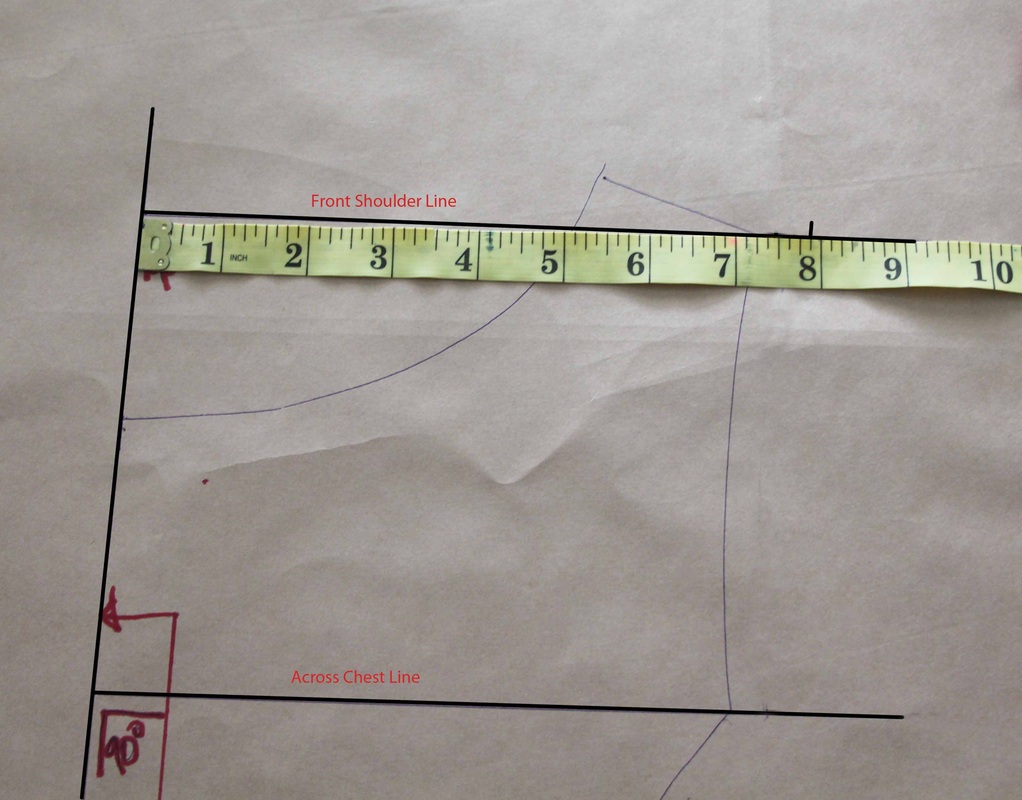
3. Now go to your sheet with all your measurements and halve your Shoulder to Shoulder measurement and add 1cm/3/8" (for seam allowance). Measure out from the CF line on the Front Shoulder Line. eg. My measurement is 38cm|15" + 1cm/3/8" = 20cm || 7/78" |
|
|
4. Do the same with your Across Chest (AC) measurement. And mark that measurement + 1cm|3/8" (for seam allowance) on the Across Front Line. eg. My AC measurement is 35.5cm/14" + 1cm|3/8" = 19cm|7/3/8" |
|
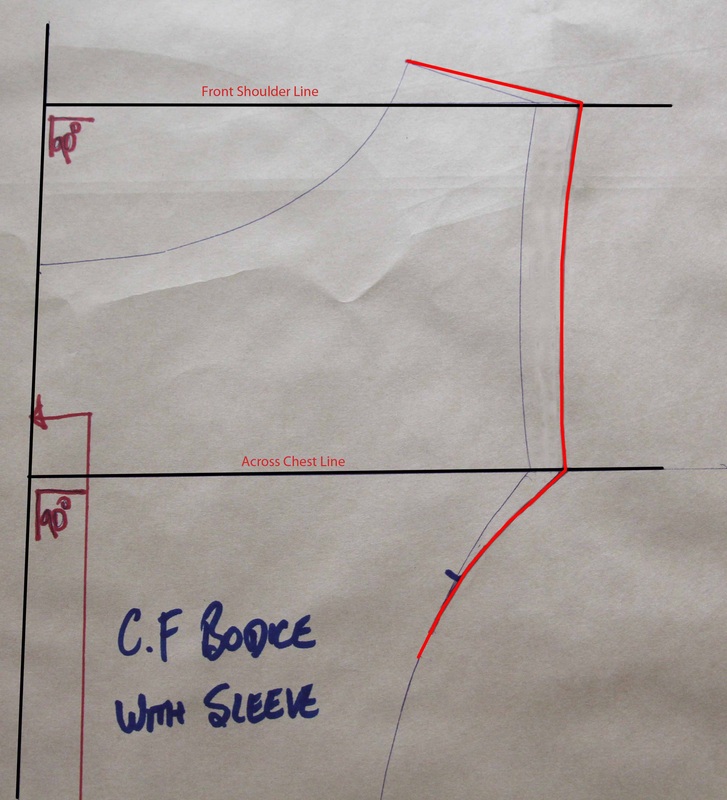
5. Draw in your new shoulder line from the neckline/shoulder point out the the armhole/shoulder point finishing on the horizontal line. The red line now becomes my new cutting line for the CF bodice pattern piece. |
|
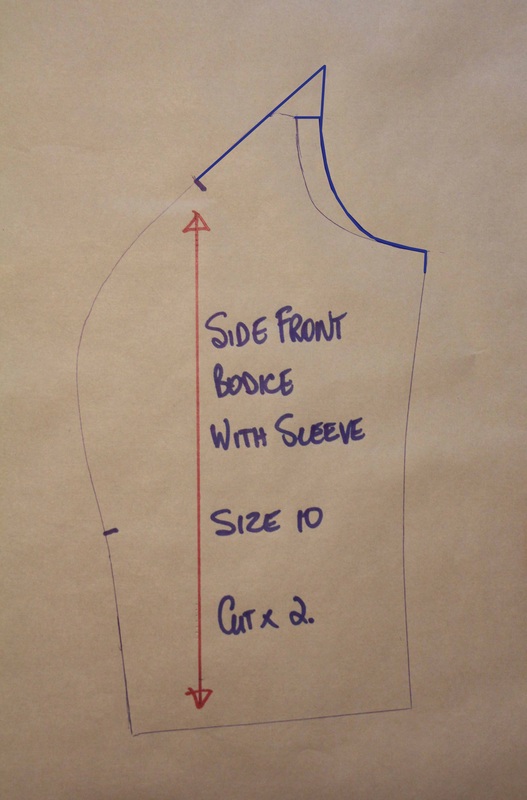
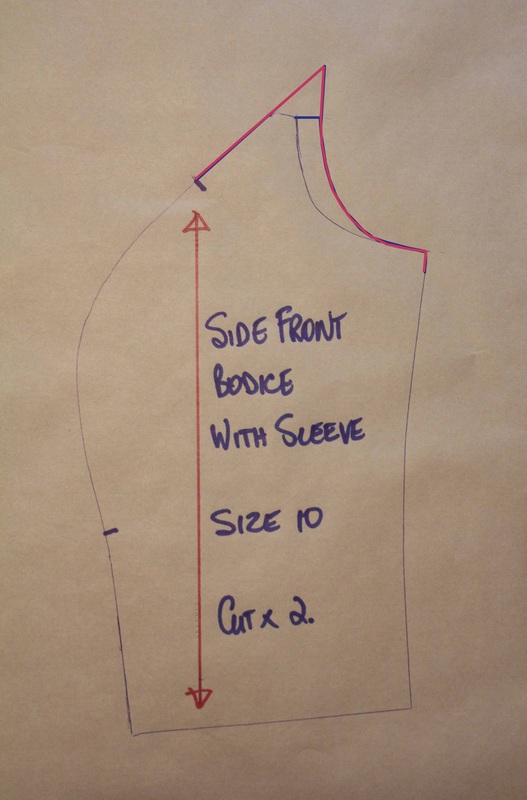
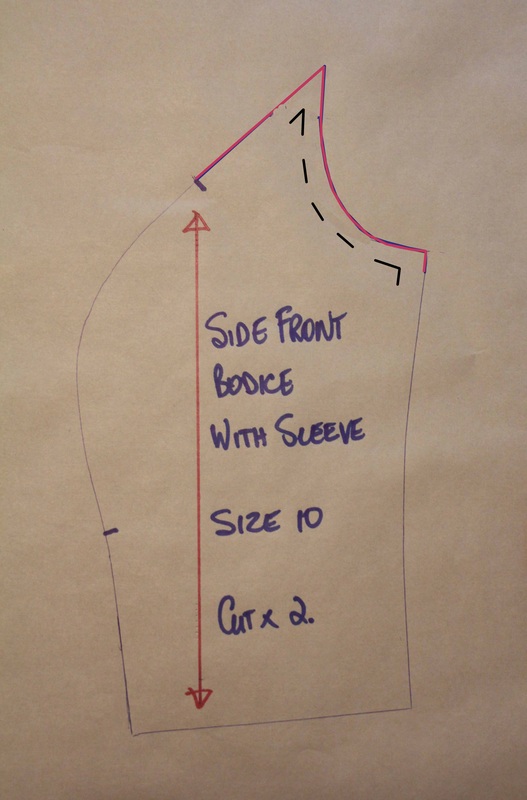
Altering the Side Front pattern piece
|
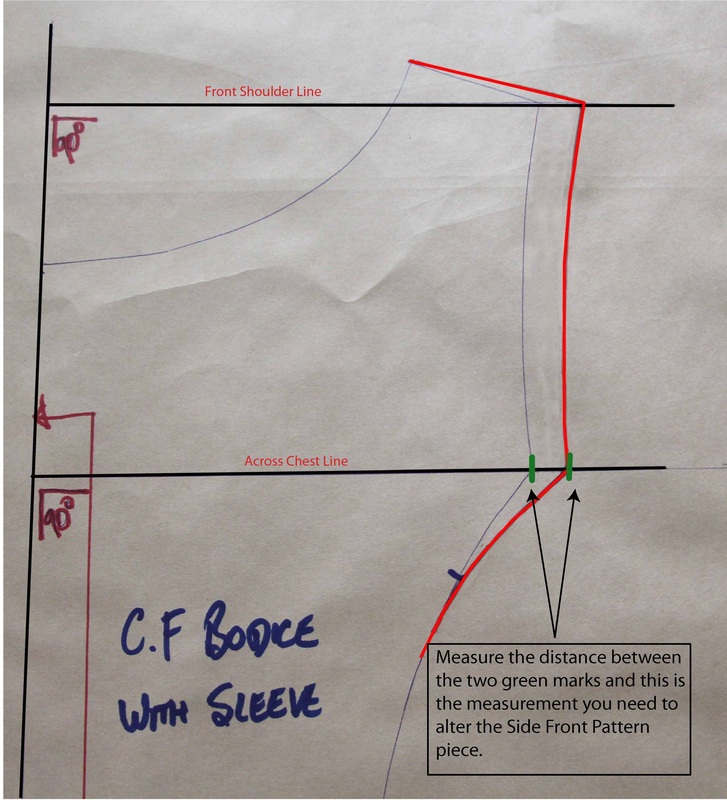
1. Measure out from the armhole/seam point the same amount as the armhole seam point on the CF bodice pattern piece. |
|
2. Mark that point in then rule a line out to that point. Now draw a curved line from that point down to the armhole/side seam point. |
|
|
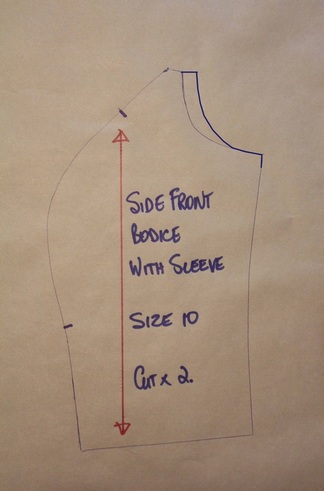
3. Now draw a line straight up from the armhole curve and a straight line from the top notch of the panel seam up to meet the other line. These lines should meet together to create a point. |
|
4. The red line now becomes the new cutting line for the Side Front Bodice pattern piece. |
|
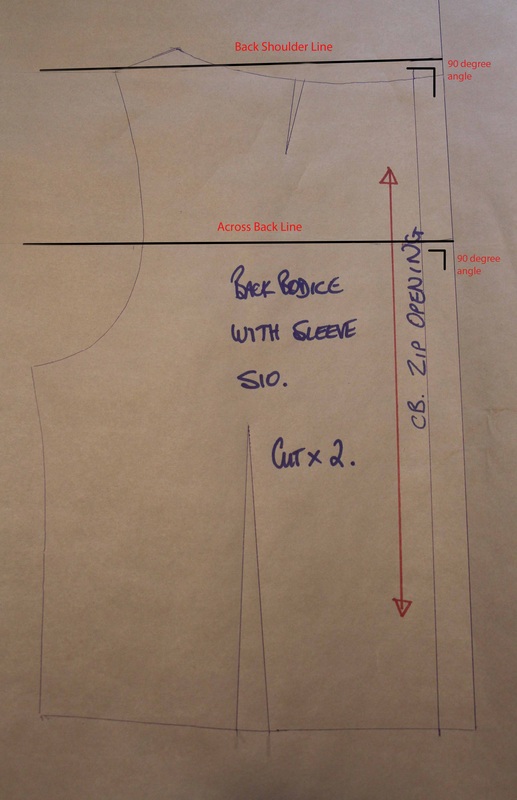
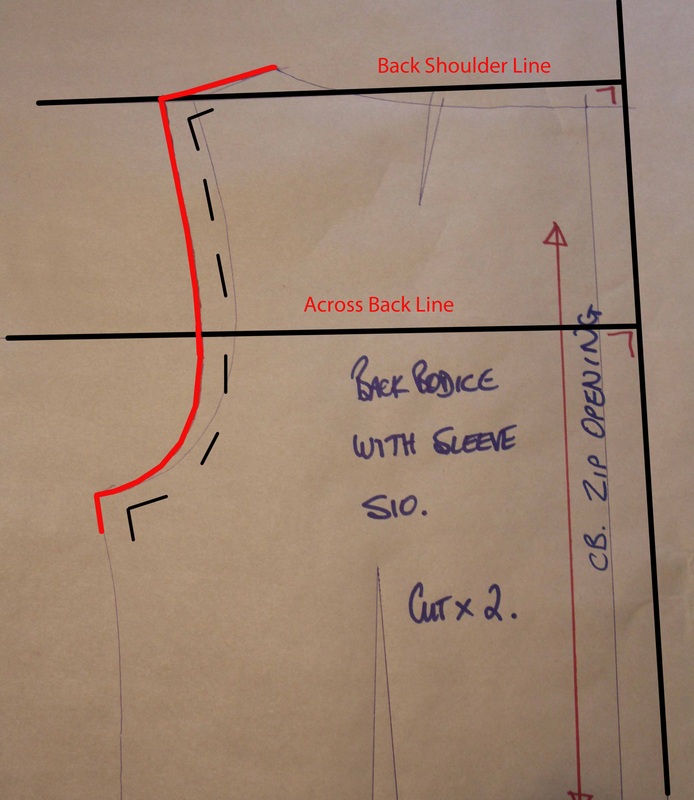
Altering the Back Bodice pattern piece
|
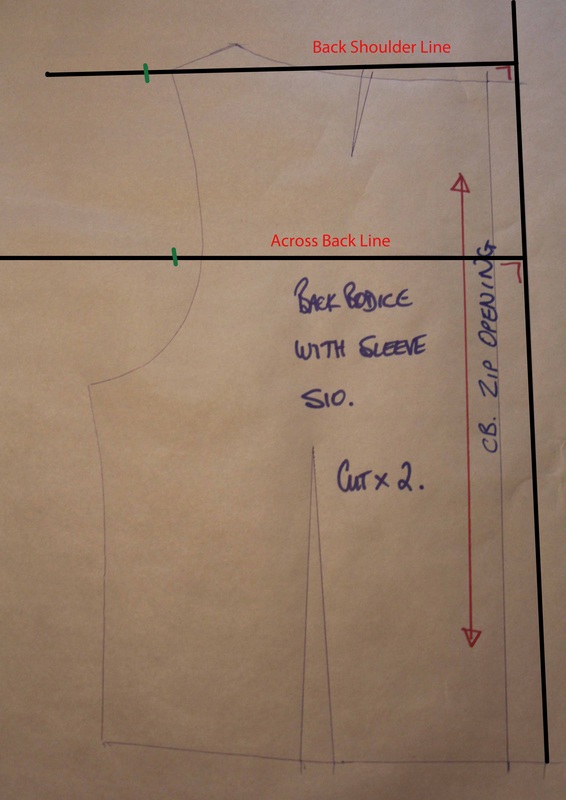
1. Draw a line out at a 90 degree angle to the back seam line and intercept it with the shoulder/armhole point. This is the Back Shoulder Line. 2. Draw another line half way down the armhole at a 90 degree angle to the back seam. Rule out from the back seam line. This line is about 10cm|4" down from the top line. This is the Across Back Line. |
|
2. Measure out the same amount from the armhole/shoulder point on the CF pattern and mark that point in on the back pattern. 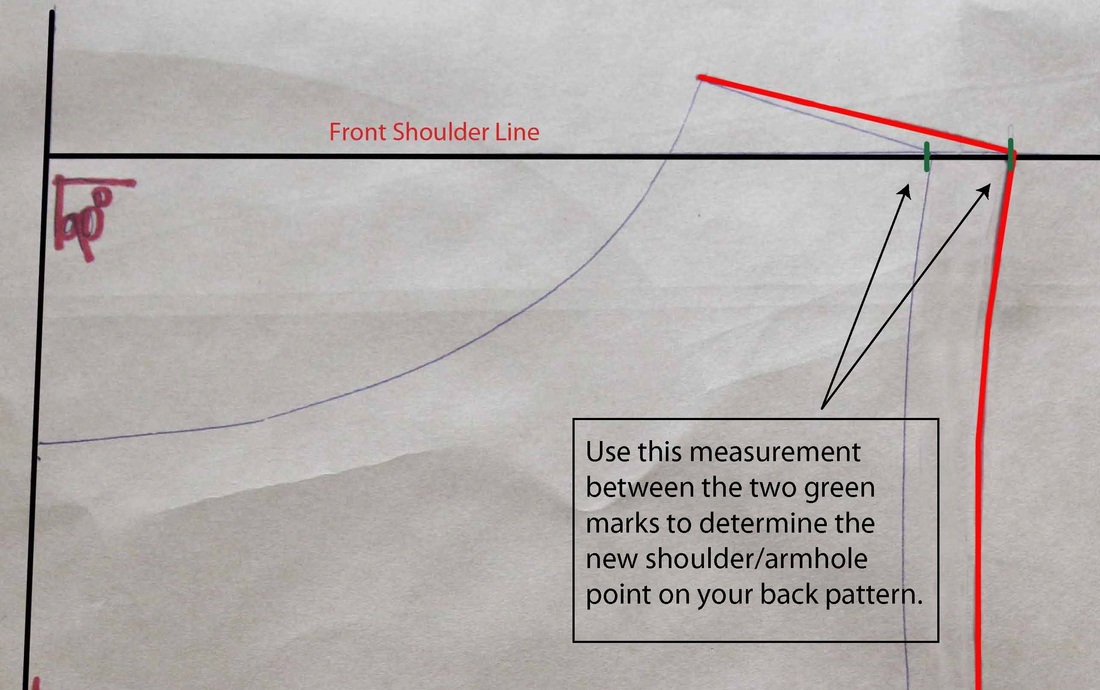
3. Now find your Across Back (AB) measurement on your measurement sheet and halve it and add 1cm (for the seam allowance).
eg. my measurement was 37c|/14.5" so half that is 18.25cm|7.25" + 1cm|3/8" = 19.25cm|7 5/8". I then marked that measurement on he AB line. |
|
|
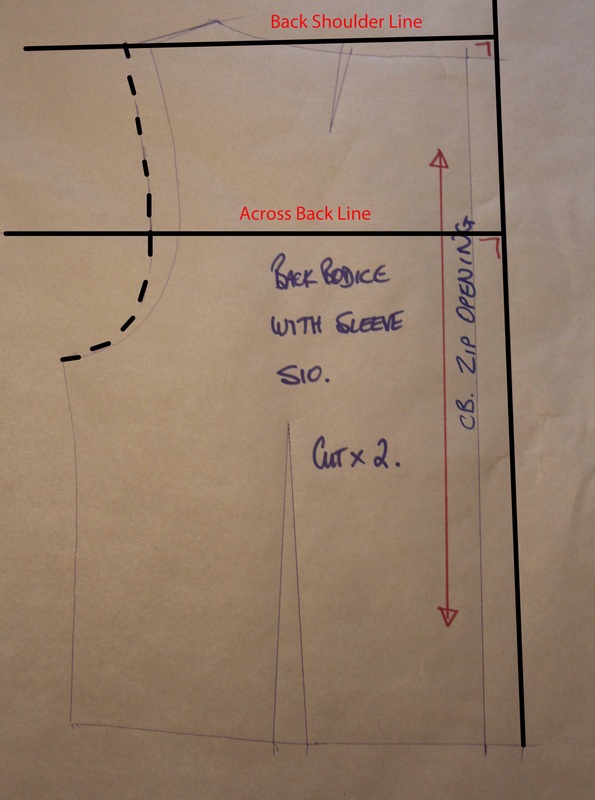
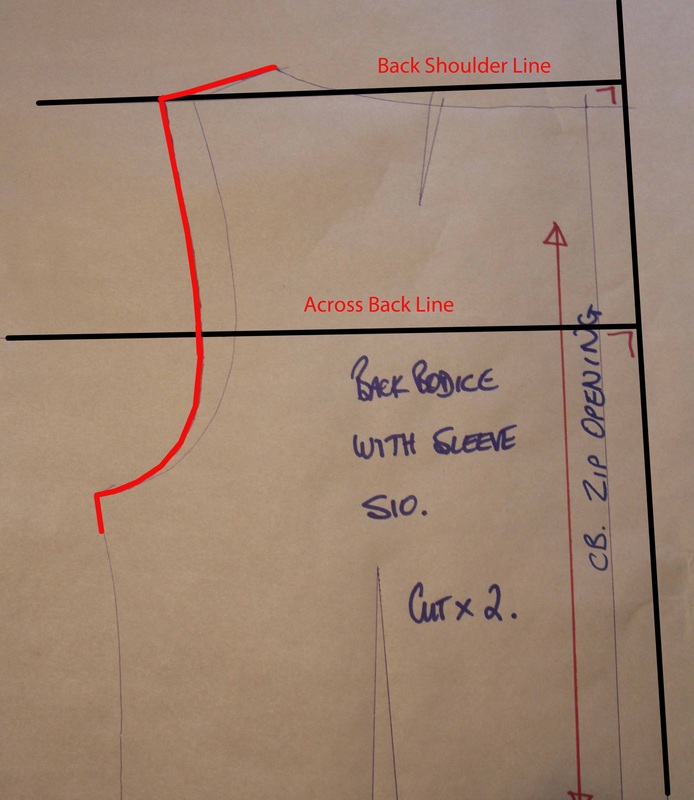
4. Join up the 2 marks and finish the line by curving down to the armhole/side seam point. Draw in your new shoulder line from the neckline/shoulder point out the the armhole/shoulder point finishing on the horizontal line. |
|
4. The red line now becomes my new cutting line. |
|
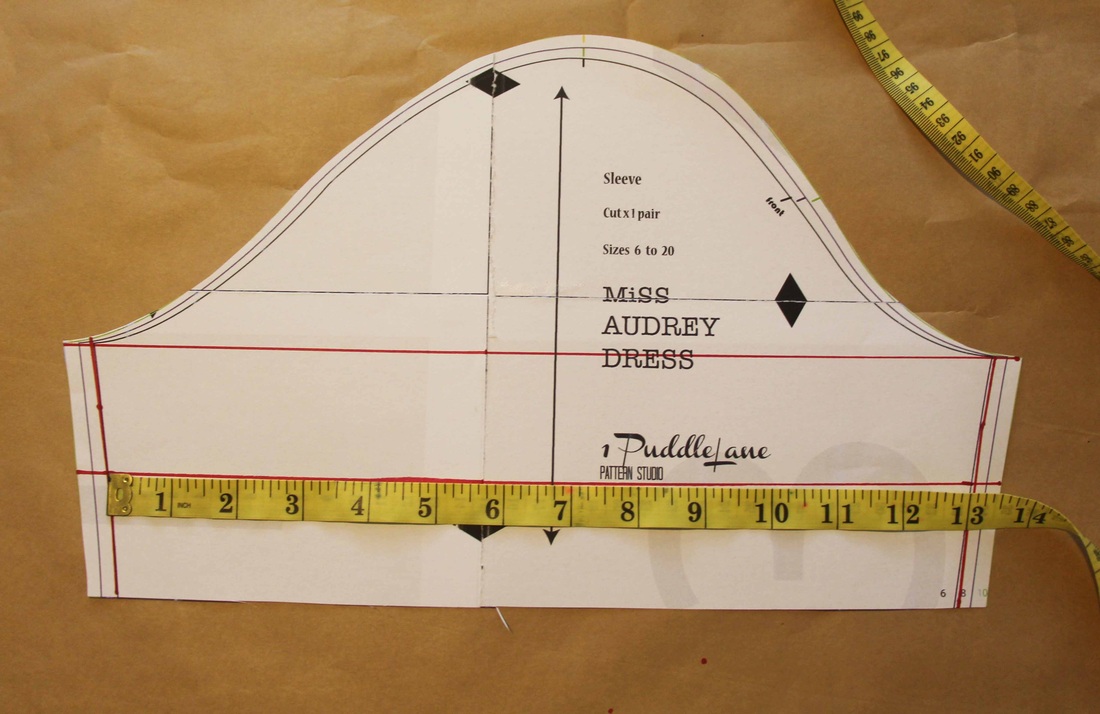
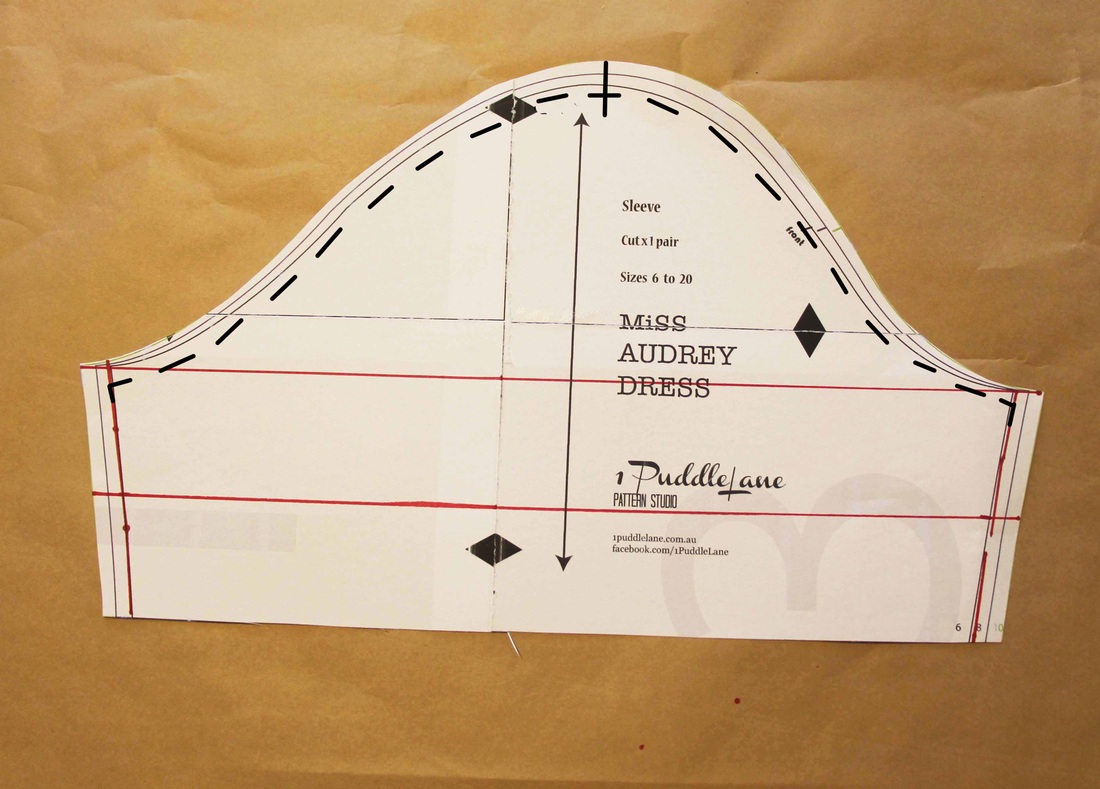
Altering your Sleeve pattern
|
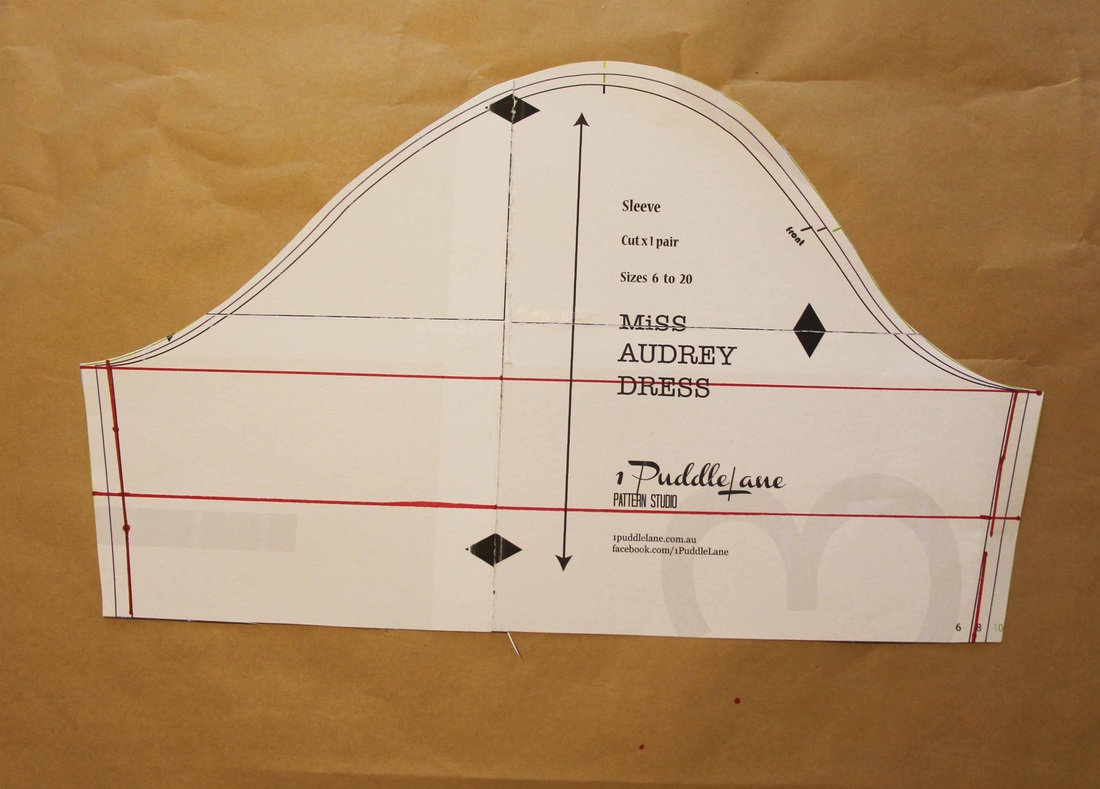
You can download sleeve pattern HERE.
1. As a starting point use the size that you started with on your Sleeveless Bodice in Module 1. 2. Cut the sleeve out and then draw in your side seam seam allowance of 1cm. 3. Draw a line across from top of the side seam to the top of the side seam on the other side. 4. Then measure half way down and draw another line across. |
|
5. Find your Arm Girth measurement on your measurement sheet and measure across the last horizontal line you drew. You need to measure from seam allowance to seam allowance. Your measurement will be correct if you have your Arm Girth measurement plus 4cm|1.5". eg. My Arm Girth measurement is 29cm|11.5" plus 4cm|1.5" = 33cm|13". So my sleeve is correct and I don't need to do anything else to this sleeve. |
|
Testing Ladies......I didn't have any problems with my sleeve because I know what to do. So I need you to show me what problems you are having so I can add the examples below.
Make Sure Your Sleeve Fits your Bodice Armholes
|
1. Mark in your seam allowance by measuring 1cm|3/8" from edge of the side seam, armhole and shoulder seam. (Please refer to photo)
|
2. Do the same for the Side Front Panel and the CF Panel.
|
|
|
3. And now do the same for the Sleeve Pattern.
|
|
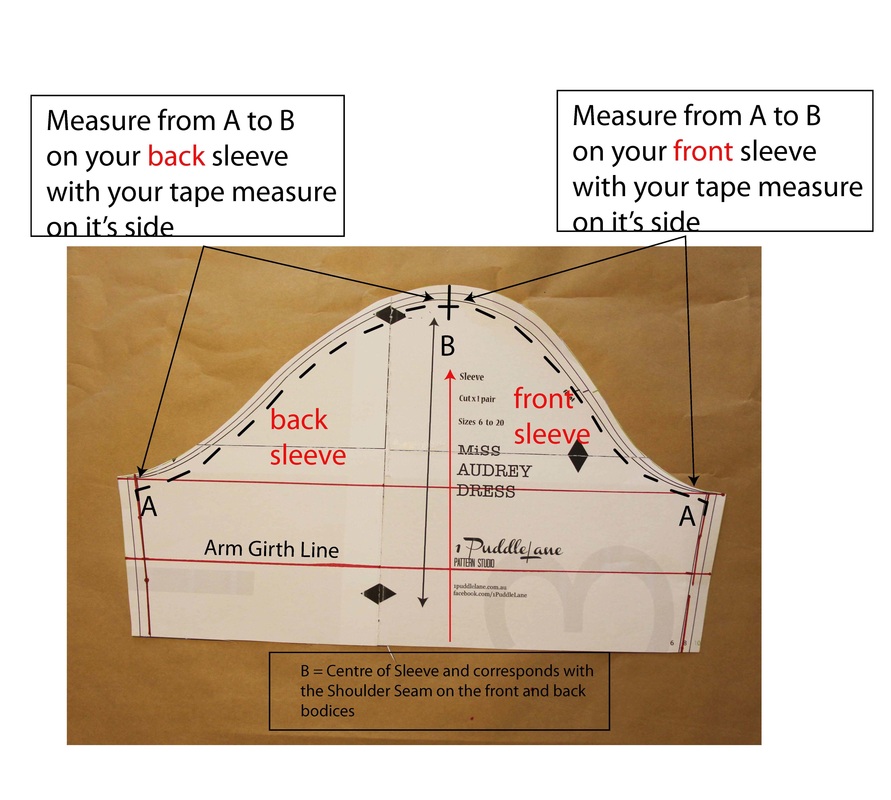
4. Once you've done this you now need to measure the seams of the bodices and the sleeve and make sure the sleeve fits the bodice armhole.
I'll explain what I did with my pattern. First of all I measured on the seam line of all the pattern pieces to get the measurement. The method I used of measuring was to put the tape measure on it's side and walk it around the pattern seam line. |

|

|
5. I started with my back pattern and measured from A to B with the tape measure on it's side.
The measurement I got was 23cm|9". |
|
6. I then measured from A to B on the back sleeve.
My measurement was: 23.5cm|9 1/4" So my sleeve is bigger than my back armhole by .5cm|1/4" which is good. |
|

|
7. Now for the front bodice pieces.
I started with the Side Front Panel and measured from A - B with my tape measure on it's side and got: 8cm|3 1/4". |
|
8. I then measure from A to B on the CF pattern piece with my tape measure on it's side and on the seam line and got:
12cm| 5". Add the two front measurements together: 8cm + 12cm = 20cm 3 1/4" + 5" = 8 1/4" |
|

|
9. Next I measured the front sleeve from A to B on the seam line with my tape measure on it's side and got:
21.5cm|8 1/2" Front sleeve measures 21.5cm|8 1/2" Front armholes measure 20cm|8 1/4" which makes the sleeve bigger by .5cm|1/4" - this is good. Back sleeve measures 23.5cm|9 1/4" Back armhole measures 23cm|9" which makes the sleeve bigger by .5cm|1/4" So overall the sleeve is bigger by 1cm|1/2" which is great for minimal ease. The easing for a sleeve should be no greater than 2 cm. |
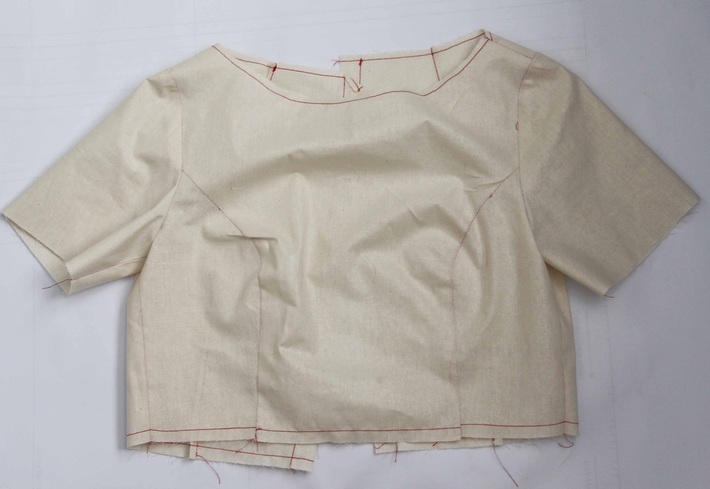
Sewing Your Bodice Toile With a Sleeve
|
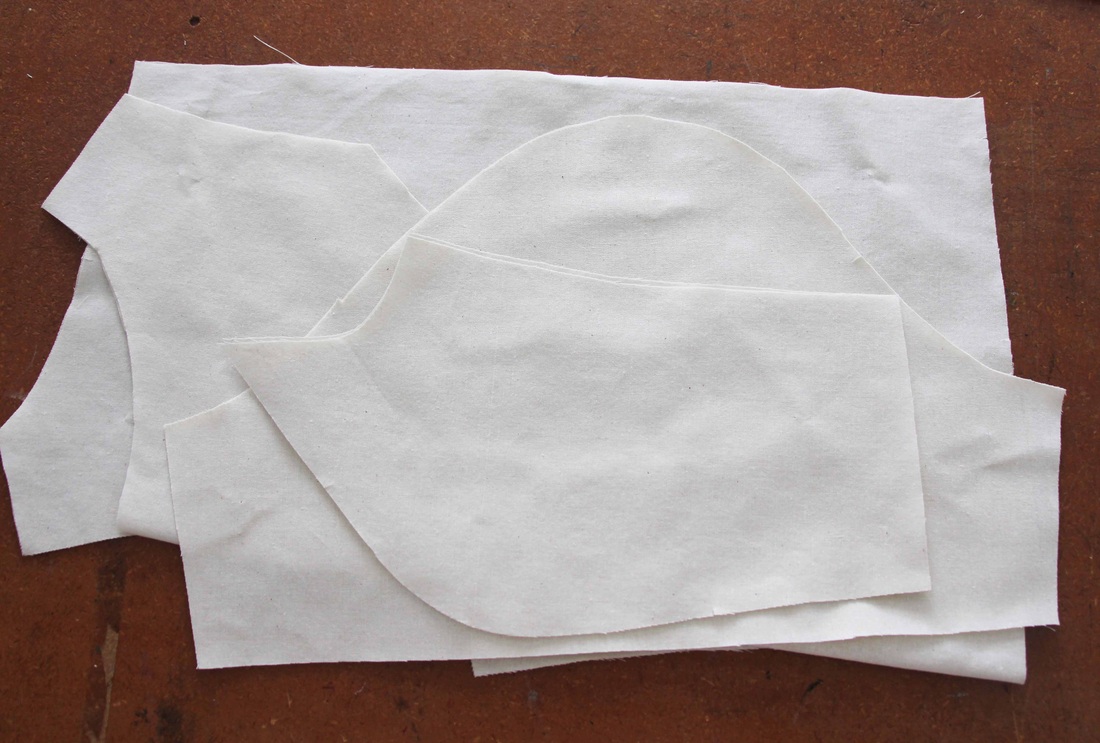
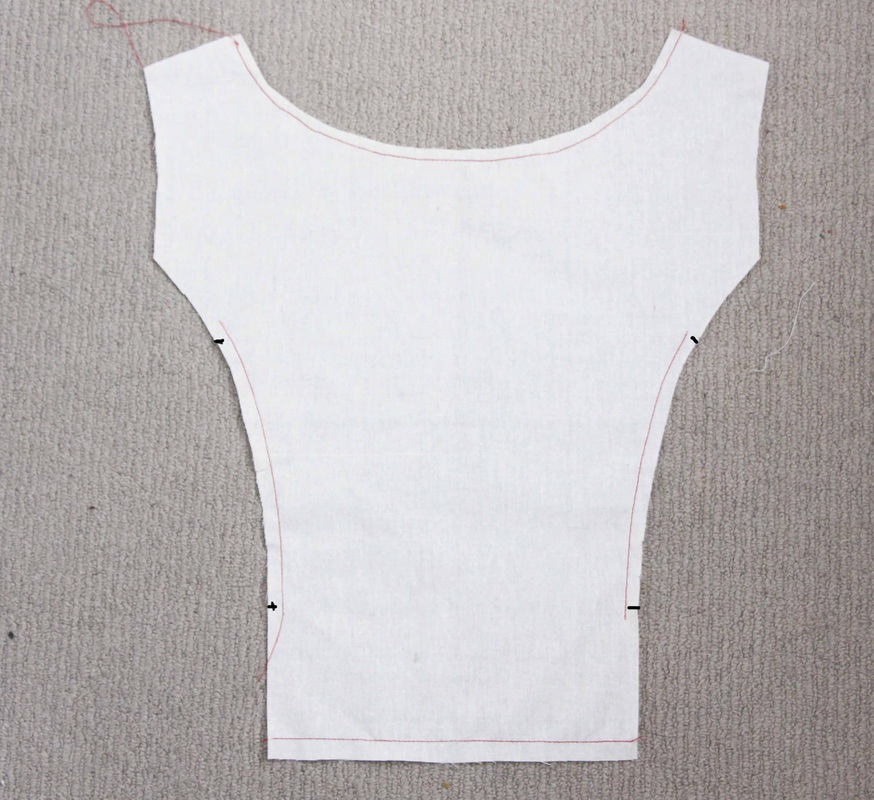
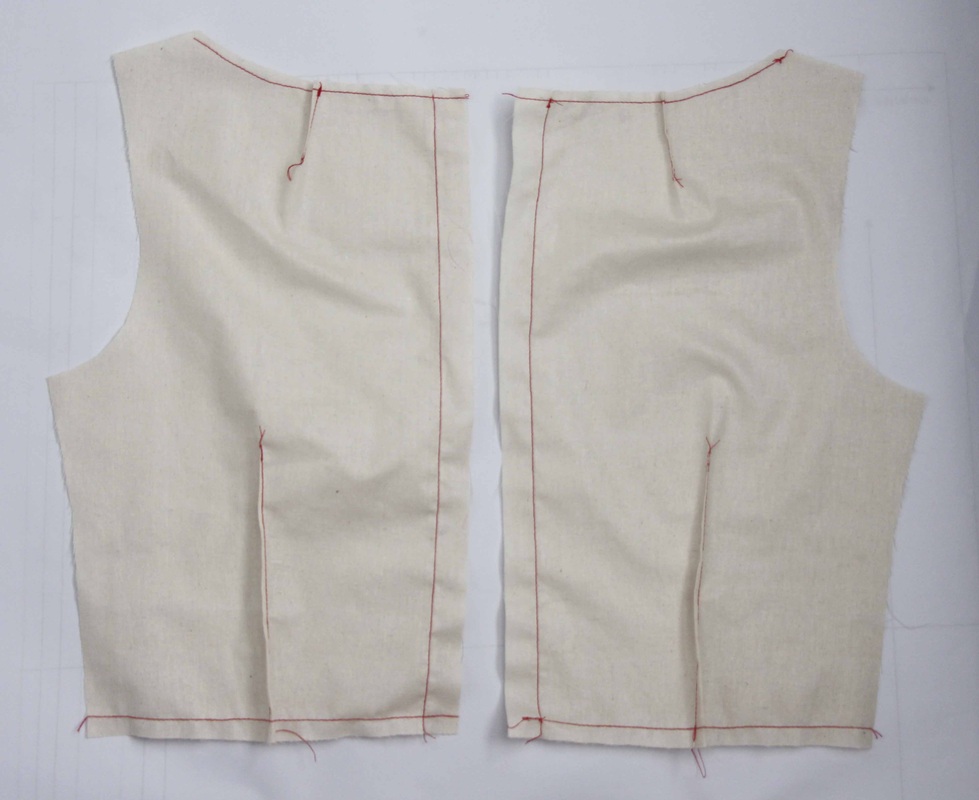
1. Cut out all your pieces:
Make sure you have marked all your notches. |
|
|
2. Stay Stitch the following:
|
|
3. Stay Stitch 12mm|1/2" in from waist edge.
|
|
|
4. Stay Stitch the following:
|
|
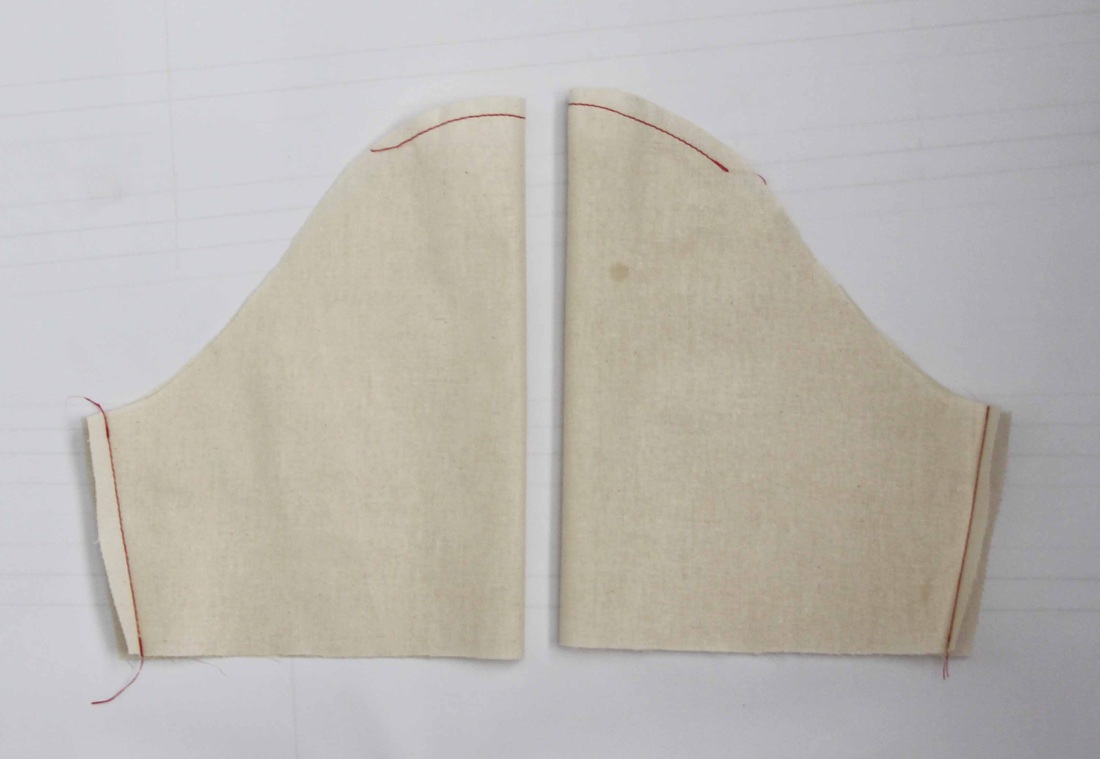
5. Sew a gathering thread across the top of the sleeve.
|

|
|
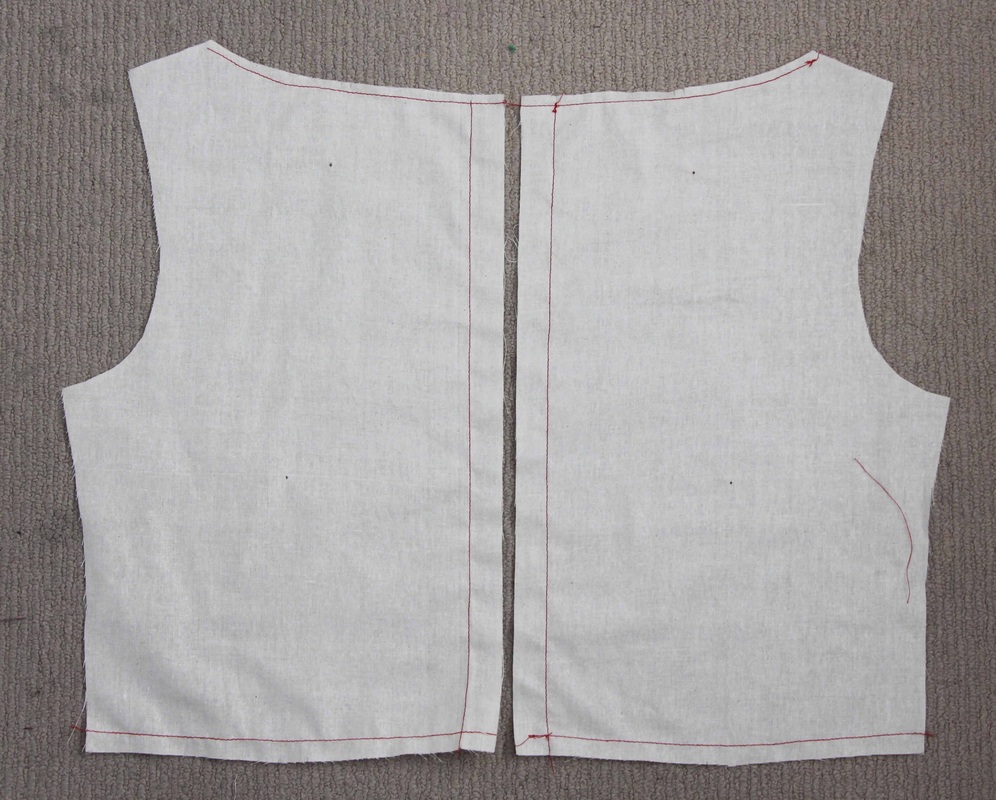
6. Sew together your CF panel and the side panel pieces. This is done the same way as Module 1:1
|
|
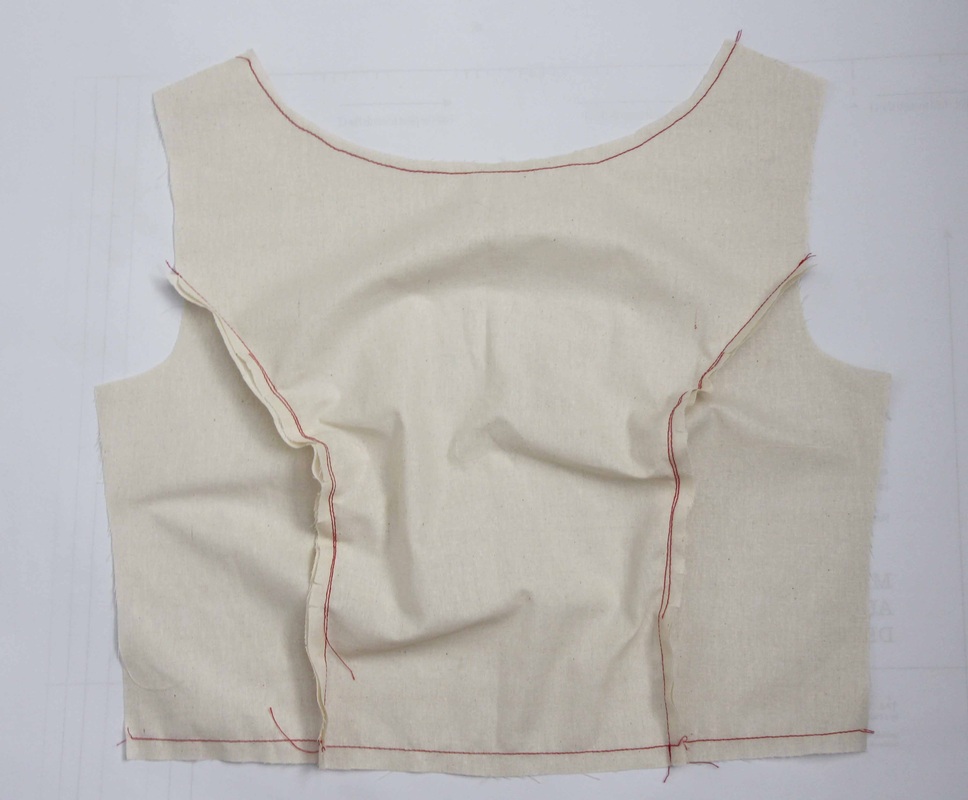
7. Sew the darts for the Back Toile Bodice.
Now sew the shoulder and side seams and iron:
|
|
|
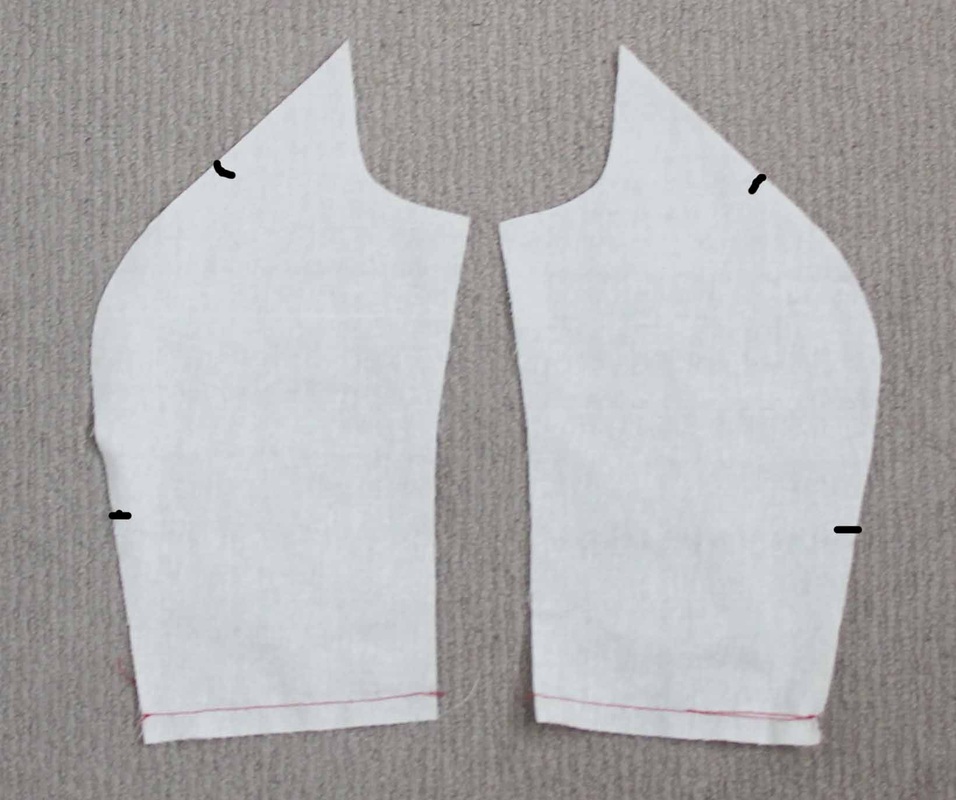
8. With right sides together sew the sleeve side seams.
|
Attaching The Sleeve
|
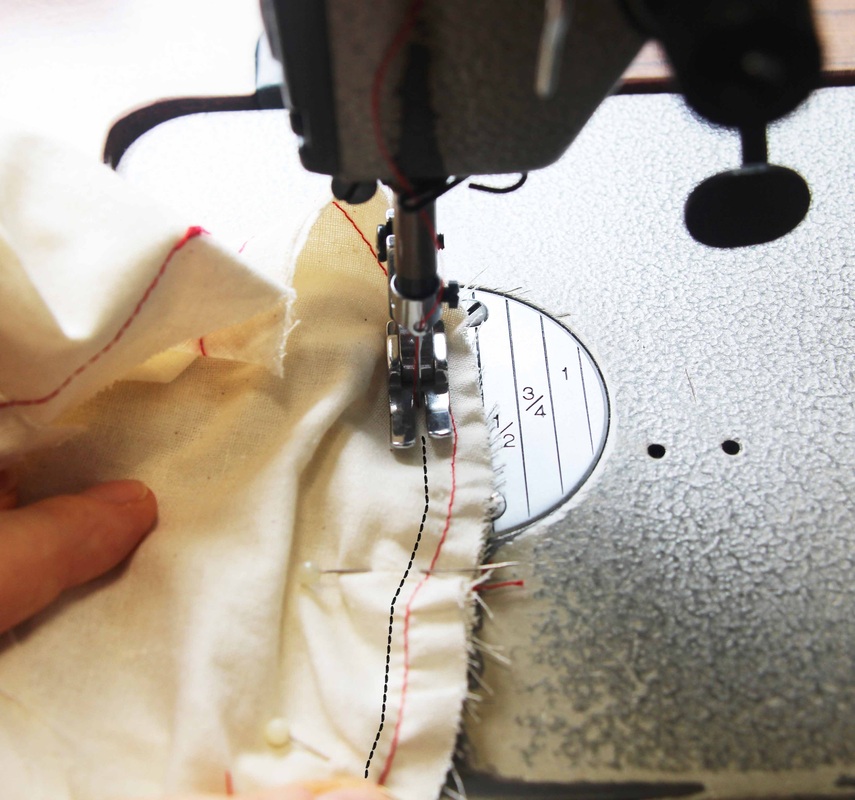
1. With right sides together match up the side seams of the sleeve to the bodice and the sleeve head notch with the bodice shoulder seam.
2. Pull up the gathering stitch so the sleeve is just eased into the bodice armhole. 3. Start sew a 1cm|3/8" seam from the underarm seam. 4. Repeat this process with the other sleeve. |
|
Finishing Off Your Toile
|
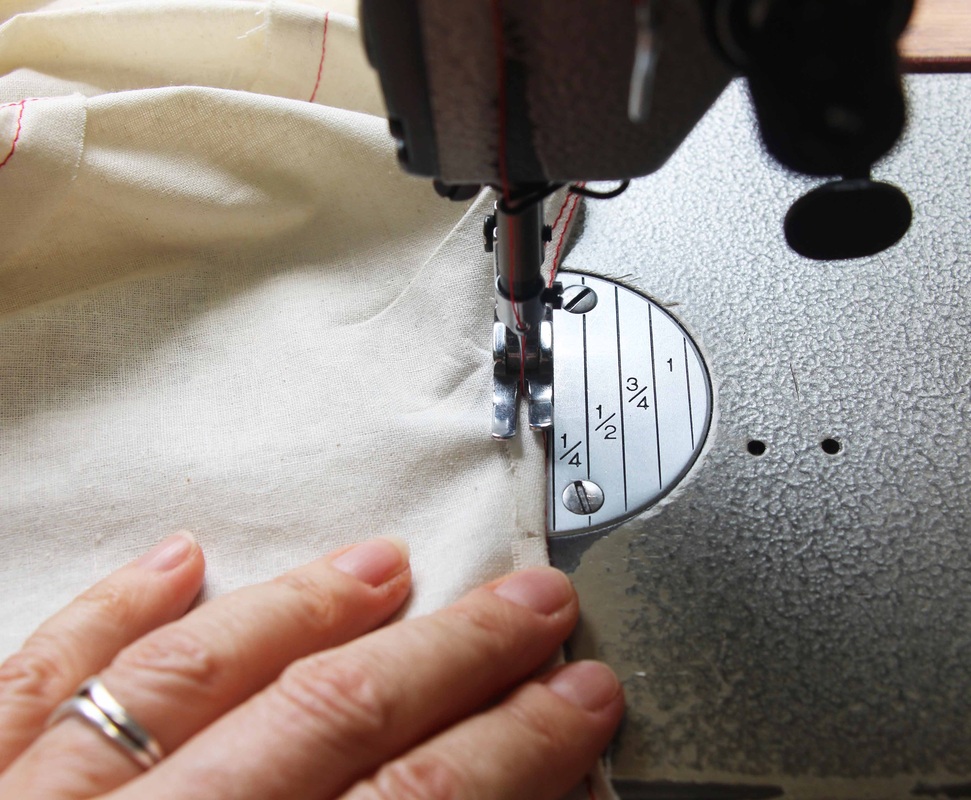
1. Fold down and stitch the neckline 6mm|1/4".
2. Leave the waist as you will be adding the skirt Toile to the Bodice for fitting in Module 3. |
That's it! Module 2:2 will show you how to fit the Short Sleeve Bodice Toile.

CREATE 5 STYLES WITH 1 PATTERN!
BONUS #1 - Choosing Your Shape
BONUS #2 - Choosing Your Colours
BONUS #3 - Choosing The Right Fabric For Your Dress
BONUS #4 - BOOKING 2 SKYPE CALLS WITH ME
- WELCOME!
- MODULE 1 - Making Your Sleeveless Bodice Toile
- MODULE 2 - Making Your Short Sleeve Bodice Toile
- MODULE 3 - Making Your Skirt Toile
- MODULE 4 - 5 Styles
BONUS #1 - Choosing Your Shape
BONUS #2 - Choosing Your Colours
BONUS #3 - Choosing The Right Fabric For Your Dress
BONUS #4 - BOOKING 2 SKYPE CALLS WITH ME
