MODULE 1:2 - Fitting Your Sleeveless Bodice Toile
Ok, you've done fantastic work so far..... so let's keep going!
This is the lesson I would like you to take photos of yourself in your Toile and post it in the facebook group.......that's if you are having trouble fitting your bodice. Remember I said yesterday that you need to measure yourselves correctly....well this is why! Your fitting stage should just have a few tweaks. But don't worry if you have a lot of tweaks.....I'm here to help you.
There might be quite a number of alterations that need to be done to your Toile so it's looking fab on you and below I'll be taking you through some examples to help you with the process.
What you'll Achieve in this Module
- Fitting your Calico Toile.
- You'll be shown examples of my Testers Toile fitting processes.
- At the end of this lesson you'll have a great fitting Toile
Fitting your Calico Toile
I'll take you through the my fitting process and explain what I've done and at the end I'll show you examples of my Testers and what they did to get their Toile fitting like a glove.
Now, fitting is a personal preference. Some like a very firm fit and some don't. Personally, I like a firm fit so don't thin that you need to do the same. Adjust your bodice the way that feels best for you.
Now, fitting is a personal preference. Some like a very firm fit and some don't. Personally, I like a firm fit so don't thin that you need to do the same. Adjust your bodice the way that feels best for you.
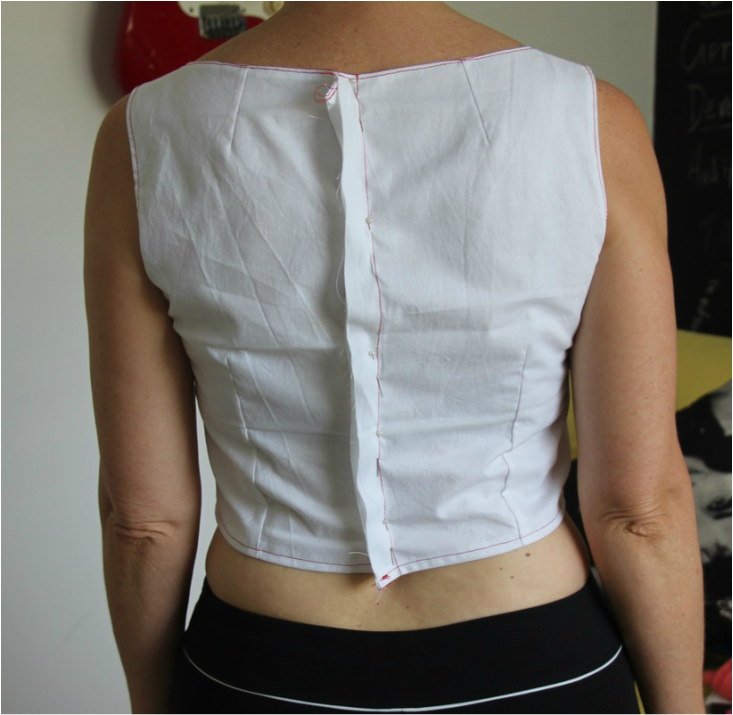
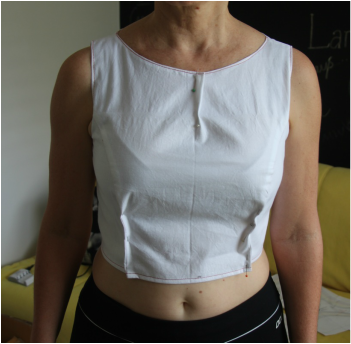
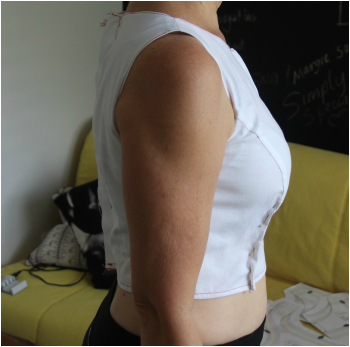
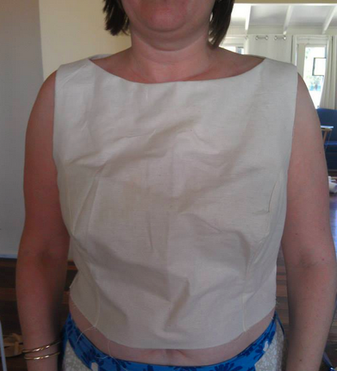
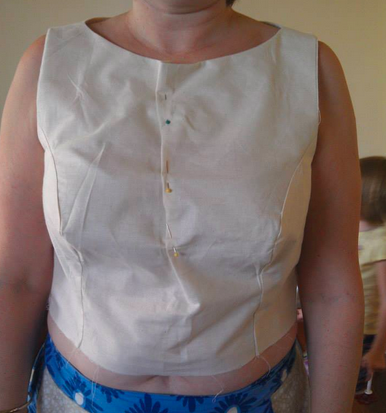
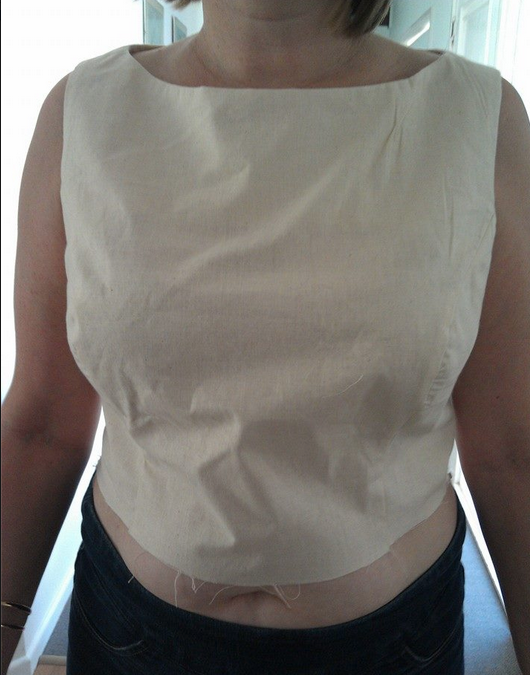
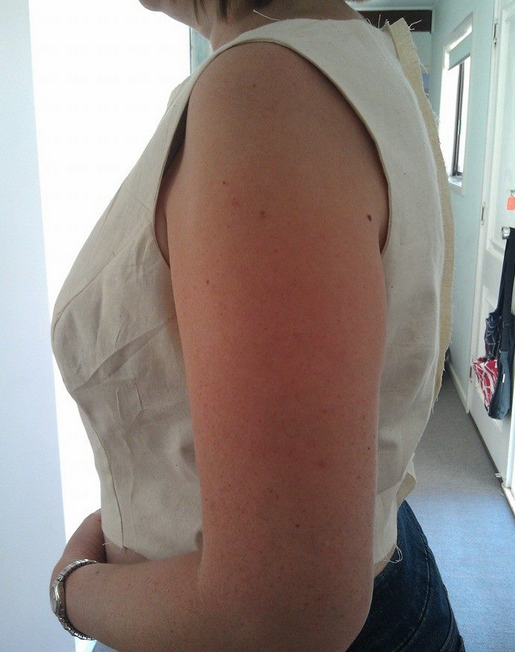
1. I got hubby to pin on the stitching line for me.......and might I say he did a good job.
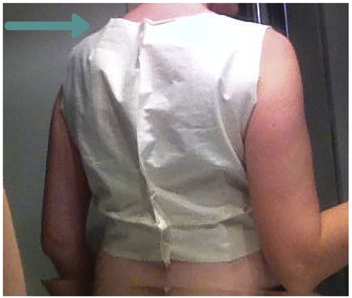
Now whilst the fit is good on the back bodice it could be taken in across the bodice just above the waist to get rid of the wrinkles. But I chose not to. Again, personal preference.
Now whilst the fit is good on the back bodice it could be taken in across the bodice just above the waist to get rid of the wrinkles. But I chose not to. Again, personal preference.
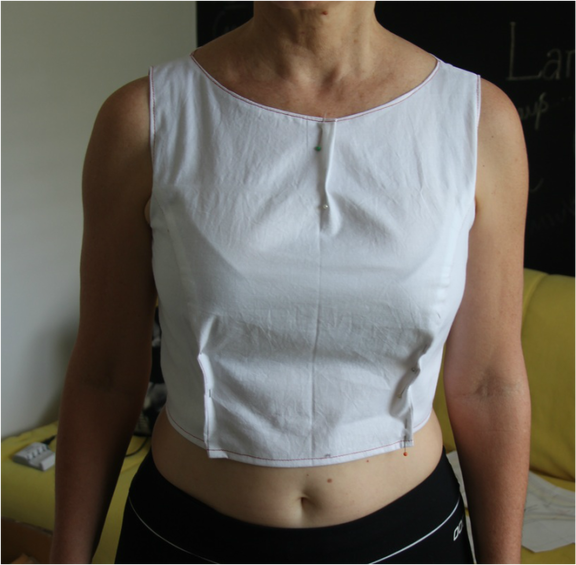
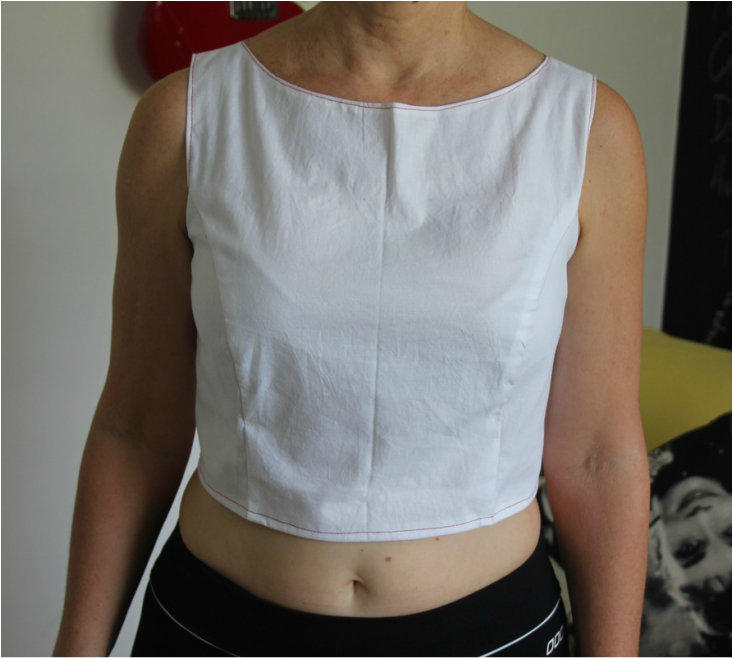
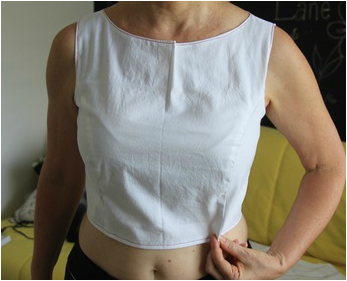
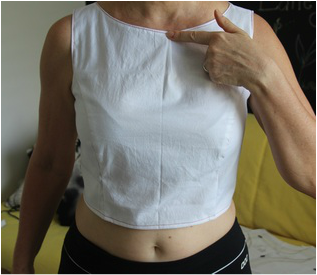
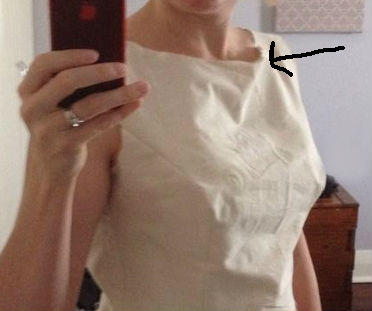
2. The front bodice look fine too but I chose to take in the front neck and also take in the waist.
3. I pinned where I wanted to remove the excess fabric. Which was the 'Gaping Front Neck' and removing excess fabric at the waist and up the panel line.
When you pin in the excess make sure you pin right to the end of the excess fabric. It will look like a dart. You'll understand the reason for this a little later.
So, for me that's all I'm going to alter for my Toile. Below are some of the Testers who I worked with during their fitting process for their Toiles.
Testers Toiles
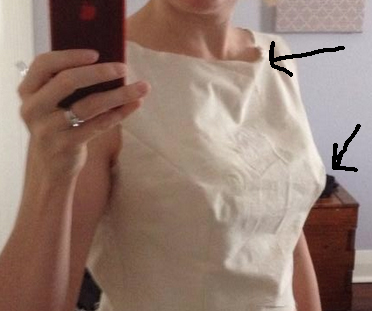
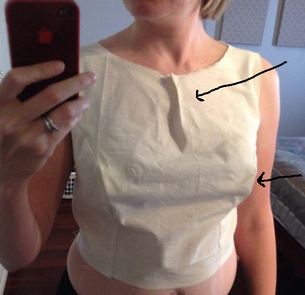
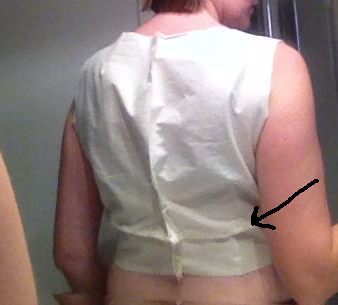
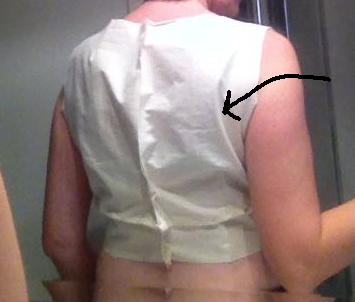
Here we have Nat who made the following alterations to her bodice:
1. Nat pinned in the neck and formed a dart. This is a 'Gaping Front Neck' alteration
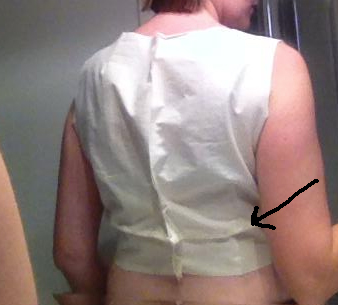
2. Nat pinned the excess fabric across the bodice just up from the waist. This is called a 'Sway Back' alteration. Also, Nat needs to do an 'Across Back' alteration. This is where there is excess fabric in the across back area.
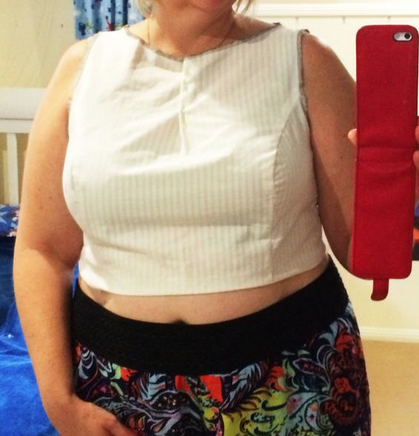
Here we have Abbie and these are the alterations to her Toile:
1. It seemed that Abbie's Toile was too big everywhere so I suggested that she just make another one and go down a size.
2. A much better fit for Abbie and really on a tweak at the slight gaping front neckline.
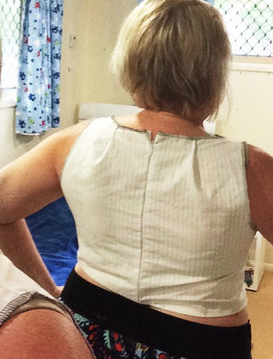
Here we have Debbie and her alterations were:
Debbie's alterations were just the gaping front neck and the back neck dart needed taking in or you can take out the dart altogether by doing an 'Across Back' alteration.
Common Bodice Alterations
The main bodice alterations that I've come across:
Your Mission
So what you need to do now is to try on your Toile and get someone to pin the CB seam at the stitching and have a really good look at where it's baggy, tight, gaping and start pinning in the excess fabric.
Take a photo of yourself in your Toile - front, back and side views - and post them in the FB group so I can help you with your fitting.
Take a photo of yourself in your Toile - front, back and side views - and post them in the FB group so I can help you with your fitting.
That's it! Module 1:3 will show you how to transfer the alterations to your pattern pieces.
CREATE 5 STYLES WITH 1 PATTERN!
BONUS #1 - Choosing Your Shape
BONUS #2 - Choosing Your Colours
BONUS #3 - Choosing The Right Fabric For Your Dress
BONUS #4 - BOOKING 2 SKYPE CALLS WITH ME
- WELCOME!
- MODULE 1 - Making Your Sleeveless Bodice Toile
- MODULE 2 - Making Your Short Sleeve Bodice Toile
- MODULE 3 - Making Your Skirt Toile
- MODULE 4 - 5 Styles
BONUS #1 - Choosing Your Shape
BONUS #2 - Choosing Your Colours
BONUS #3 - Choosing The Right Fabric For Your Dress
BONUS #4 - BOOKING 2 SKYPE CALLS WITH ME
