MODULE 1- How to Grade 'Sweet Pea Wrap Dress' Bigger
Grading a pattern is so simple - once you know how. And without going into all the technical detail of grading I'd like to show you a simple and easy way to grade children's patterns.
PLEASE NOTE: You can do this simple grading to a Size 12 and smaller to a Size 1. Once you go bigger than a Size 12 you are getting into pre-teens and this is where a child's body starts to change and reshape - which requires a different pattern.
Also, I wouldn't do this grading to Adults patterns. This is a too simple grade for Adults patterns as they are more fitted and more complex in shape and structure.
|

|
What You'll Achieve In This Module
- how to grade the Sweet Pea pattern to Sizes 9 - 12
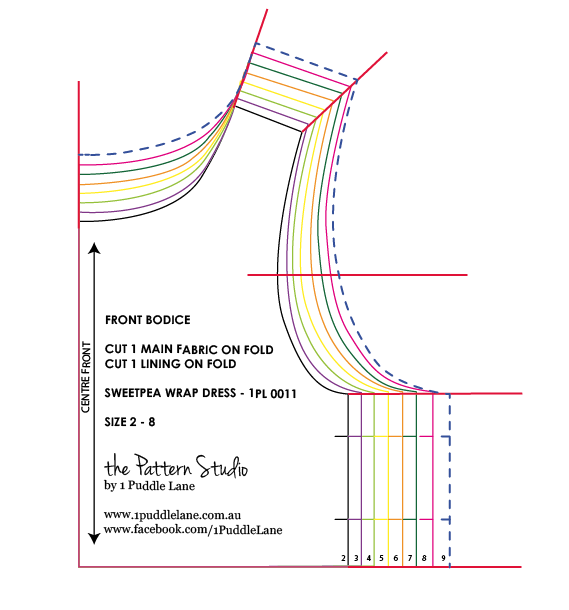
Making the Front Bodice Pattern to Sizes 9 - 12
Grading the Front Bodice to Size 9
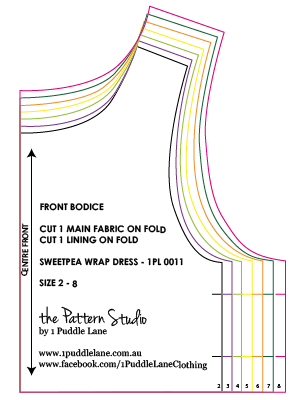
Start with your nested Front Bodice pattern piece. It shows Sizes 2 to 8.
Start with your nested Front Bodice pattern piece. It shows Sizes 2 to 8.
Step 1 - Rule lines connecting:
- A - CF line
- B - neck/shoulder point
- C - shoulder/armhole point
- D - armhole point (to get the armhole point measure the front armhole and then halve that measurement and mark it on the pattern. Then rule a like across the pattern at that point at a 90 degree angle to the CF line.)
- E - side seam/armhole point
- F - side seam/waist point
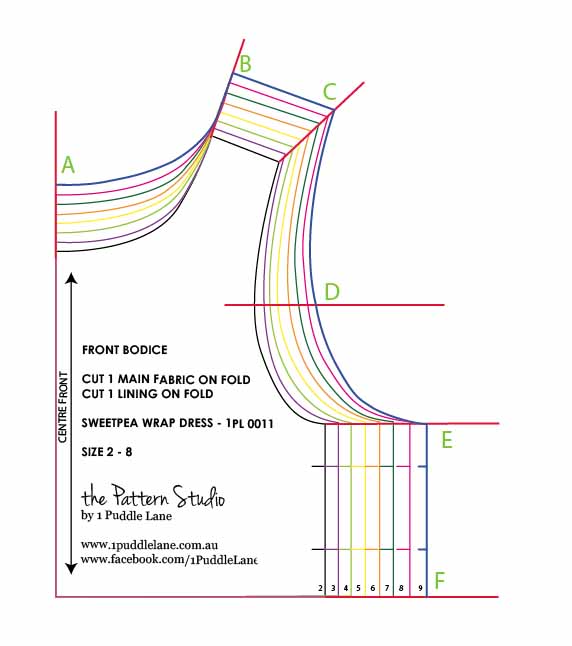
Step 2 - Then measure the previous size amount at each point and mark that amount on the red lines.
eg. If A measures 6mm | 1/4" on the previous size then mark up the same amount and so on.
eg. If A measures 6mm | 1/4" on the previous size then mark up the same amount and so on.
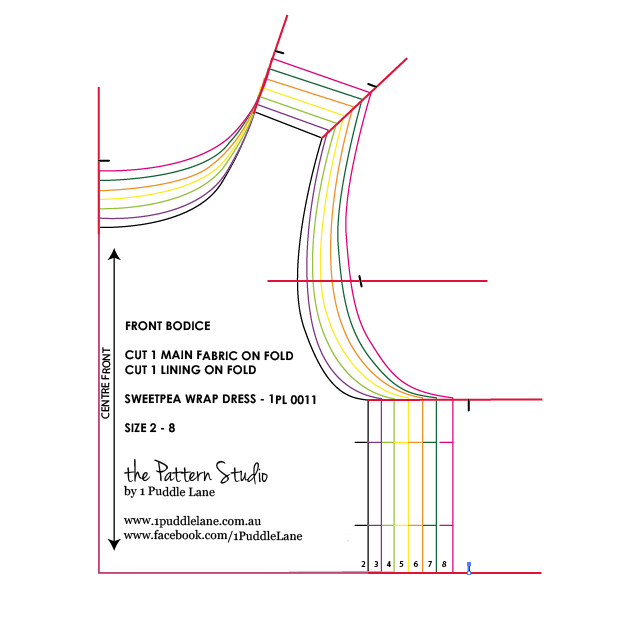
Step 3 - Now connect these points making sure the lines are similar to the previous size.
.
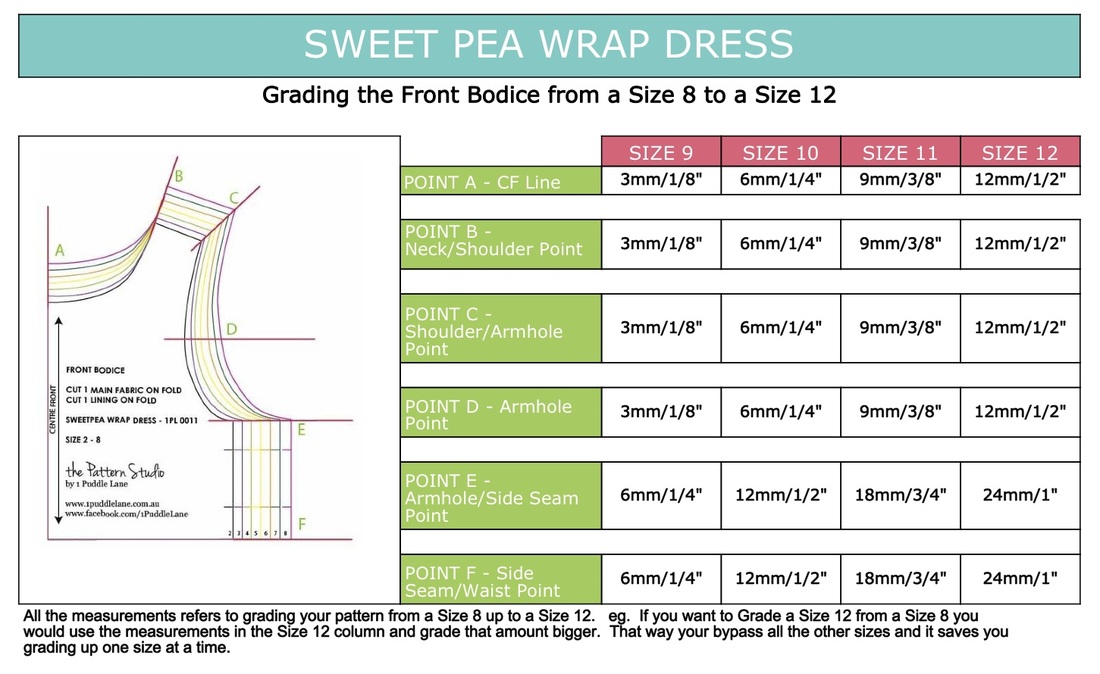
PLEASE NOTE: If you want a Size 10 then you would need to do this process again. If you want to grade a Size 12 from a Size 8 then refer to the spreadsheet below.
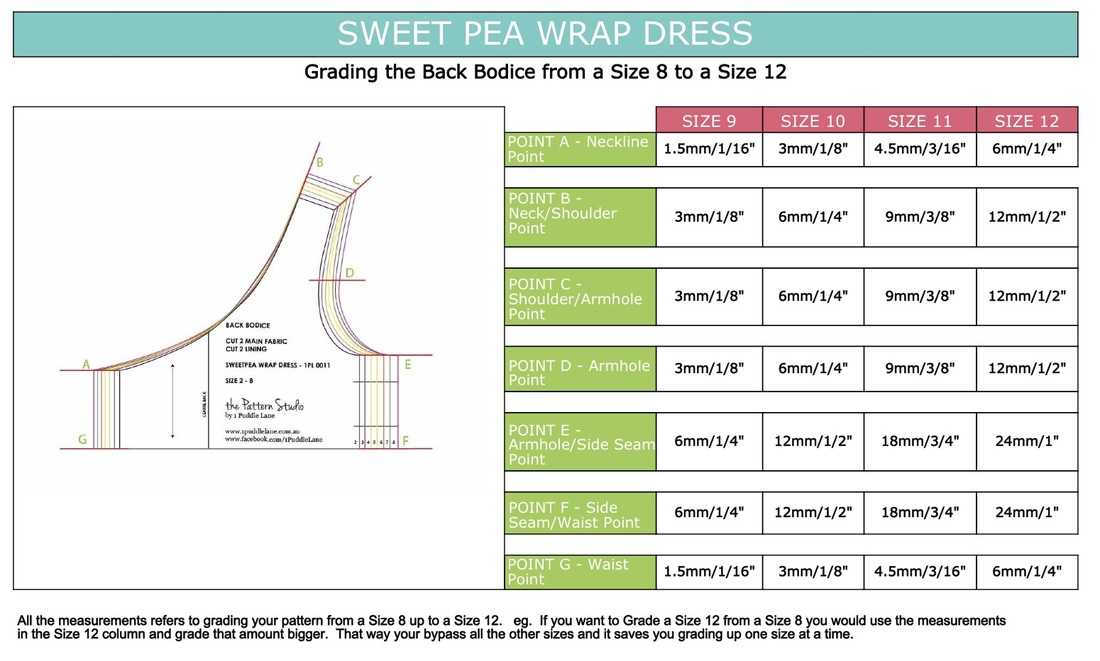
Grading the Back Bodice Pattern to Sizes 9 - 12
Grading the Back Bodice to Size 9
1. As you did with the Front Bodice pattern......start with the nested Back Bodice pattern and rule lines connecting:
1. As you did with the Front Bodice pattern......start with the nested Back Bodice pattern and rule lines connecting:
- A - back neckline point
- B - back neck/shoulder point
- C - back shoulder/armhole point
- D - back armhole (to find this point measure around the armhole and halve it. Then rule a line at 90 degree angle to the CB)
- E - back armhole/side seam point
- F - back side seam/waist point
- G - back waist point
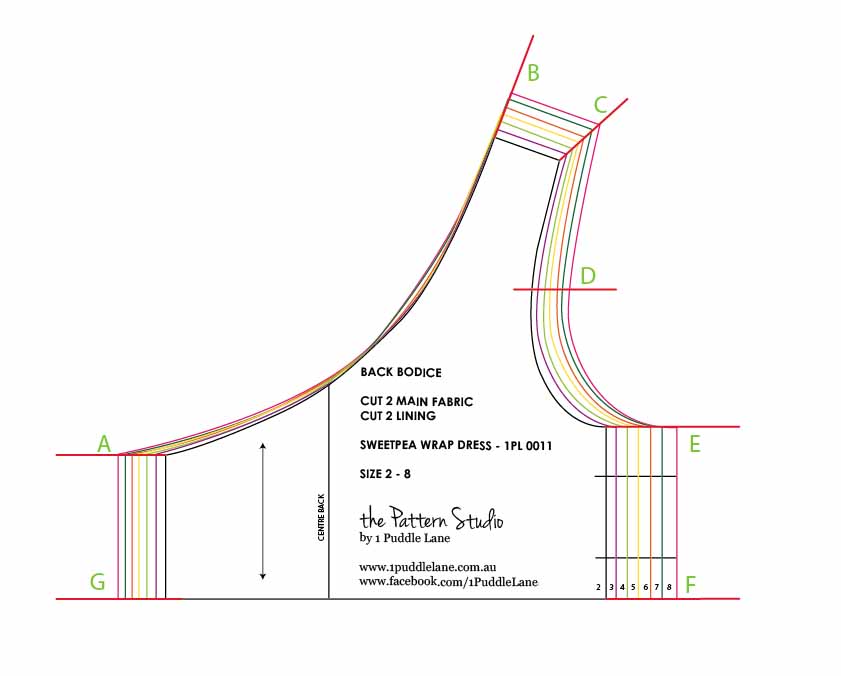
2. Then measure the previous size amount at each point and mark that amount the lines.
eg. If A is 1.5mm | 1/16" then measure out the same.
eg. If A is 1.5mm | 1/16" then measure out the same.

3. Connect these points making sure the line are similar to the lines on the previous sizes.
4. This how your Size 9 back pattern should look.
PLEASE NOTE: If you want a Size 10 then you would need to do this process again. If you want to grade a Size 12 from a Size 8 then refer to the spreadsheet below.
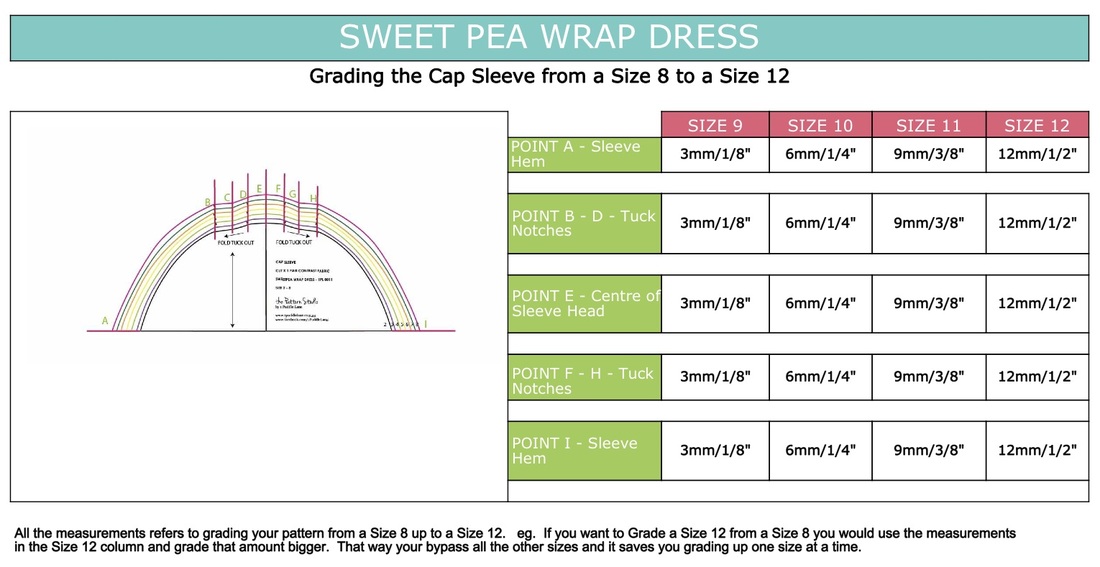
Grading your Cap Sleeve Pattern to Sizes 9 - 12
|
Grading the Cap Sleeve to Size 9
1. Start with your nested Cap Sleeve pattern. Rule lines connecting:
|

2. Now measure out the same amount as the previous sizes. eg. If A measures out 1.5mm | 1/16" then measure out the same amount.
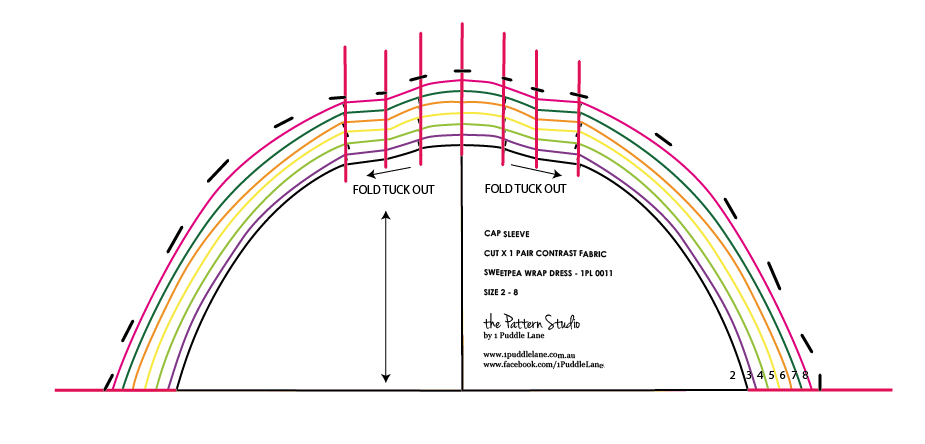
3. Now connect these lines.
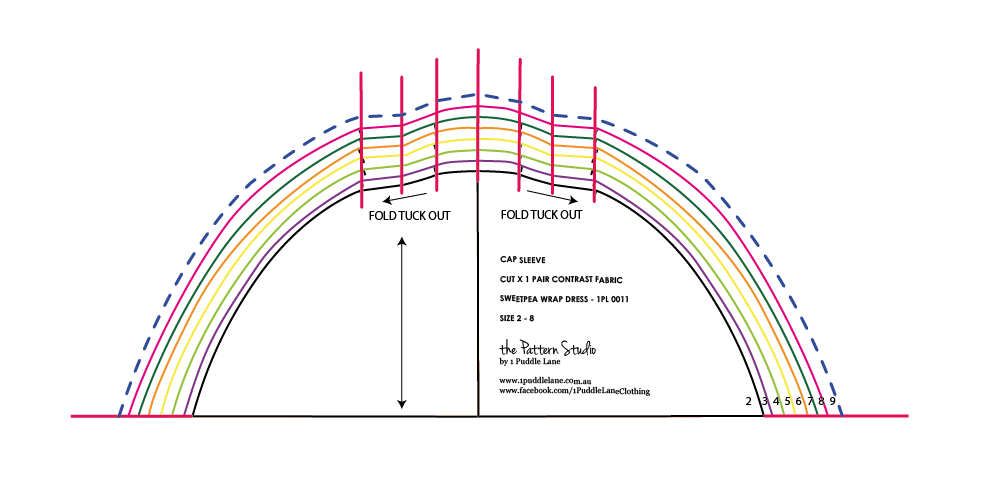
4. This how your Size 9 pattern should look.
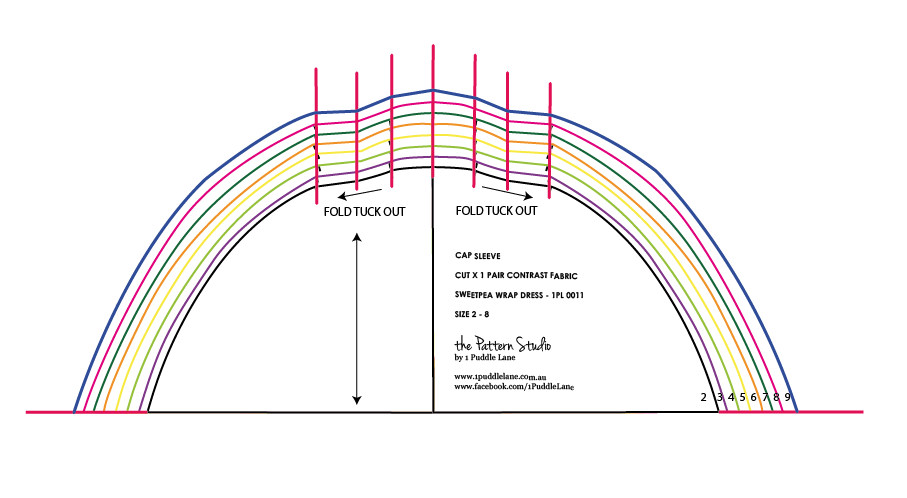
PLEASE NOTE: If you want a Size 10 then you would need to do this process again. If you want to grade a Size 12 from a Size 8 then refer to the spreadsheet below.
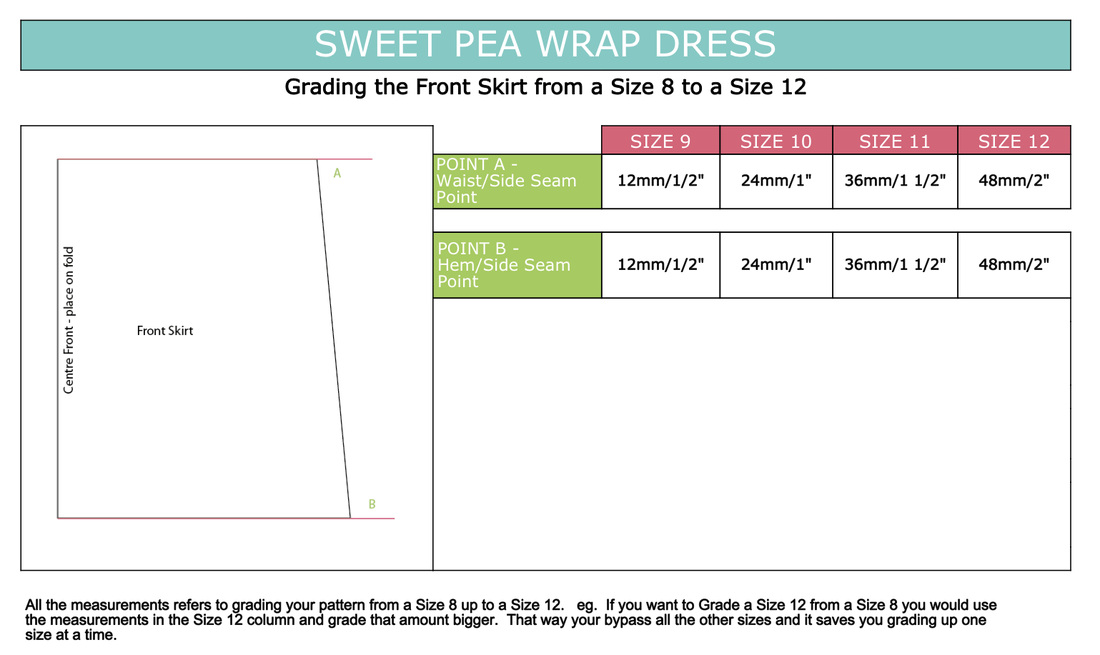
Grading the Front Skirt to Sizes 9 - 12
Grading the Front Skirt to Size 9
Draw your Size 8 skirt from the measurements in the instructions on page9.
1. Rule lines out from:
Draw your Size 8 skirt from the measurements in the instructions on page9.
1. Rule lines out from:
- A - waist/side seam point
- B - hem/side seam point
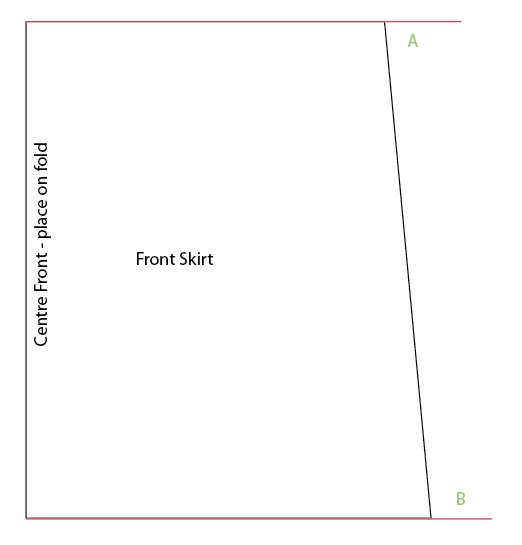
2. Each size increases by 12mm | 1/2". So measure out 12mm | 1/2" and mark at point A and B.
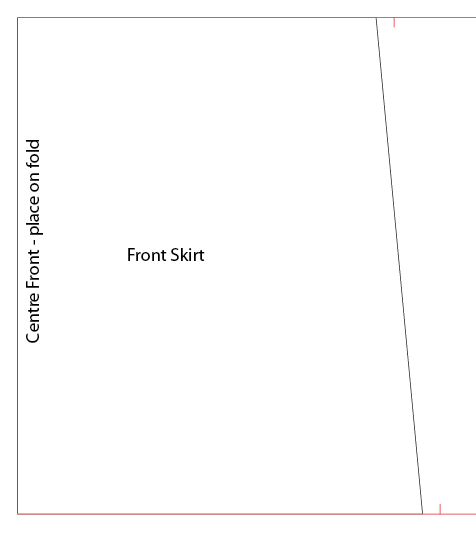
3. Connect these 2 points. This is how your Size 9 Front skirt should look.

PLEASE NOTE: If you want a Size 10 then you would need to do this process again. If you want to grade a Size 12 from a Size 8 then refer to the spreadsheet below.
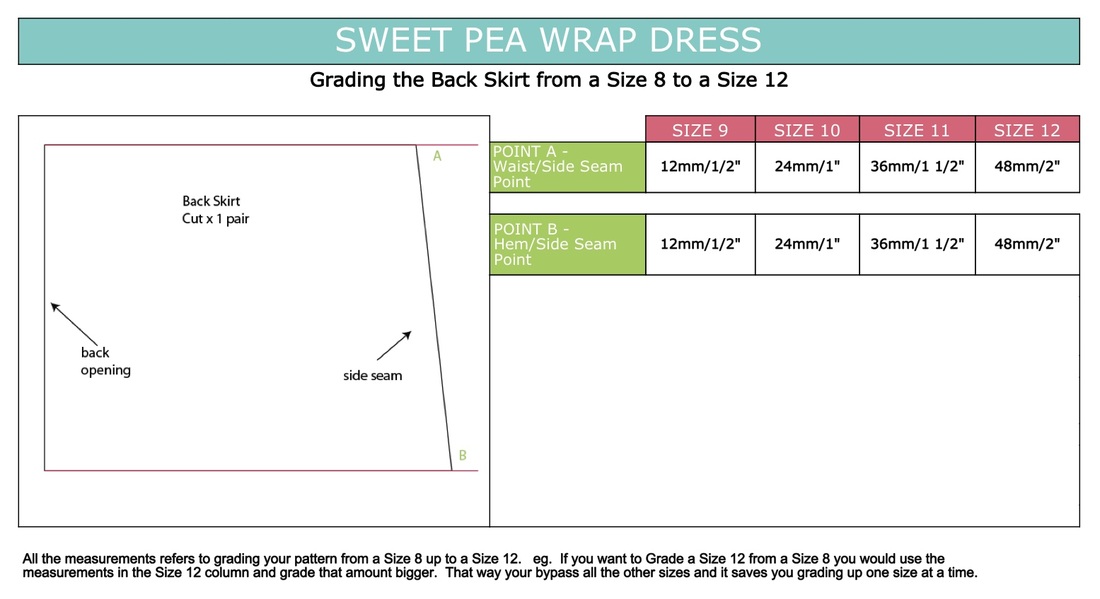
Grading the Back Skirt to Size 9
Draw up your Size 8 Back Skirt.
Draw up your Size 8 Back Skirt.
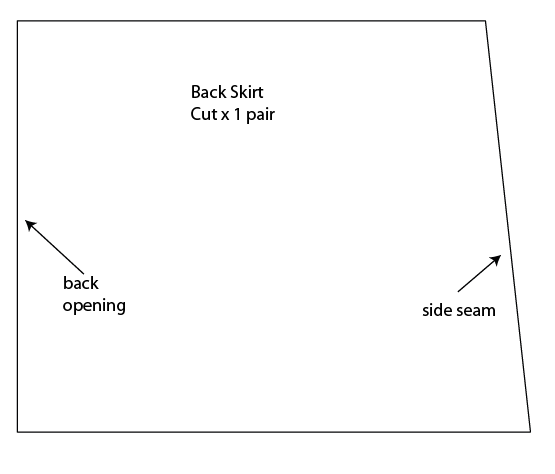
1. Rule lines out from:
- A - back skirt waist/side seam point
- B - back skirt side seam/hem point
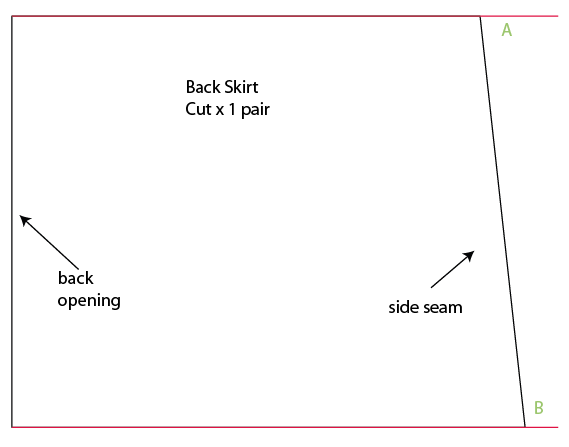
2. The back skirt will increase by 12mm | 1/2" so measure out 12mm \ 1/2" from points A and B.
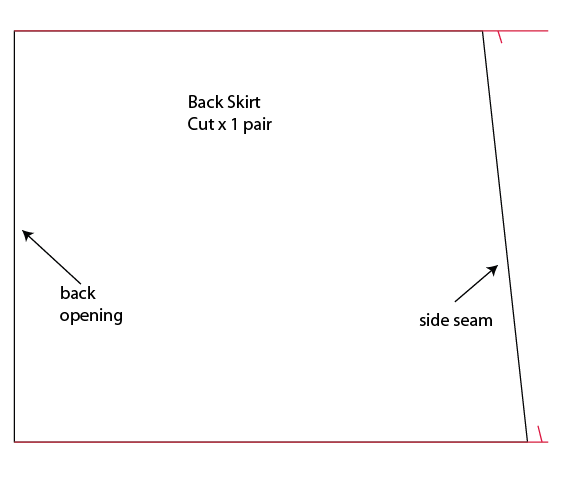
3. Now connect points A and B. This is how your Size 9 Back skirt should look.
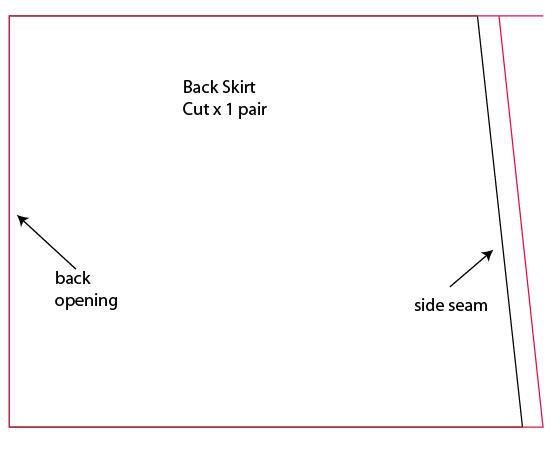
PLEASE NOTE: If you want a Size 10 then you would need to do this process again. If you want to grade a Size 12 from a Size 8 then refer to the spreadsheet below.
Grading the Long and Short Sash Bigger
- Refer to page 9 for your Sash measurements.
- Measure out Size 8 Long Sash and increase the length of the Sash by 24mm \ 2" per size.
- Measure out the Size 8 Short Sash and increase the length of the Sash by 24mm \ 2" per size.
PLEASE NOTE: If you want to increase your Sash to a Size 12 then you'll need to add 20cm | 8" on each Sash.

MODULES
- MODULE 1 - Grading the Sweet Pea Wrap Dress to Sizes 9 - 12
- MODULE 2 - Grading the Sweet Pea Wrap Dress to Size 1
- MODULE 3 - Grading the Molly Skirt to Sizes
- MODULE 4 - Grading the Molly Skirt to Size 1
- MODULE 5 - Grading the Tree Climber Hoodie to Sizes 9 - 12
- MODULE 6 - Grading the Tree Climber Hoodie to Size 1
- MODULE 7 - Grading the Girls Pixie Hoodie to Sizes
- MODULE 8 - Grading the Girls Pixie Hoodie to Size 1
- MODULE 9 - How to adapt the same principles to other PDF patterns
- BONUS #1 - You'll receive the SECRET CODE to purchase any of my patterns for 1/2 price
