1 PUDDLE LANE
  • BACK TO NEW WEBSITE
  • TUTORIALS
    • PATTERN ADJUSTMENTS
    • SEWING TUTORIALS
  • PATTERN HACKS
  • SEW-A-LONGS
    • MiSS FOX DRESS - SEW-A-LONG

Lesson 3 - Transferring your Calico Toile/Muslin Alterations to your Pattern

Now that you've made all the alterations to your Toile we need to transfer those alterations to your pattern.


Let's get into it!


Picture

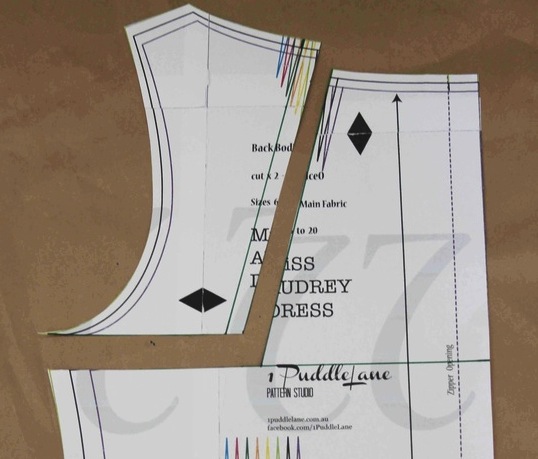
Here's What You'll Achieve Today

  • how to transfer all the alterations on your Toile to your pattern pieces
  • getting your pattern ready to start sewing your gorgeous dress

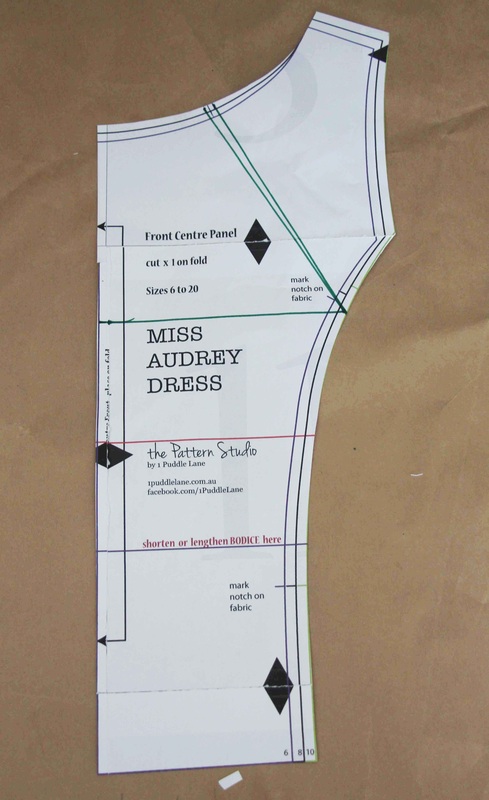
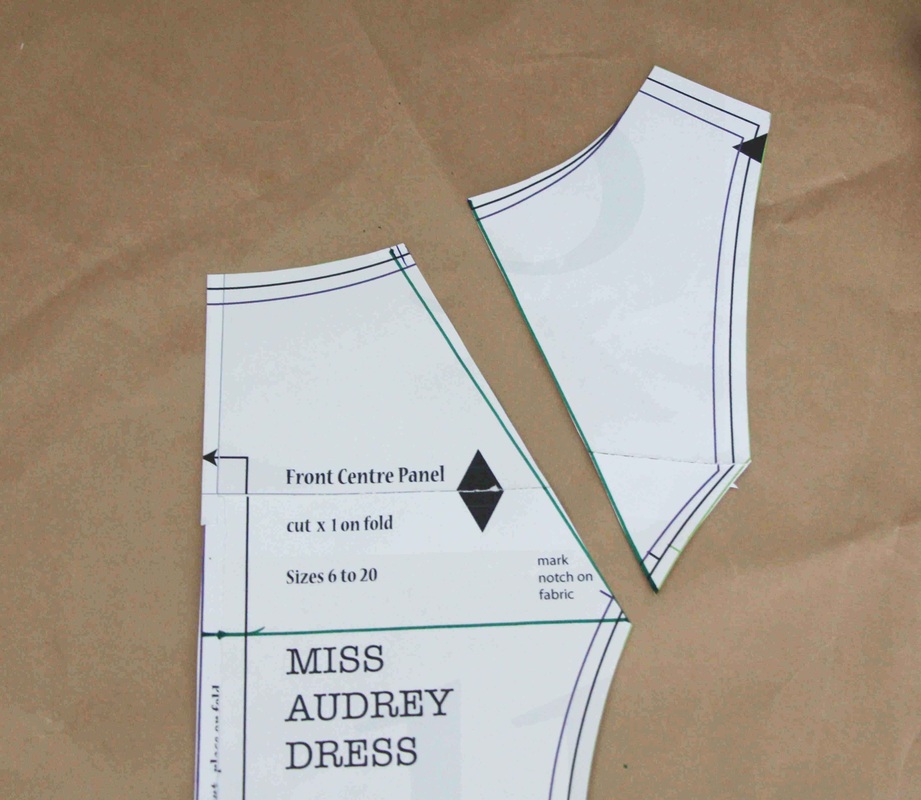
With the alterations I did to my Toile this is how I altered my pattern pieces.

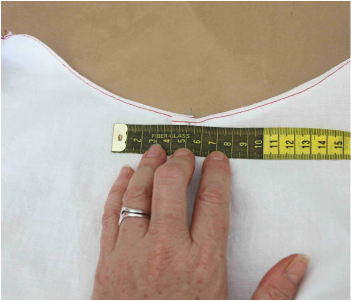
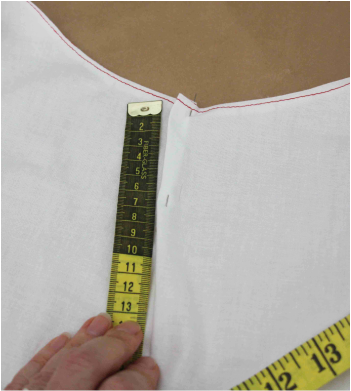
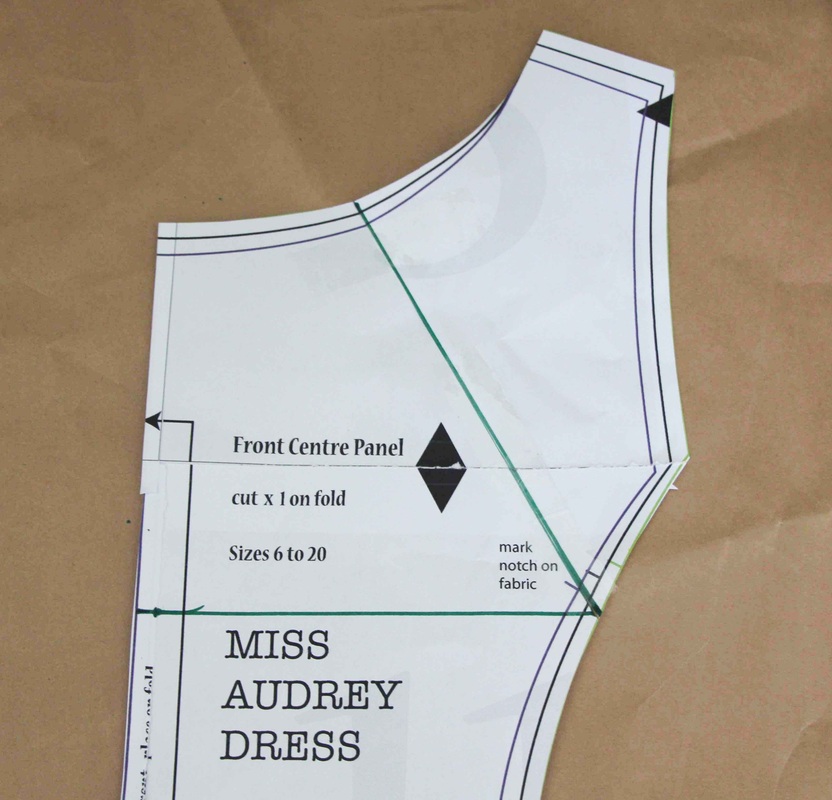
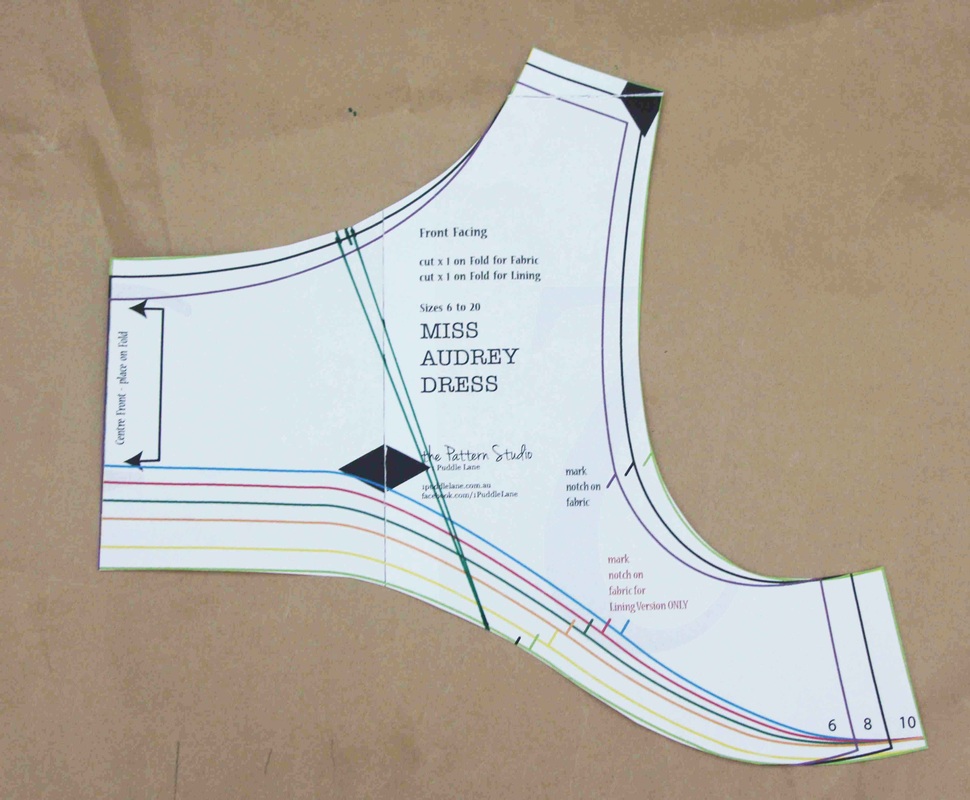
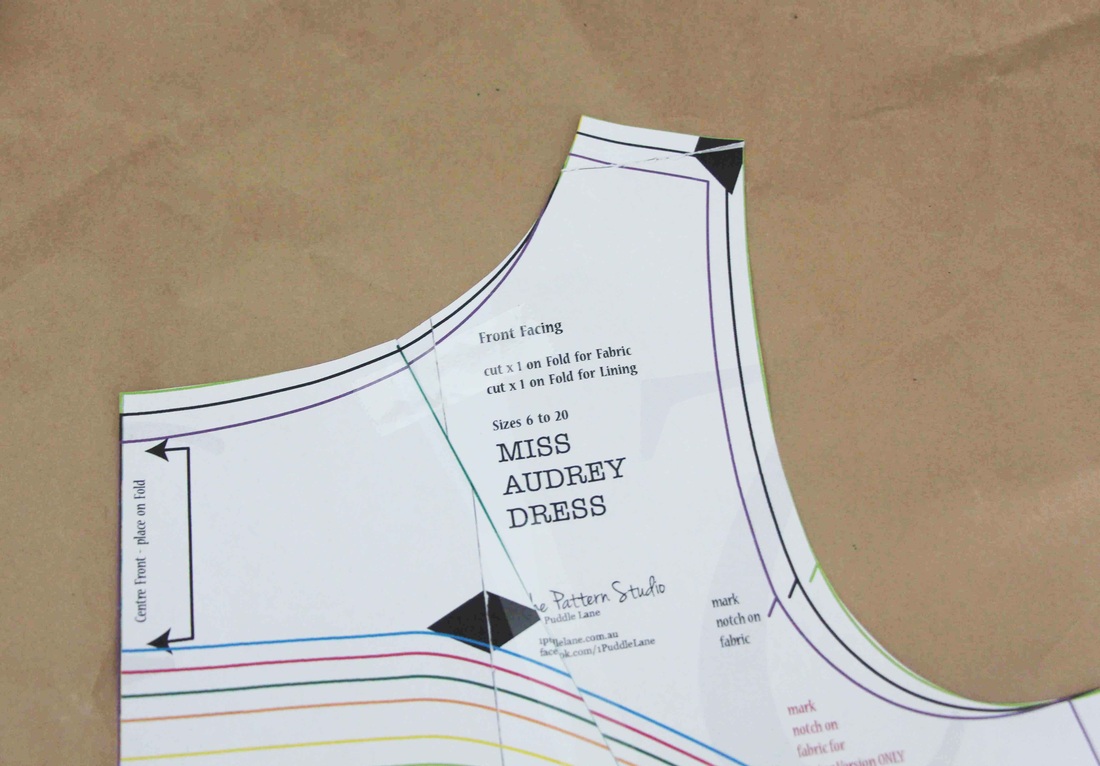
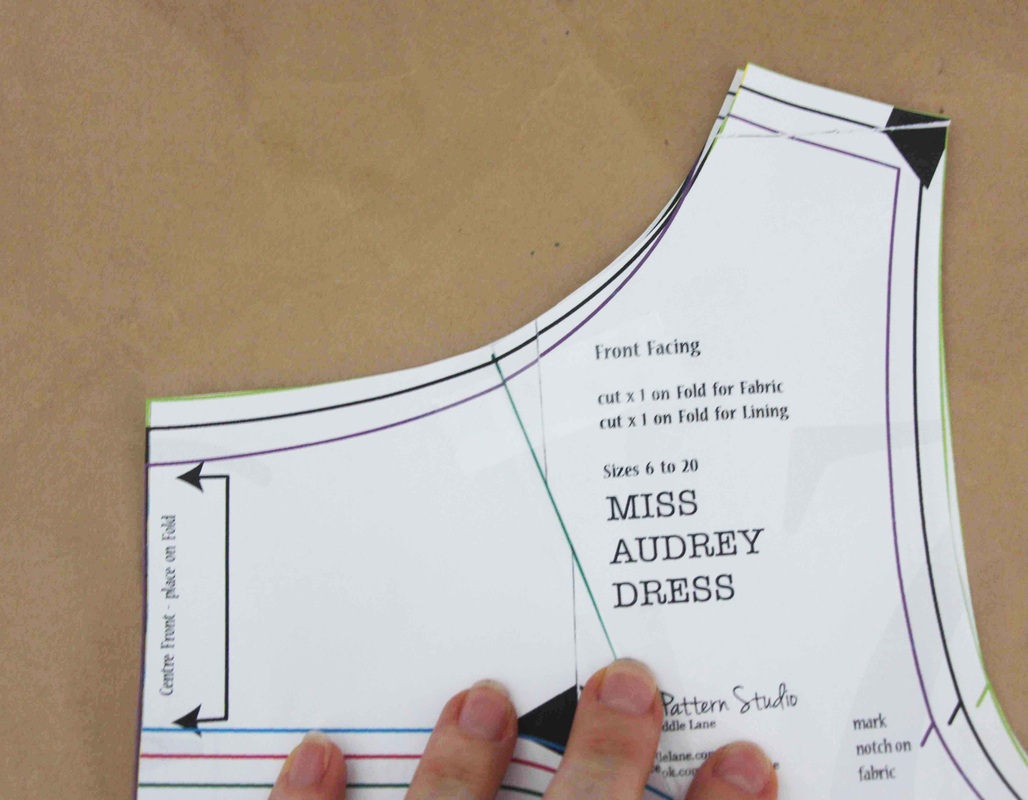
The Gaping Front Neckline

Picture
1.  I measured the width of the excess fabric dart  -  which was 2cm.
2.  I then measured down the length of the excess fabric dart  -  which was 13cm.
Picture
Picture
3.  I then transferred those measurements to my pattern.  
Now because I'm altering a pattern that is on the fold I need to half those the width measurement.
4.  I measured down the CF the length measurement of the excess dart ( 13cm) and squared out a line to the seam.
5.  I made a mark half way along the neck edge and ruled a line down to the first squared out line.
6.  Because my excess fabric measured 2cm I need to half that measurement.  So I measured out 1cm from the first line at the neck and ruled another line down to the squared out line.  


I have now formed a dart which I'm now going to get rid of.

7.  I cut down one side of the dart....
Picture
Picture
8.  Then moved the piece over and taped it down to get rid of the dart.

You may also need to redraw the neckline if it's an odd shape or not like the shape it was before.


9.  Now that I've made this alteration to the CF panel I need to make the same alteration to the front facing.

10.  I made a mark in the same place that I did for the CF bodice at the neckline and ruled a line down to near the notch on the lower edge of the facing.


11.  I measured out 1cm at the neckline and ruled a line down to the lower edge of the facing to connect with the first line.

Picture
Picture
12.  I then cut a the line through the facing (like I did with the CF panel) and moved the other line over to meet it and taped it down.
13.  I  placed the facing over the CF panel to make sure they matched up.


That's my Gaping Front Neckline fixed.

Picture

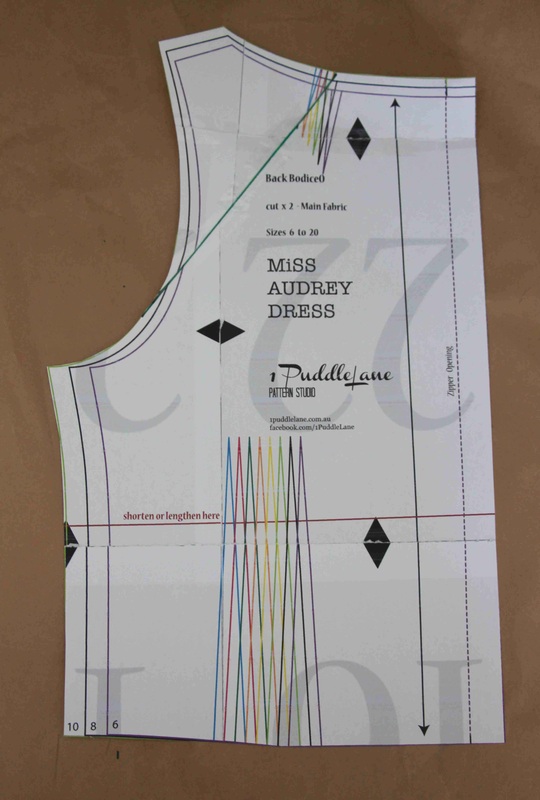
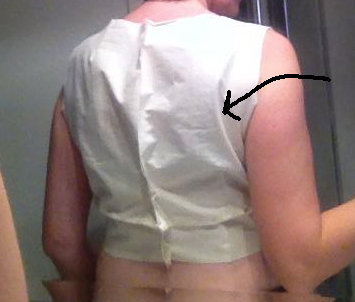
For a Gaping Back Neckline

I didn't have a gaping back neckline but if it did this is what I'd do.

Picture
1.  The same thing you did with the Gaping Front Neckline.  Pin the excess fabric as a dart.
2.  With your back bodice pattern draw a line half way on the neckline down to the armhole.


3.  Now work out the amount of excess fabric has been pinned at the neck and mark that amount on the other side of the dart.  Then draw a line down to meet the first line at the armhole.

Picture
Picture
4.  Cut down one of the lines from the neck to the armhole.
5. Then join the 2 line together and secure in place with tape.

REMEMBER - whatever alteration you do the back you need to do the same for the facing. Then check the 2 patterns match.

See the Gaping Front Neckline alteration above.

You have now altered your pattern for a Gaping Back Neckline.

Picture

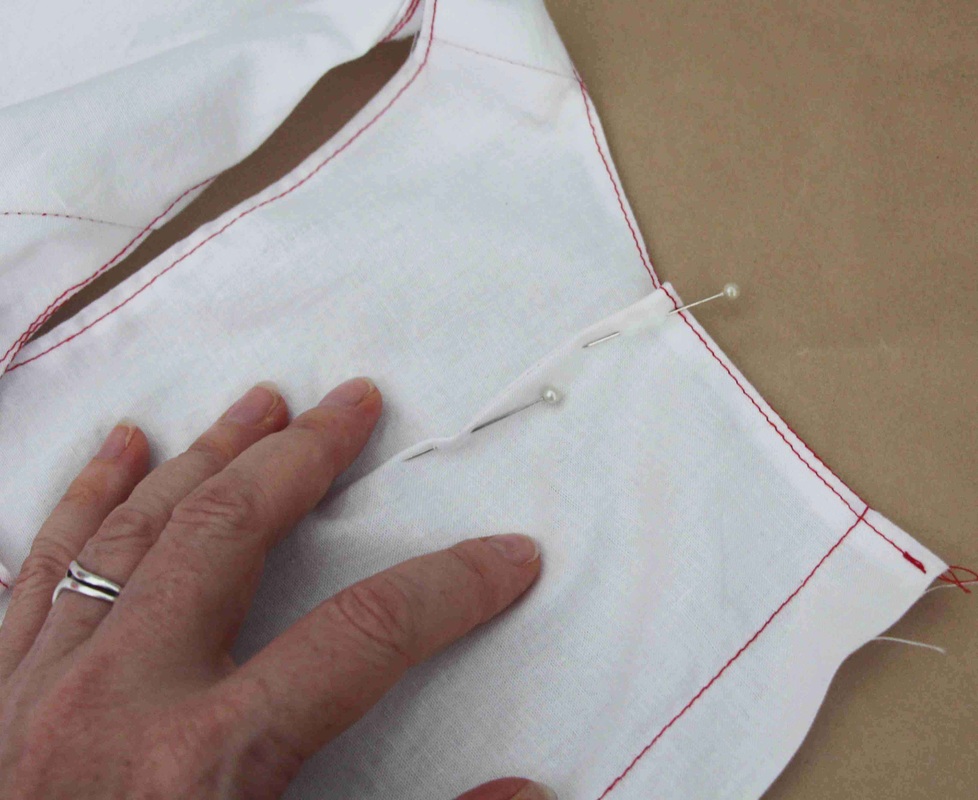
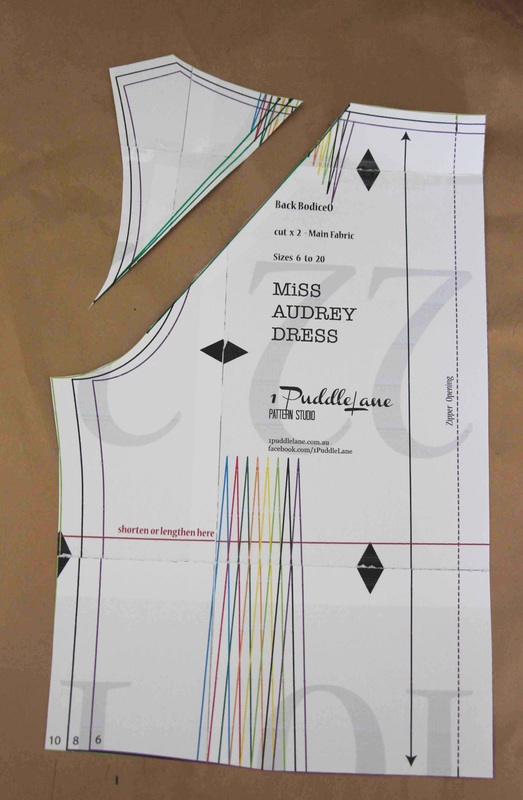
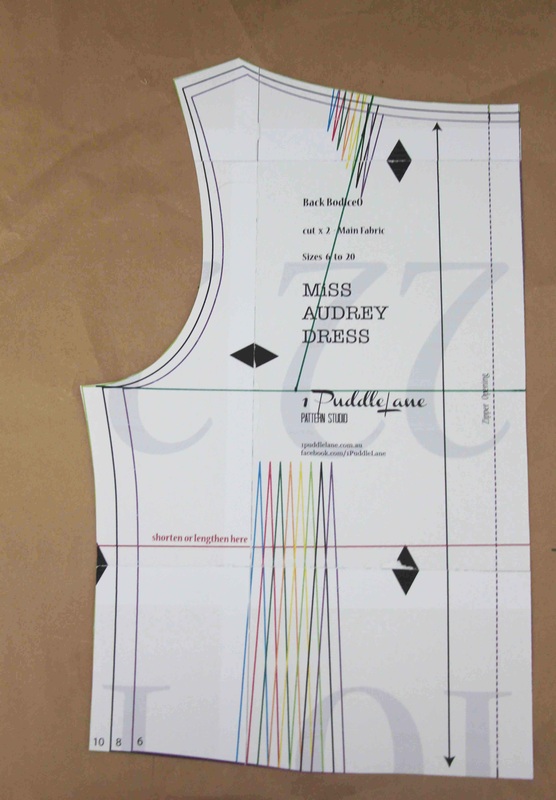
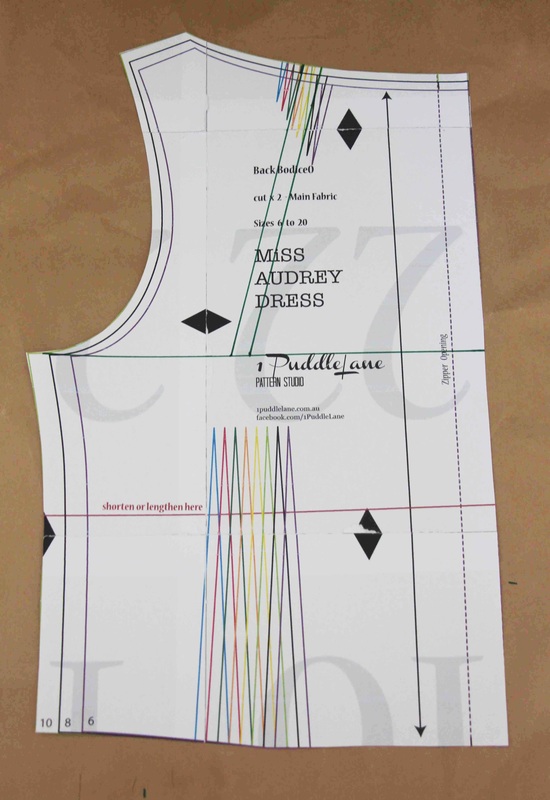
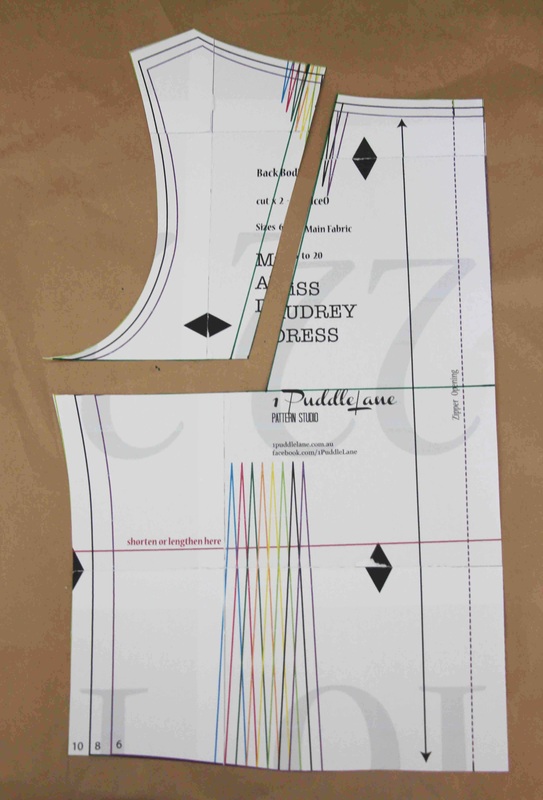
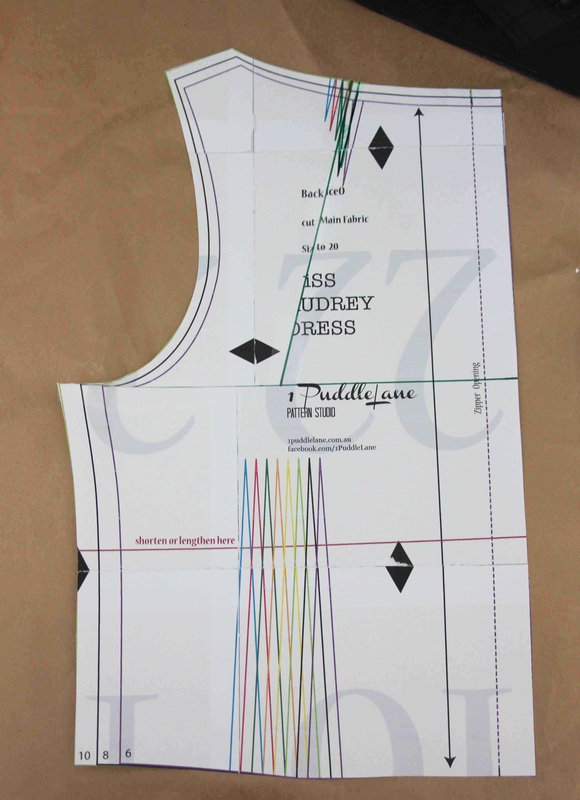
Across Back Alteration

Picture
This happens when the across back is too baggy.  In the photo you can see the bagginess by the vertical line of excess fabric.


So to fix this problem you need to pin the excess fabric you want to remove.

1.  On the Back Bodice square a horizontal line out from the CB seam out to the armhole/side seam point.


2.  Draw a line from the midpoint of the neckline to the midpoint of the horizontal line.

Picture
Picture
3.  Measure how much excess fabric you pinned on your Toile and transfer that amount to the pattern.  Rule a parallel line to the last line the excess amount you want to get rid of.  eg. if the excess is 1cm then rule a line parallel to the last line 1cm over.
4.  Now cut down one vertical line and the horizontal line out to the side seam.
Picture
Picture
5.  With the 2 horizontal line of the bodice pieces against each other move the cut piece over and under the other piece to line up the 2 vertical line.  Then tape in place to secure.

REMEMBER - the alteration you've done to the back needs to be done to the back facing as well.  And then check that that the 2 patterns match.

Your pattern has now been fixed for the Across Back alteration.

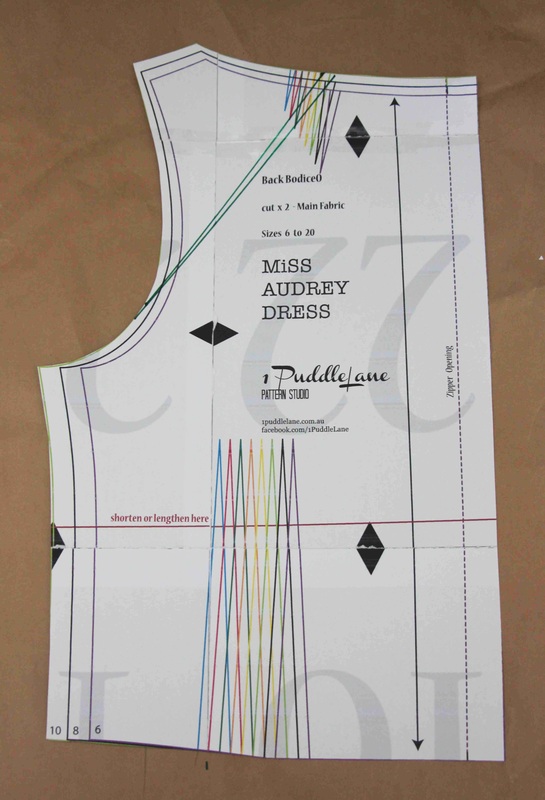
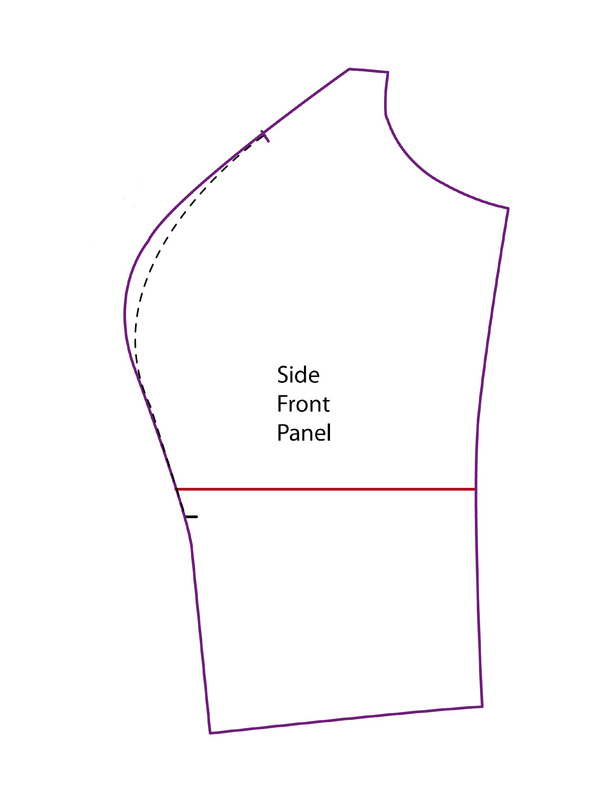
Pointy or Excess Bust Panel

This happens when there is excess fabric around the bust area of the bodice.

To fix this problem you need to pin the excess fabric you want to get rid of.

Picture
Picture
1.  Now transfer that amount to the Front Side Panel ONLY.  eg. if you pinned 2cm at the bust at one panel you mark 2cm in from the bust curve of the panel.  Then measure how far you pinned the excess fabric and mark those measurements on the pattern and redraw a new curved line.


REMEMBER - if you dress is going to be lined you need to do the same alteration to the Front Side Lining panel.


You have now fixed up a pointy bust.

That's it for Today

How's your brain?  Does it hurt?  I know mine does!  Well, that's a good thing.  It means that you are learning new techniques!  So stick with it as it's going to be invaluable what you will learn and you'll be able to use these techniques with any pattern in the future.  And I'm learning how to run my first Sew-A-Long which will be invaluable for future Sew-A-Longs.  So we are both benefiting!


Now don't forget to come on over to the facebook group with your questions and I or one of my clever testers will be there to help you out.  

Lesson 4 will come out in about 5 days time and this is where we get into the fun of cutting our your beautiful fabric and sew your Miss Audrey Dress ready for Christmas.  


Picture

1 DRESS PATTERN - SOOO MANY STYLES!
  1. WELCOME!
  2. MODULE 1 - Making Your Bodice Toile
  3. MODULE 2 - Making Your Bodice Toile with a Short Sleeve
  4. MODULE 3 - Making Your Skirt Toile
  5. NECKLINES
  6. SLEEVES
  7. SKIRTS
  8. PEPLUMS
  9. MODULE 4 - Putting It All Together

BONUS #1 - Choosing Colours that Suit You!
BONUS #2 - Choosing Fabric to Suit Your Style of Dress
BONUS #3 - Booking your Skype sessions with me.

Lesson 2
MODULE 2

Find Out When NEW Patterns Are Released!

* indicates required
Picture
Picture
Picture
Picture
Picture
Picture
Picture
Powered by Create your own unique website with customizable templates.
  • BACK TO NEW WEBSITE
  • TUTORIALS
    • PATTERN ADJUSTMENTS
    • SEWING TUTORIALS
  • PATTERN HACKS
  • SEW-A-LONGS
    • MiSS FOX DRESS - SEW-A-LONG