MODULE 5 - Grade 'Girls Pixie Hoodie' to Sizes 11 & 12
This grade is a bit more difficult as we now have more curved lines in the pattern. But if you follow along you should be fine.
|
|
What You'll Achieve in this Module
- grade the front, back, sleeve and hoodie to Sizes 11 & 12
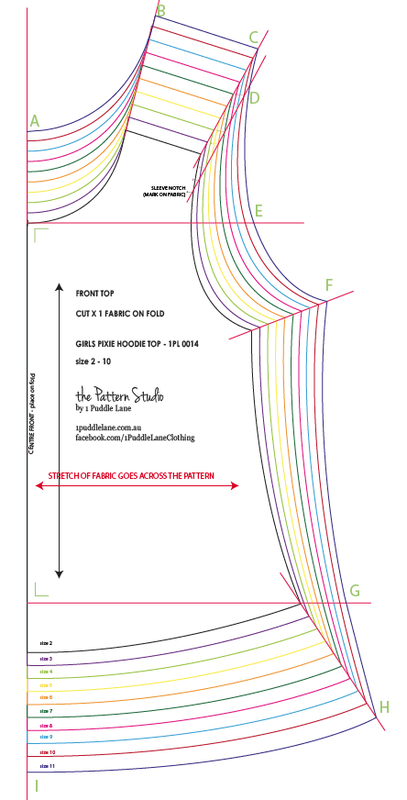
Grade Front Pattern to Sizes 11 & 12

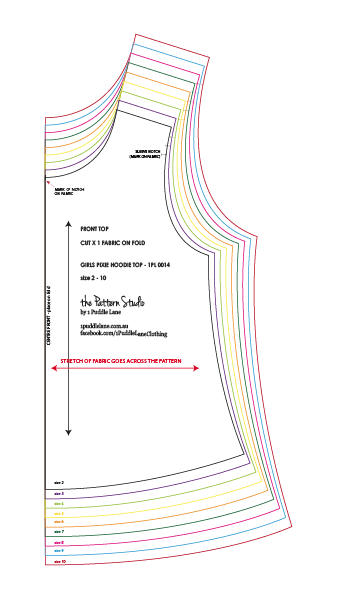
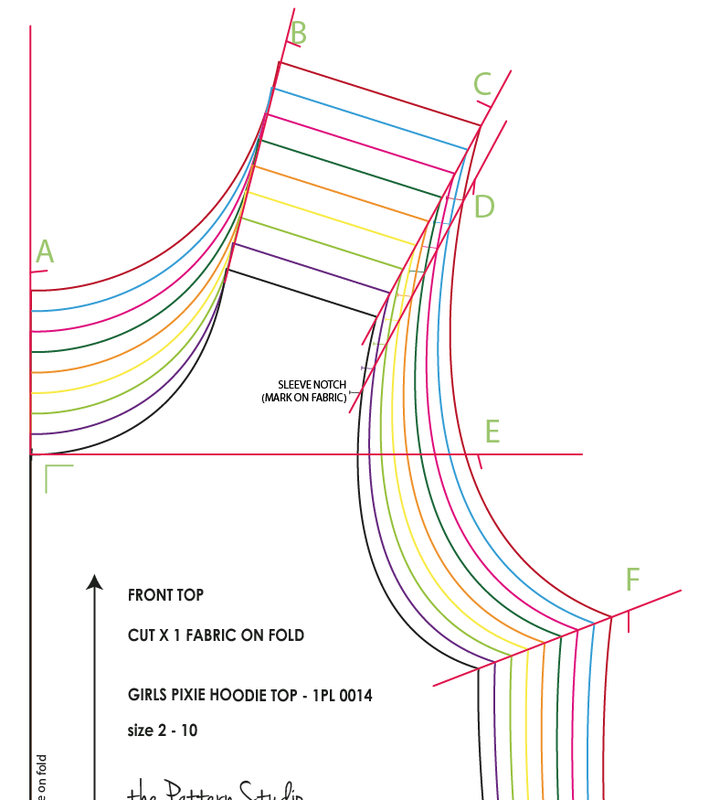
1. Start with the nested front pattern.

2. Rule lines connecting:
|
3. Next rule a line connecting:
|
4. Once you've ruled your lines out this is how your pattern will look.
|
5. Now it's time to start marking out the pattern to a Size 11. Measure the same amount as the previous sizes. eg if A measures 6mm \ 1/4" on the previous sizes then you will do the same. Do this process for each of the points A - F.
|
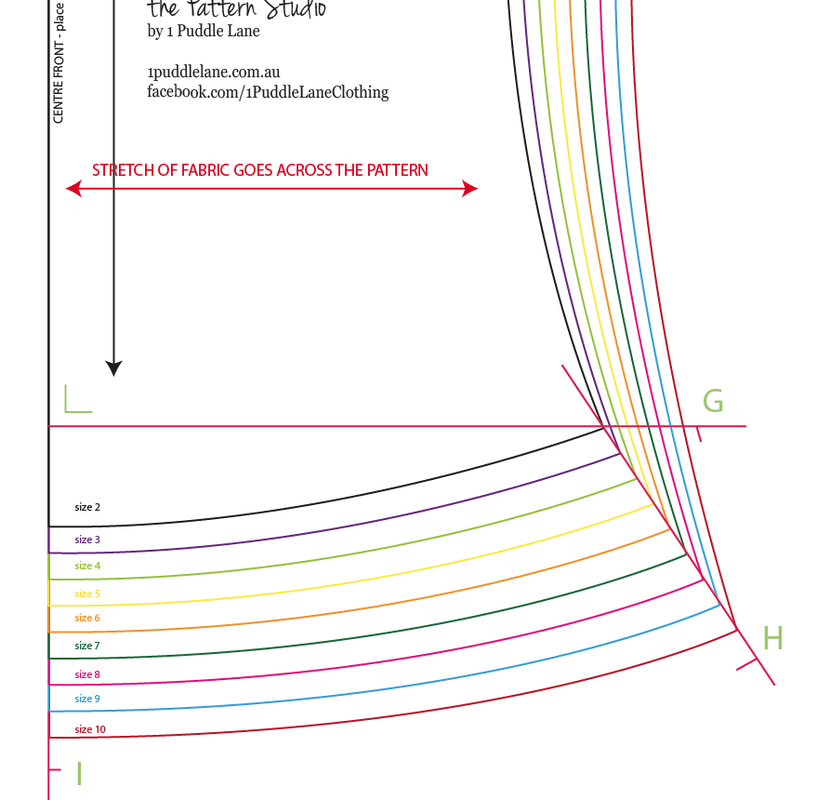
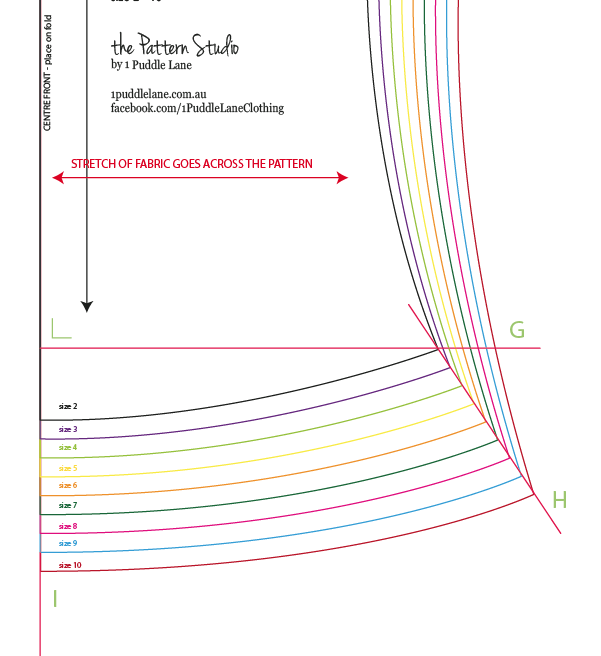
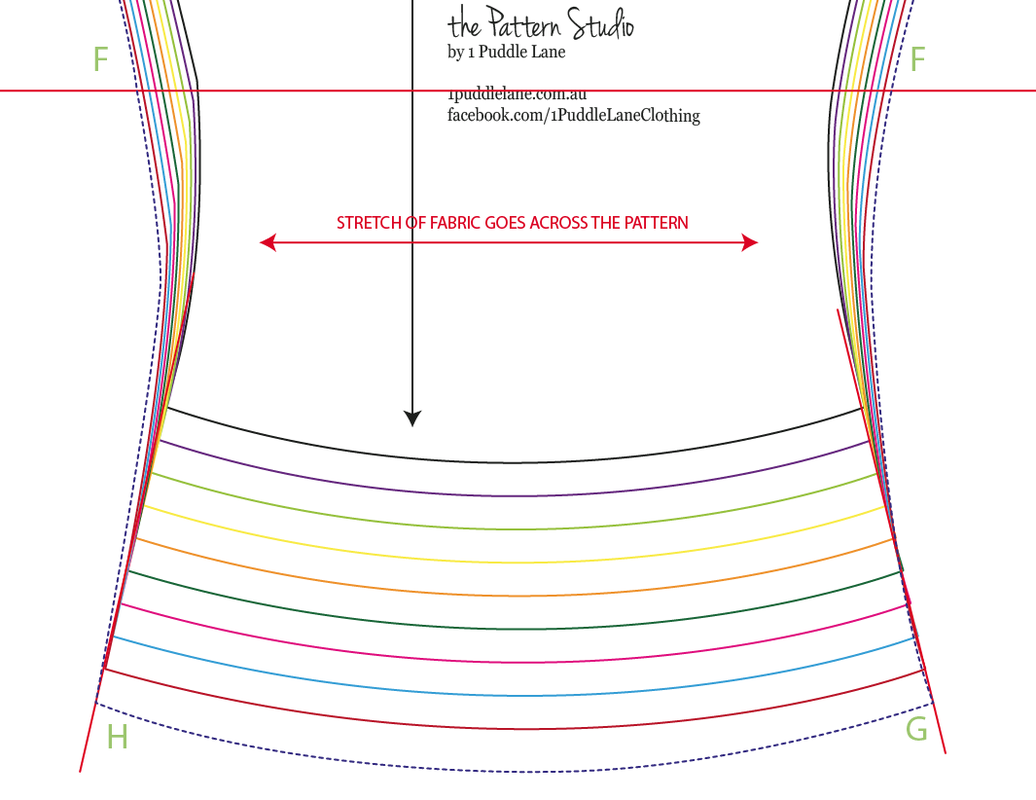
6. Now do the same process to Points G - I.
If you need help with this pop on over to the Facebook group and I will be able to help you out. |
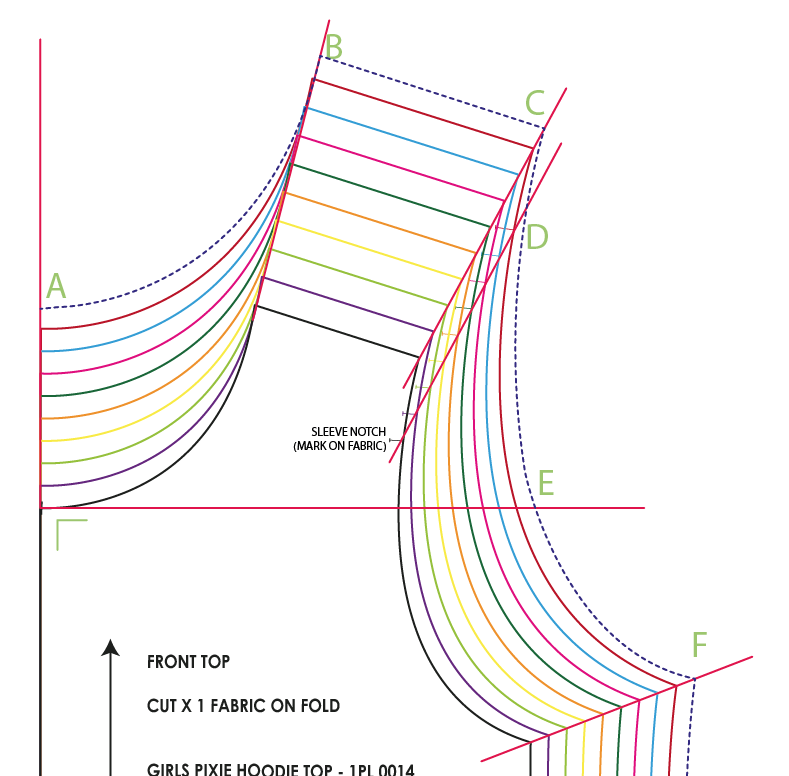
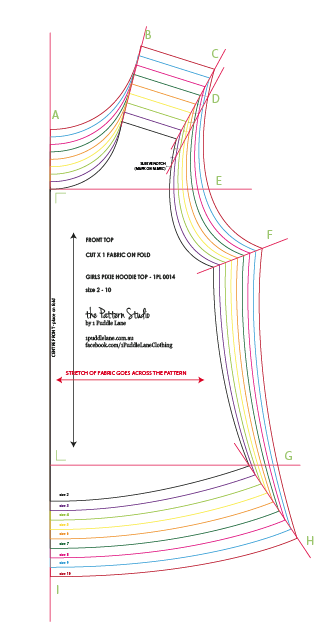
7. Once you've marked these new points it time to connect them. Draw lines similar to the previous sizes so that you keep the style shaping the same. Do this to Points A - F.
|
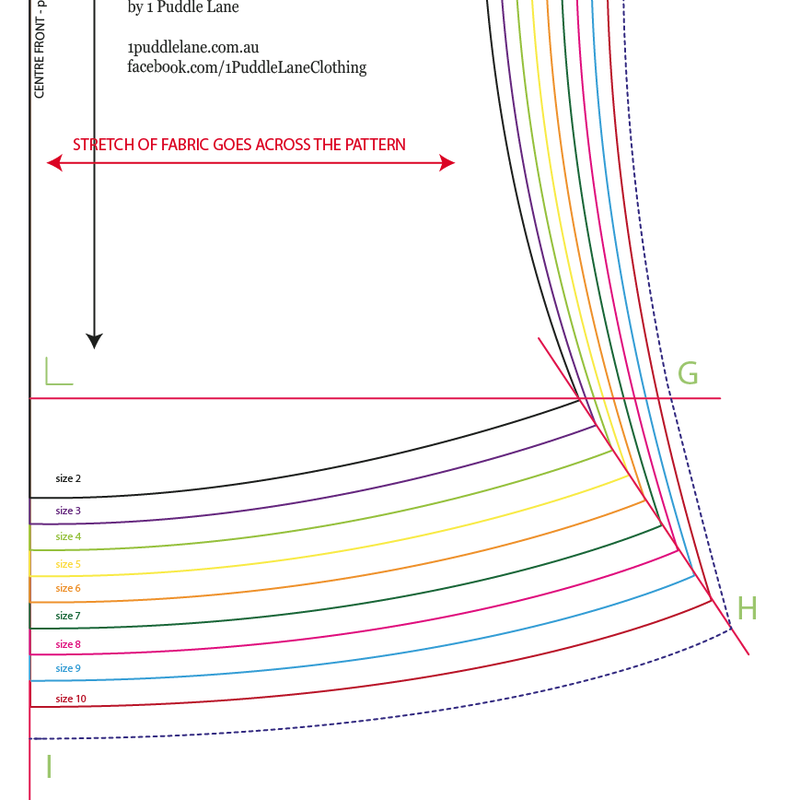
8. Then repeat this process to Points G - I.
|
9. This is how your new Size 11 pattern will look.
|
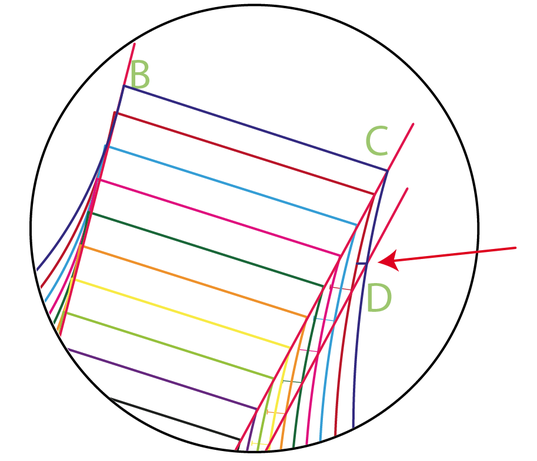
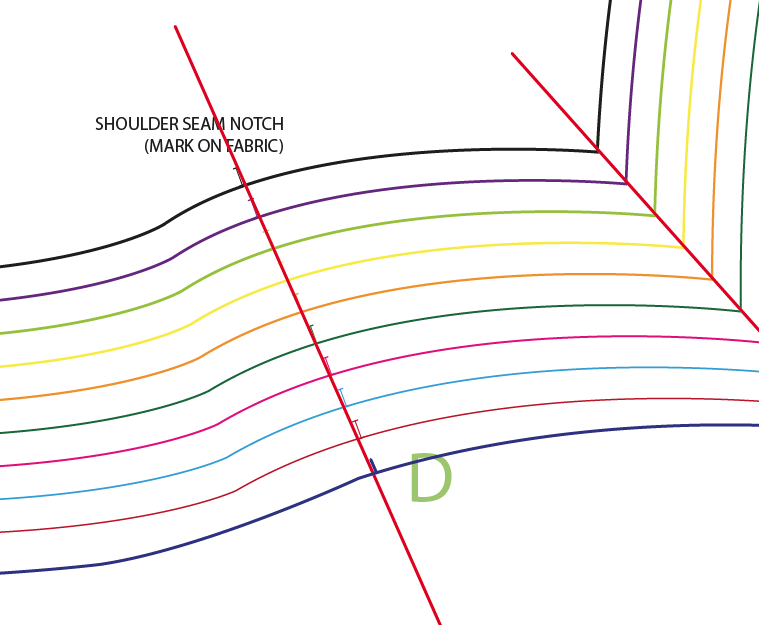
10. Don't forget to add your new Shoulder/Sleeve notch on your Size 11 pattern.
|
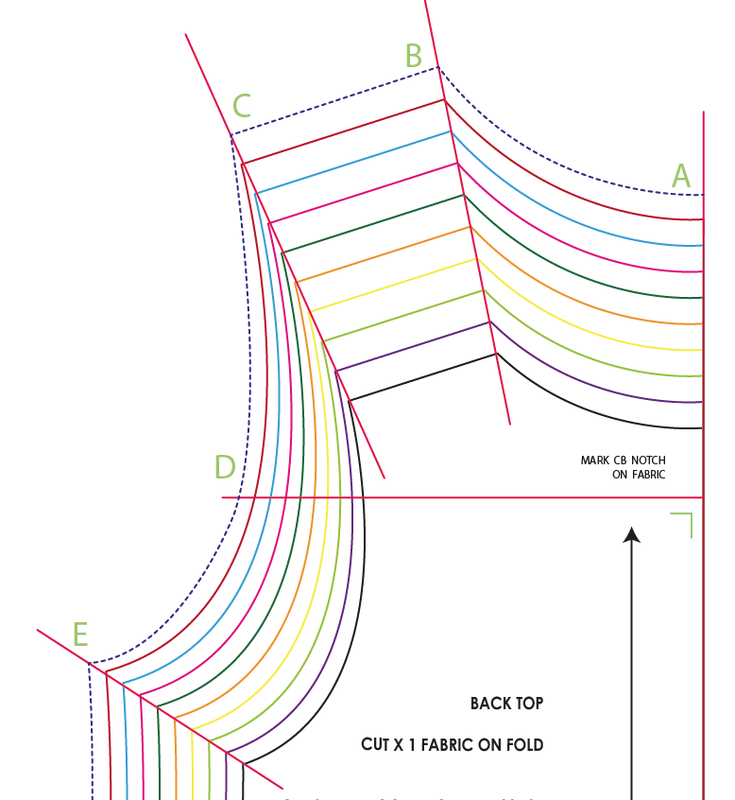
Grade Back Pattern to Sizes 11 & 12
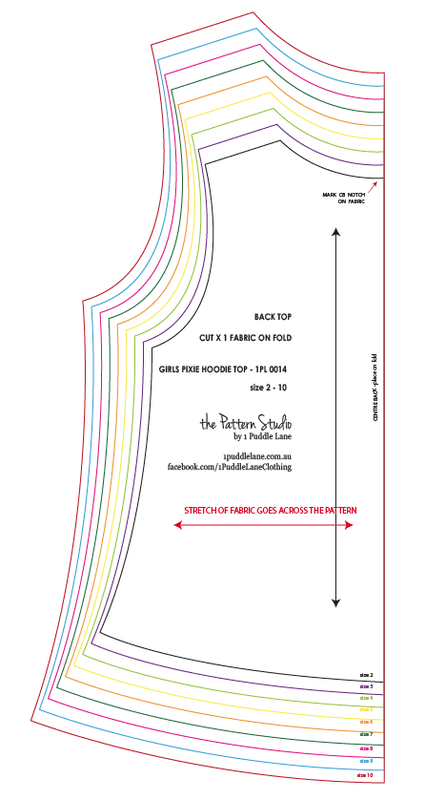
1. Start with the nested Back pattern.
2. Rule lines from:
|
3. Next rule lines from:
|
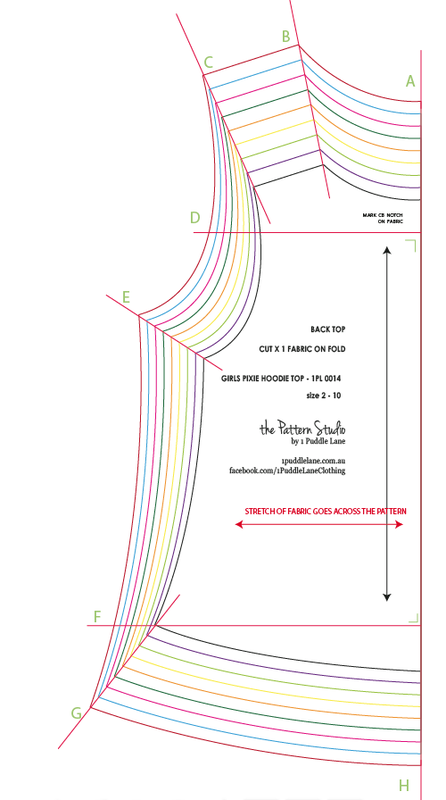
4. This is how your back pattern will look.
|
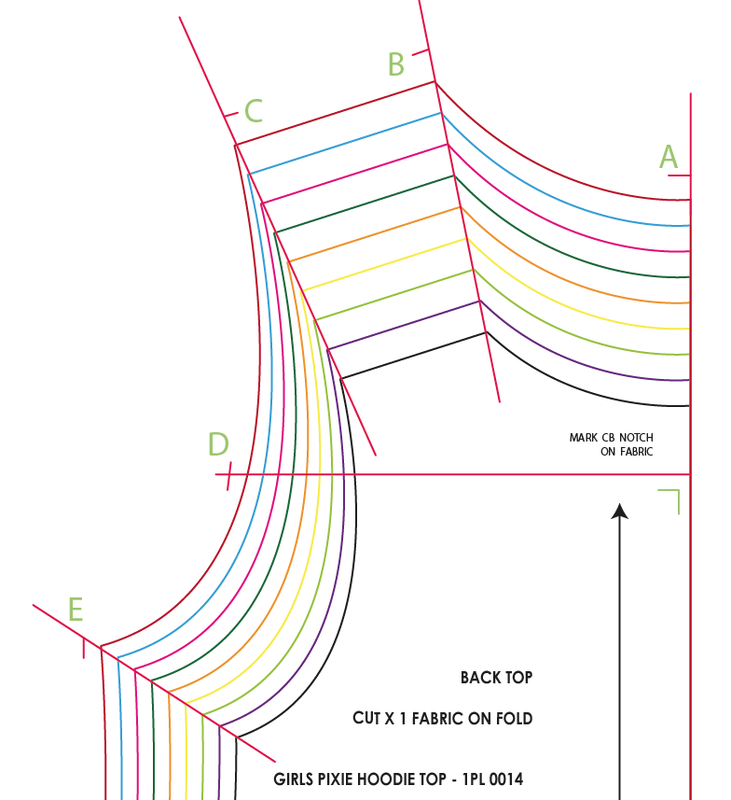
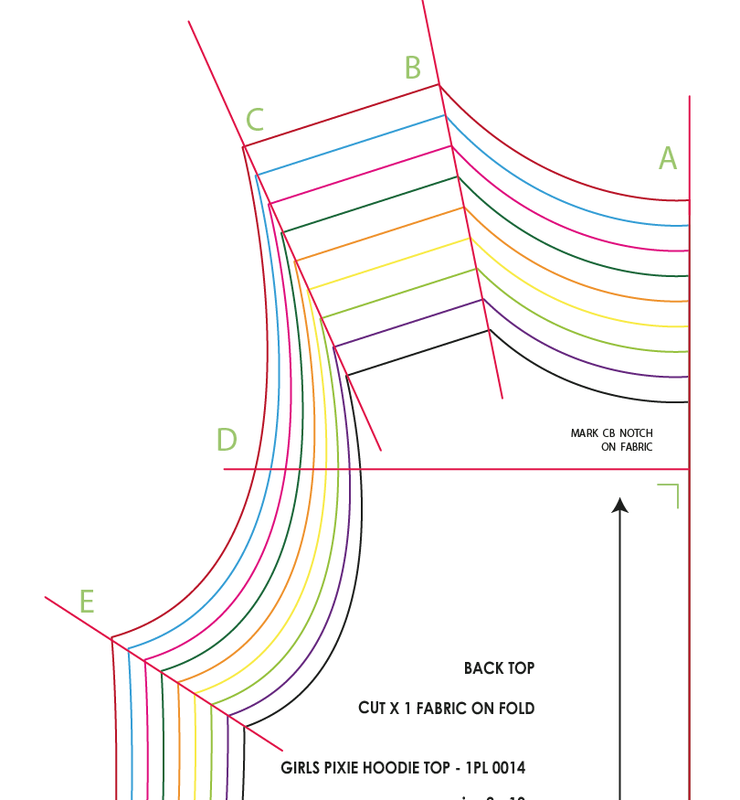
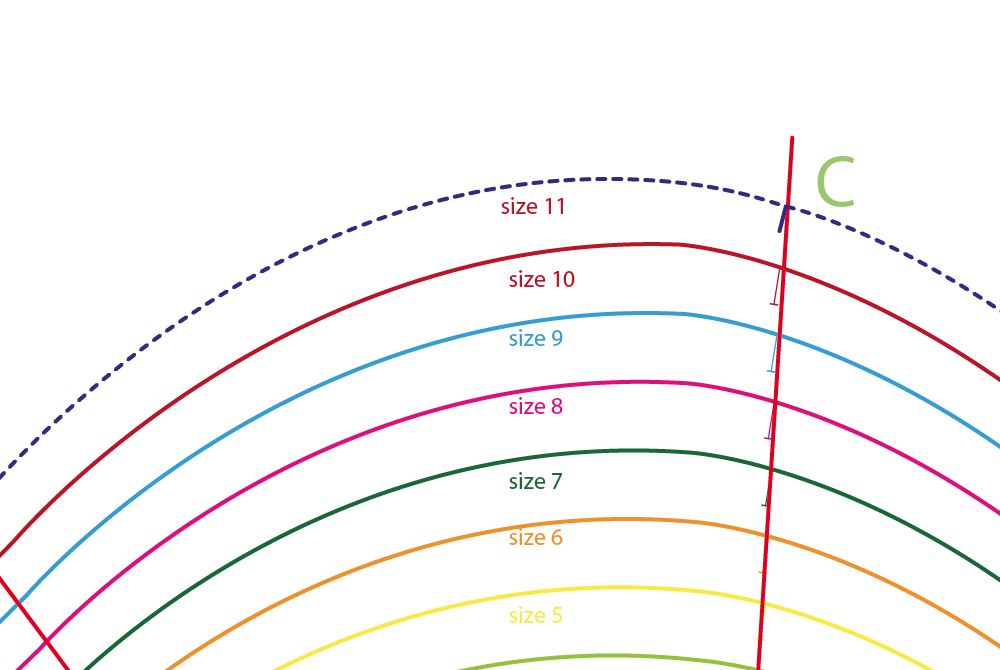
5. Once you've ruled all the lines it's now time to add the marks for your Size 11 pattern.
Measure out the amount the previous sizes have increased by. eg. If A has increased by 6mm \ 1/4" in the previous sizes then you'll use that measurement to increase the pattern at that point. Do this with Points A - E. |
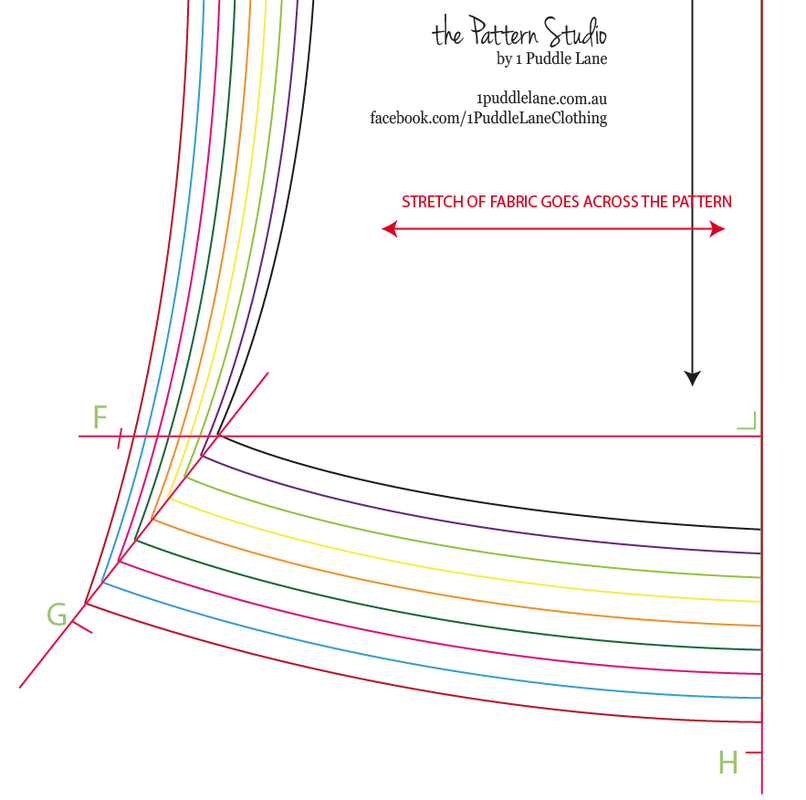
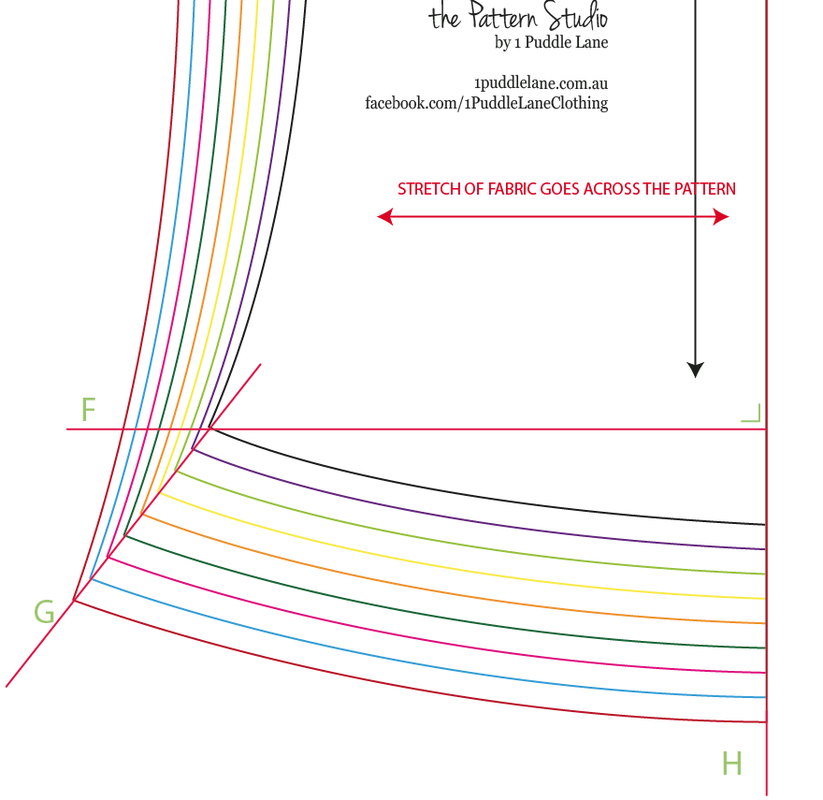
6. Then do the same process with Points F - H.
|
7. Once that's been done it's time to connect all the points to for your Size 11 pattern. Make sure the lines are similar to the sizes before. This keeps the styling shape the same.
|
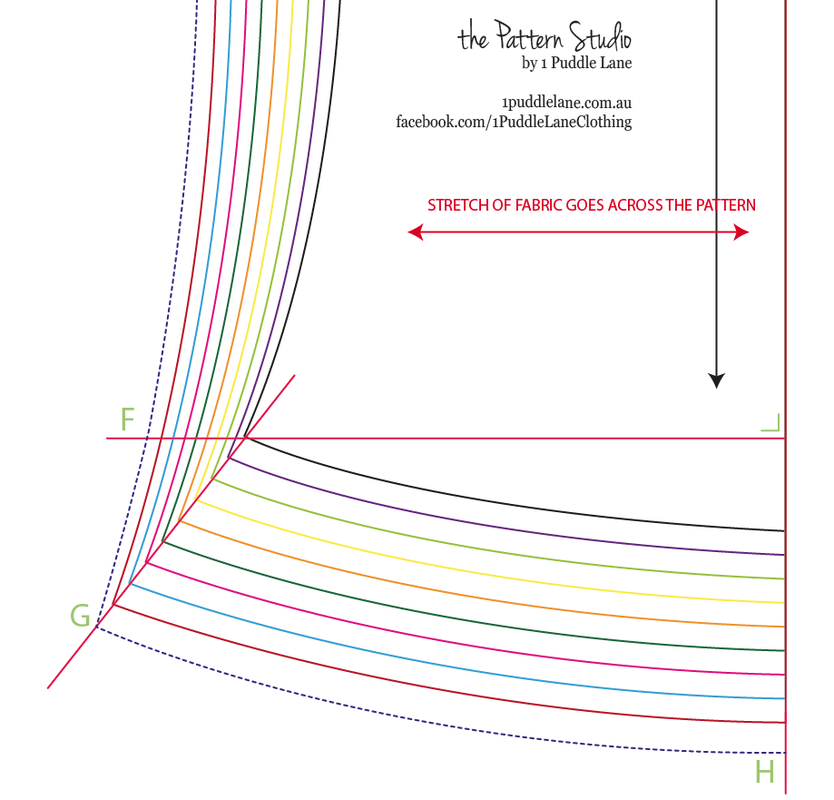
8. Now connect the Points F - H.
|
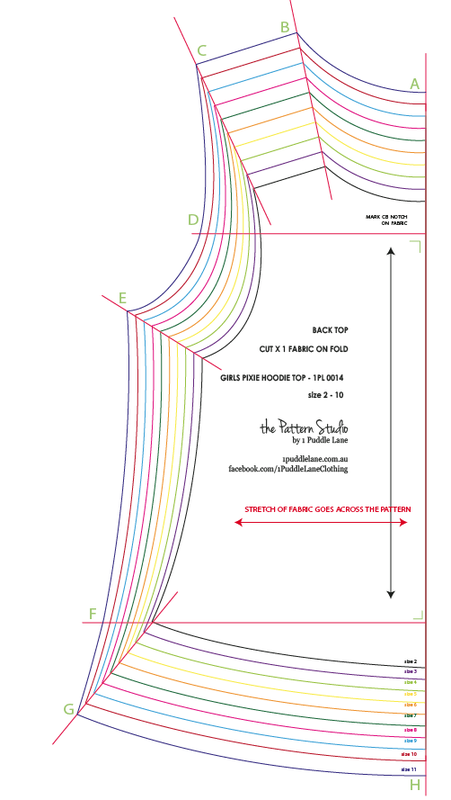
9. Your Size 11 Back pattern will now look like this.
|
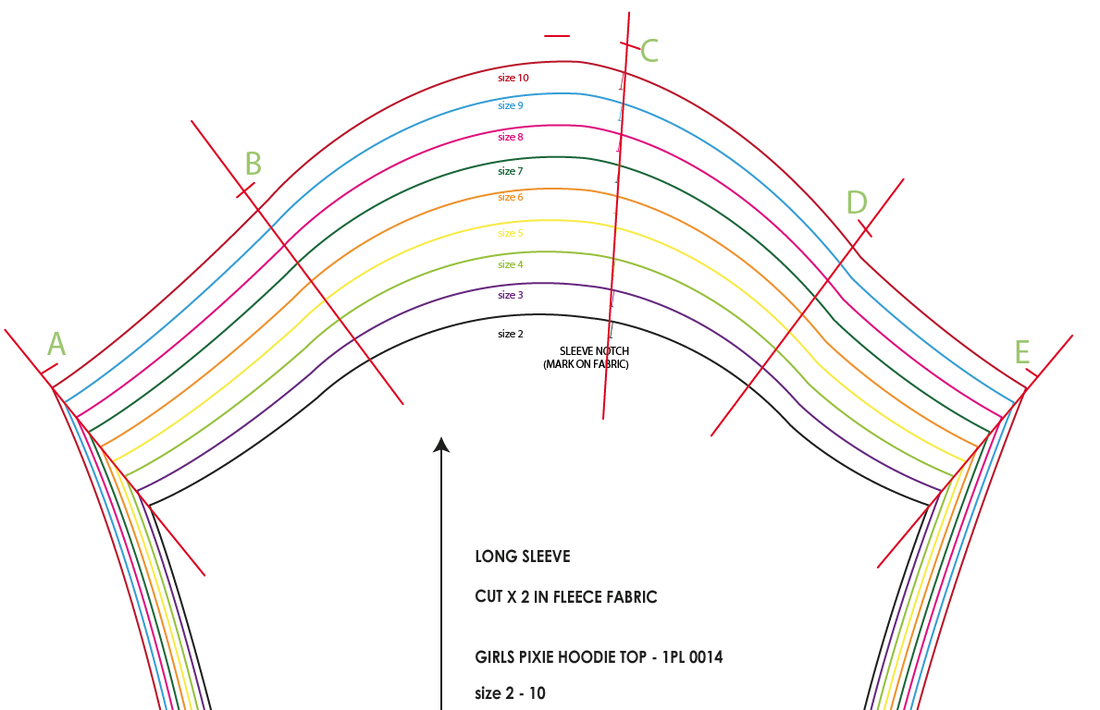
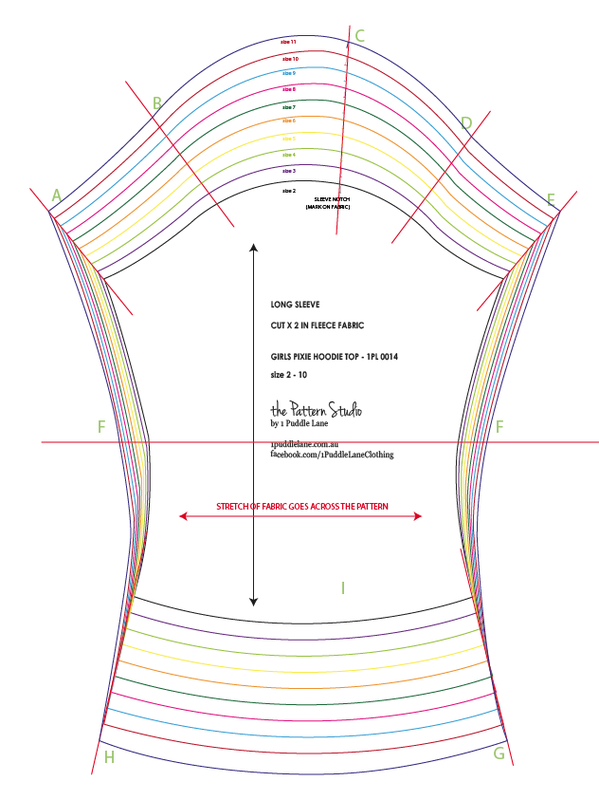
Grade Sleeve Pattern to Sizes 11 & 12
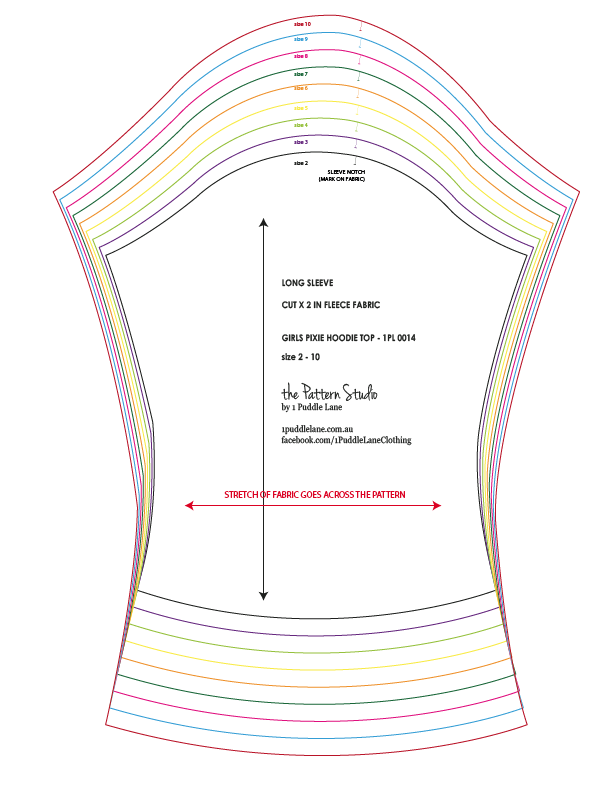
1. Start with the nested Sleeve pattern.
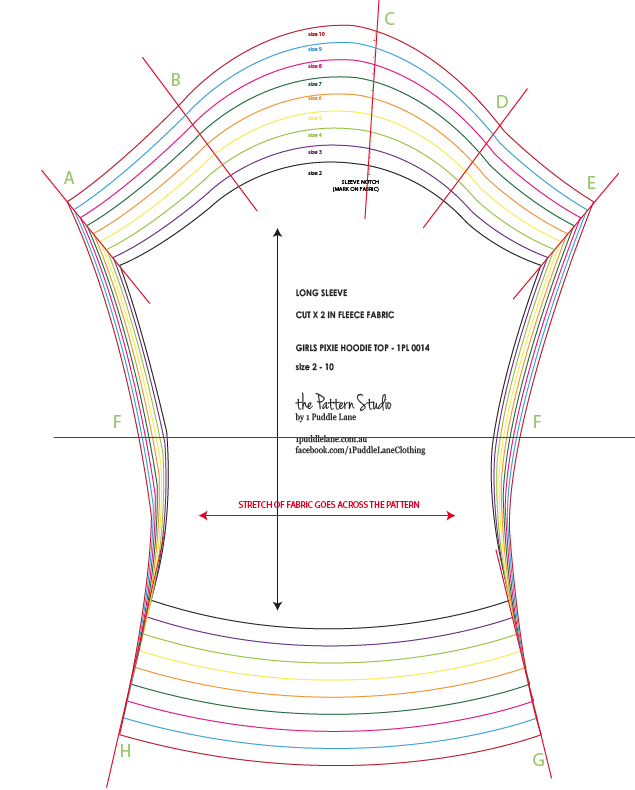
2. Rule lines from:
|
3. Once you've done this it's time to mark out your new Size 11 sleeve. At each point measure the same amount that the previous sizes have increased. eg. If A has increased by 6mm | 1/4" then you'll measure the same amount out.
|
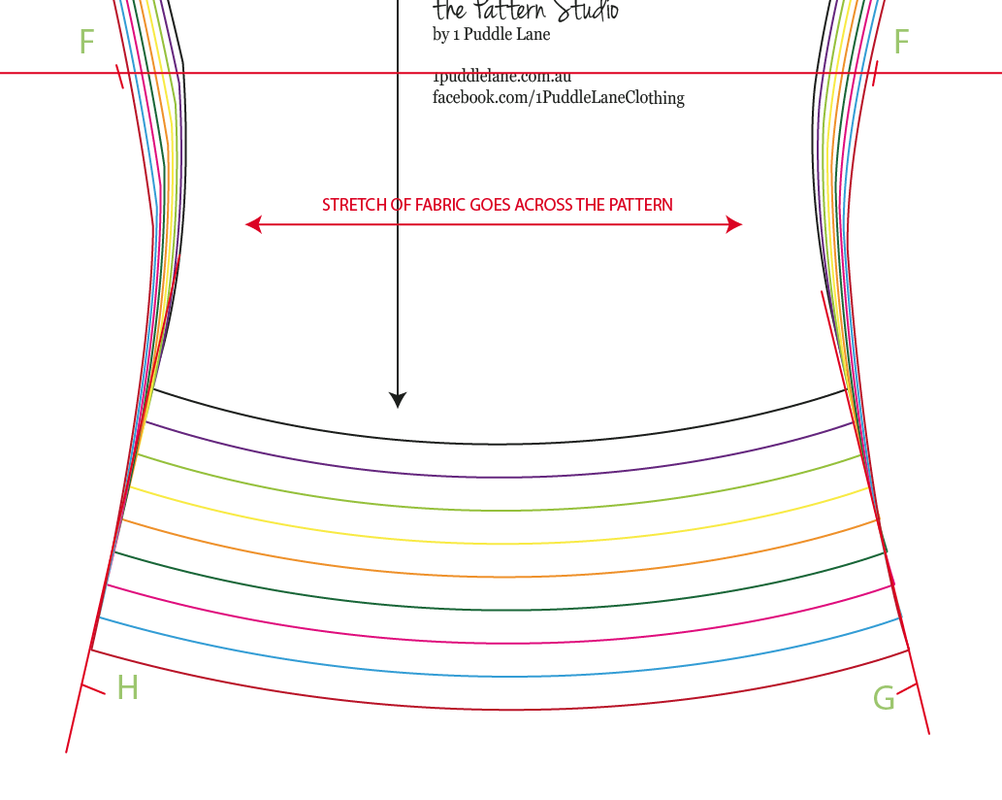
4. Now do the same process with Points F - H.
|
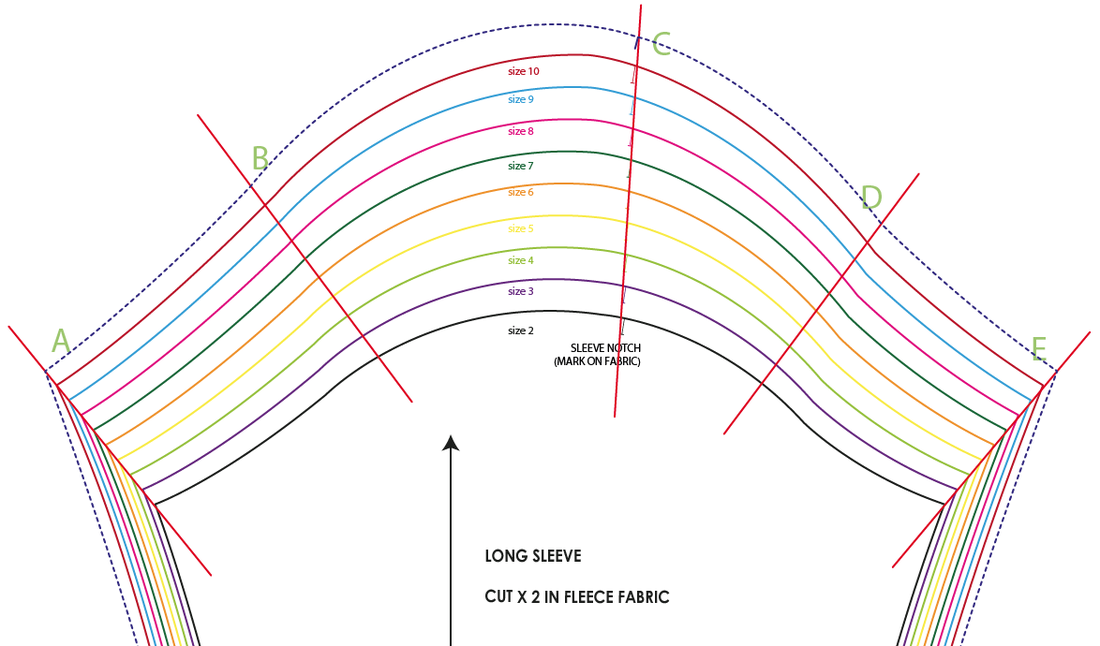
5. Once this has been done it's time to connect all the points. Make sure your Size 11 line is similar to the previous sizes. This will keep the styling the same.
|
6. Now do the same process with Points F - H.
|
7. Don't forget to mark the new Sleeve Head notch point.
|
8. This is how your new Size 11 Sleeve will look.
|
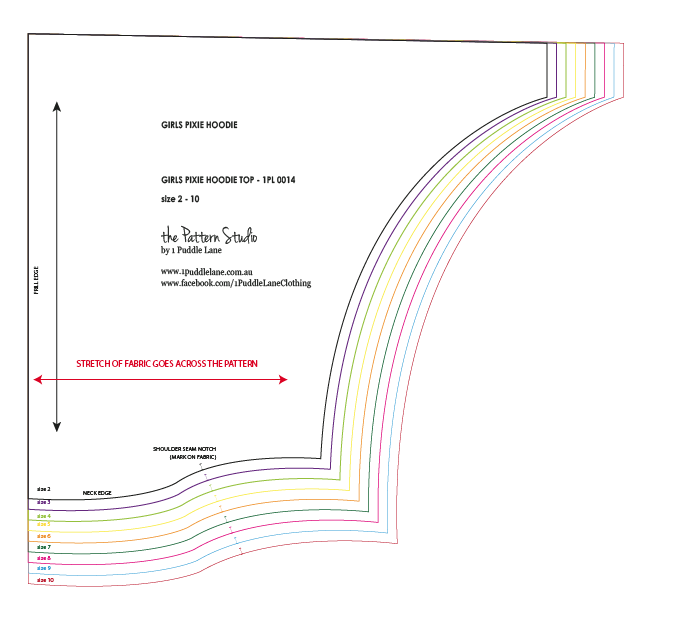
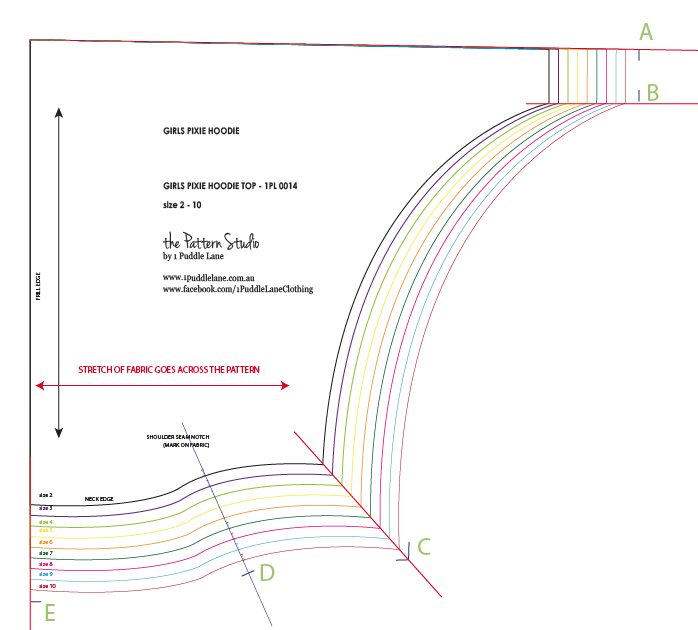
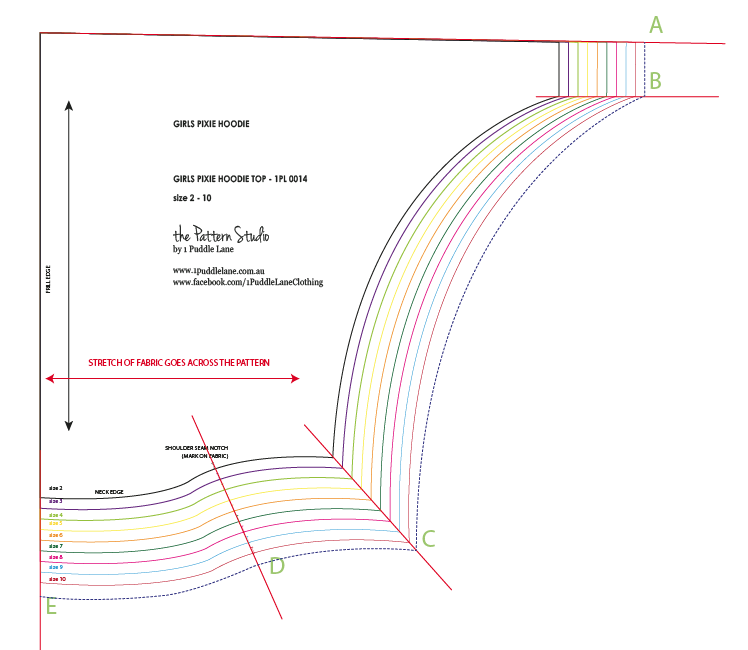
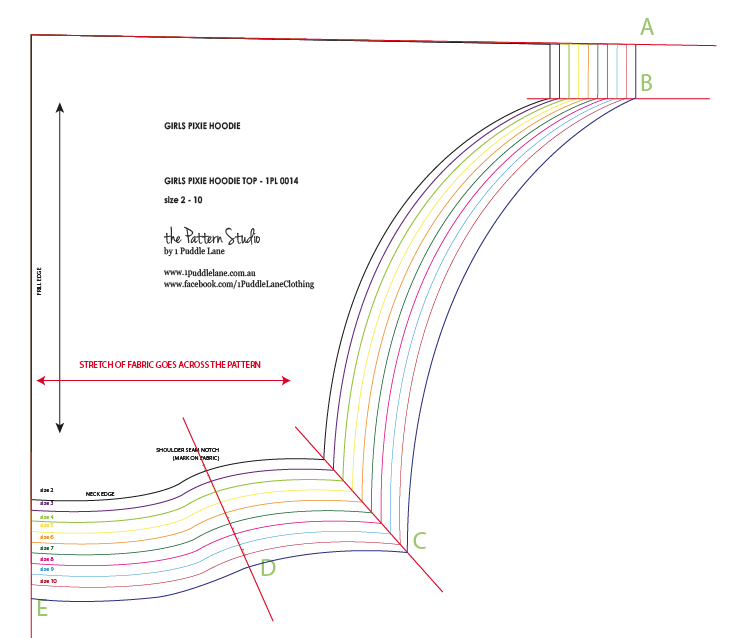
Grade Pixie Hoodie to Sizes 11 & 12
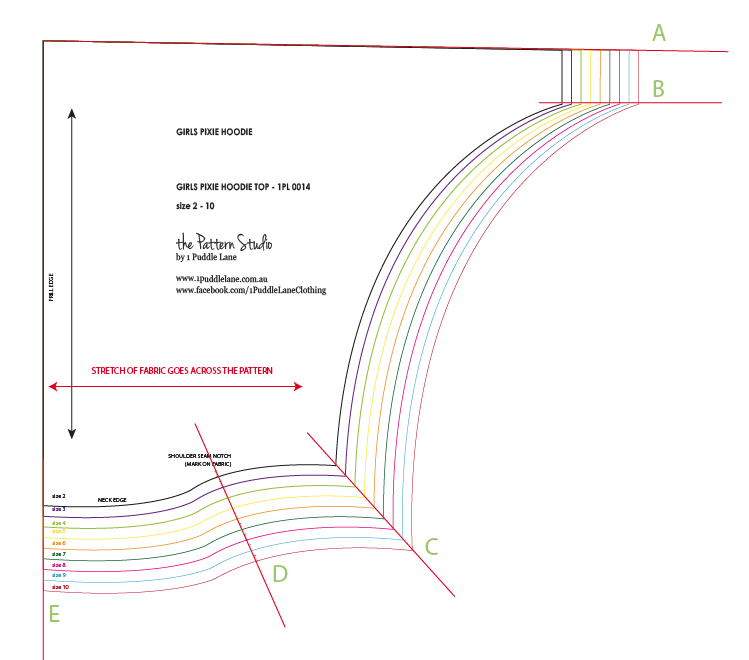
|
|
|
|
|

|
|
|
|
|
|

