|
Your first Lesson today will be the most IMPORTANT Lesson of the SEW-A-LONG. You need to take particular care and accuracy when you are measuring yourself today as that determines a good fit for the bodice and ultimately a fantastic fitting dress at the end. And it's fine if you make more than one Calico Toile. It's better to be sure than cut into that gorgeous fabric that you've spent an arm and a leg and it's not correct. Try not to be overwhelmed with all the info I'll be posting up about the Calico Toile and fitting. It will be new for you but I'll be taking you out of your comfort zone and that can be overwhelming but by the end of the SEW-A-LONG you will have more skills in your sewing tool kit. And that is my mission! Ok, so let's get started!  Here's What You'll Achieve Today:
How to Measure Yourself Correctly:It's important to measure yourself correctly right from the start - when you have your correct measurements there is less room for error. IMPORTANT - make sure you wear your best bra when you measure yourself as it does make a difference with the bra you wear. Your best bra needs to make your GIRLS sit up and look confident. As the dress at the end really features your bustline and your waist. So it is a must that you wear your bestest bra for the measuring and then wear it with the dress. So with that in mind and to help you with your measuring I've attached a PDF on 'How to Measure Yourself' Form and Guide. So step 1 is to measure yourself and write down those measurements on the PDF I've provided. Deciding on What Size to Use:Ok, now that you've done your measurements:
So, let's just say:
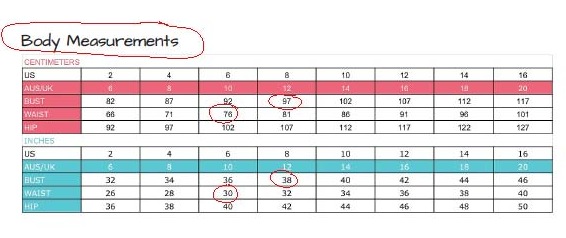 With the example above you would use size 8/12 for the bust and size 6/10 for the waist. In the pattern instructions (on page 9) I explain how to print out only the size you want OR you can just print out all the sizes and work from there. Either way is ok. Then you would draw in your size D Cup line on the Side Front Bodice piece. Below I'll show you how I picked the size for me. I'm a size 10 bust with a B cup, a size 10 waist and a size 12 hip - so I'm a lovely pear shape or I like to think I'm an hourglass shape. But if you follow what I've done below it applies to all sizes and size combinations. 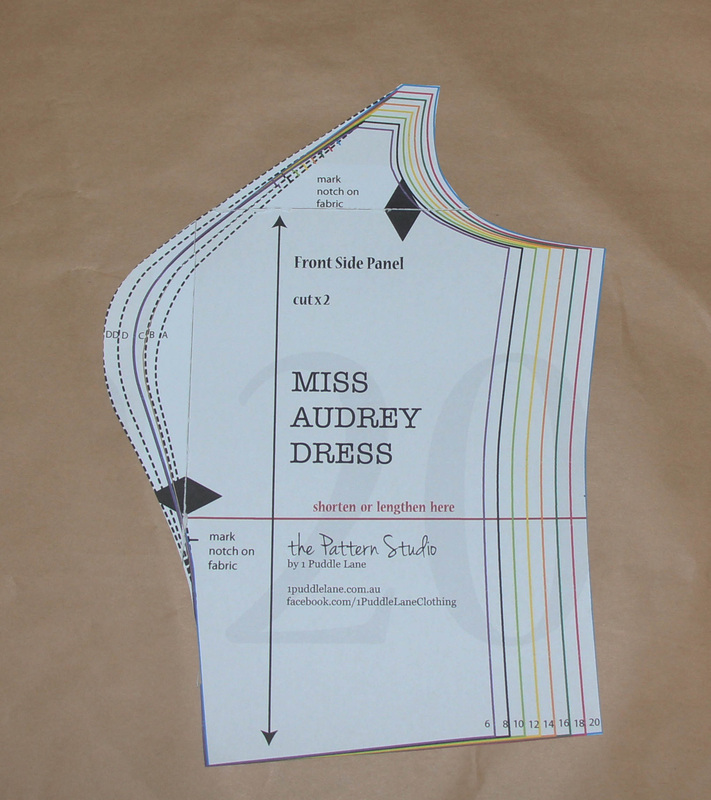 I chose to print all the sizes out and started with the front side panel. 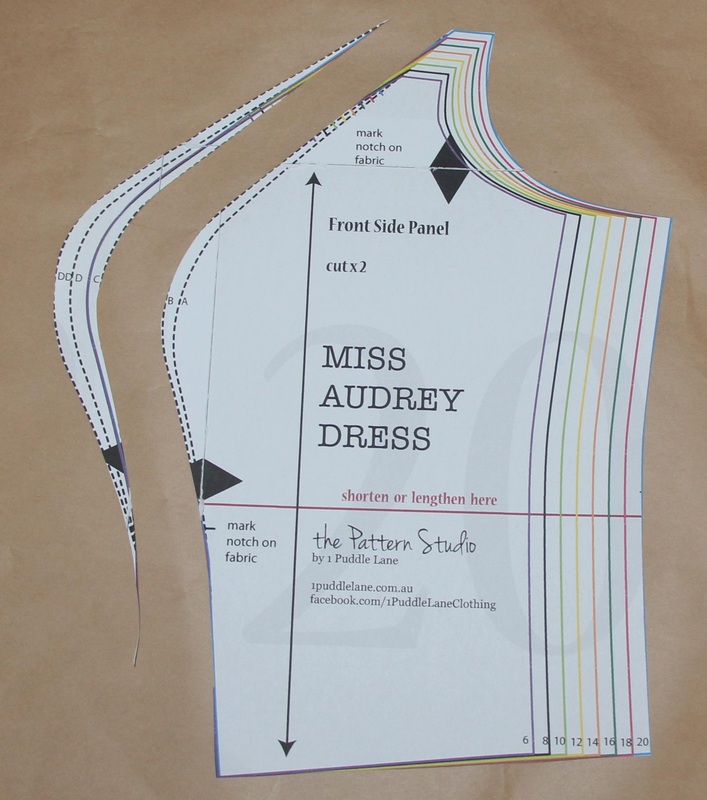 Then cut along the B cup line. 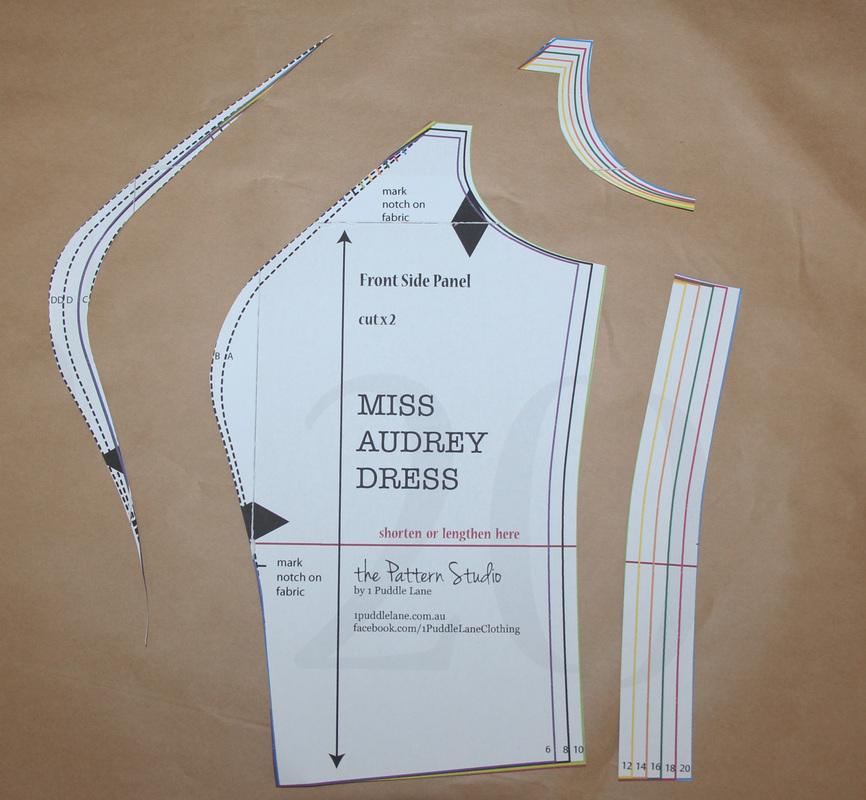 I then cut the size 10 line for the side seam and armhole. 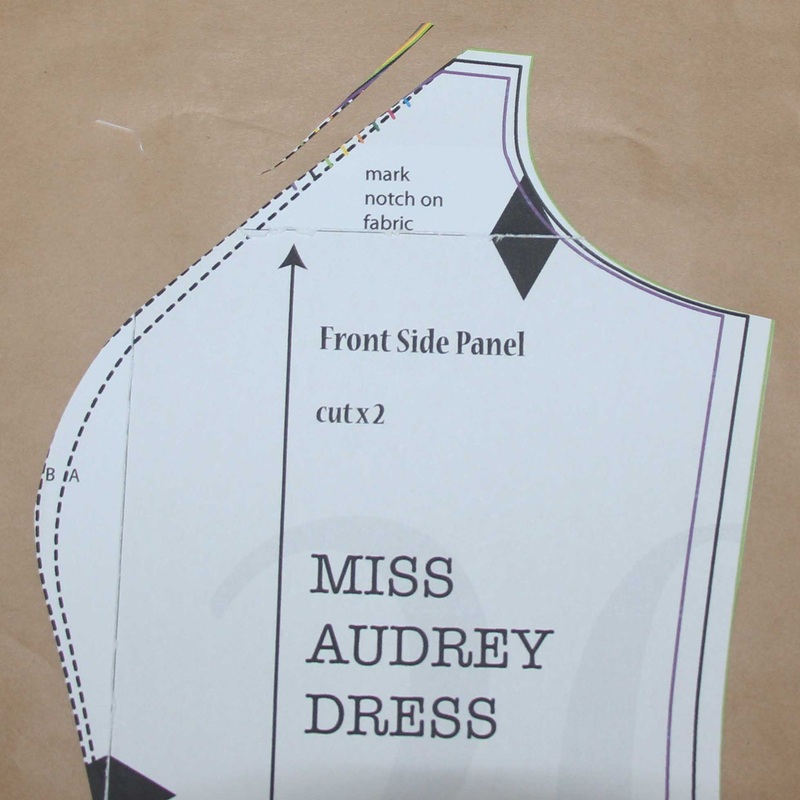 Then I cut away the tiny bit to make the B cup size line up with the size 10 at the top of the panel. 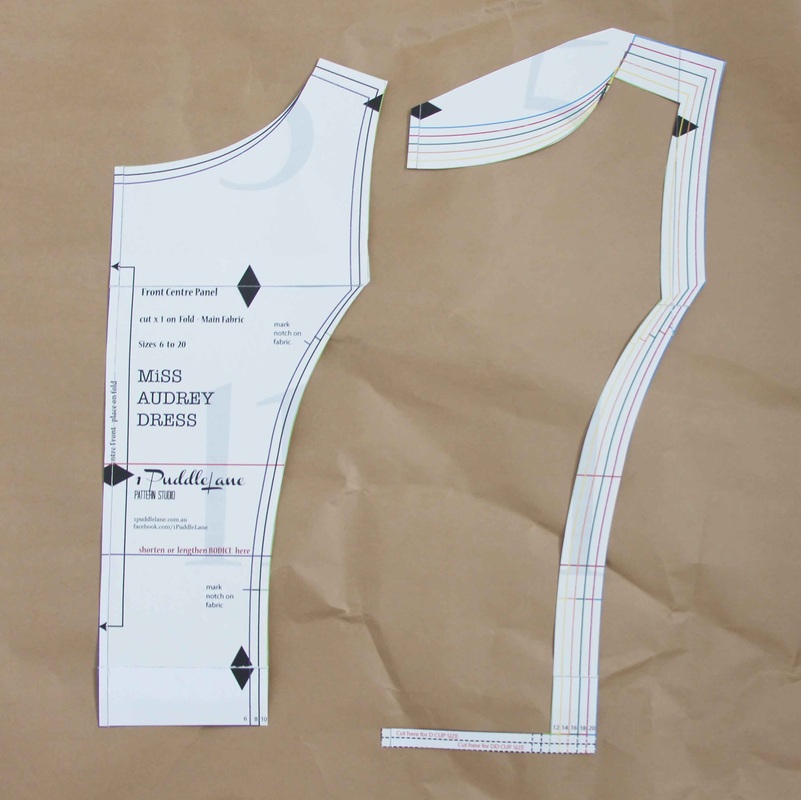 With the CF panel I cut out the size 10. Don't forget if you are a D or DD cup size you need to cut on the line that you need at the waist. And for the back I just cut a straight size 10. 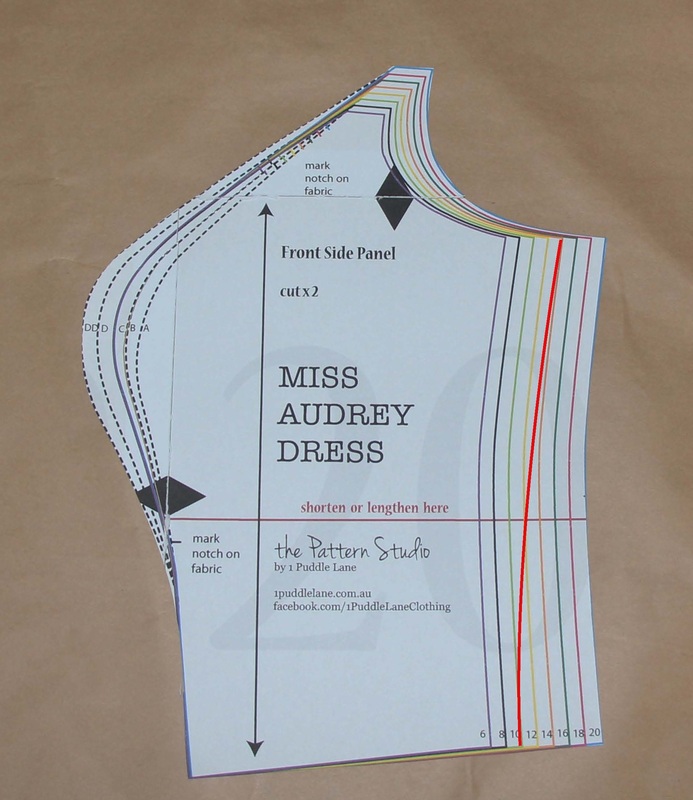 So, if you are multi sized - say a size 14 bust and size 10 waist you need to connect the sizes by drawing a slightly curved line from the 14 at the underarm down to the 10 at the waist and then continue cutting the size 14 line for the underarm. And vice versa if you are a size 10 bust and a size 14 waist you will draw a line from the size 10 bust down to the size 14 waist and so on for other size combinations. Make sure, however, whatever alterations you do to the front side panel at the side seam you need to do the same for the back bodice as well. So, go ahead and work out what size/s you are and the cup size to use and print out your size/s and draw the cup size line on your Side Front Bodice piece. Make the skirt size the same as the waist size on the bodice. Don't forget if you run into any trouble with choosing your size/s come over to the facebook page and ask away. How to Sew Your Calico Toile for the Fitting Stage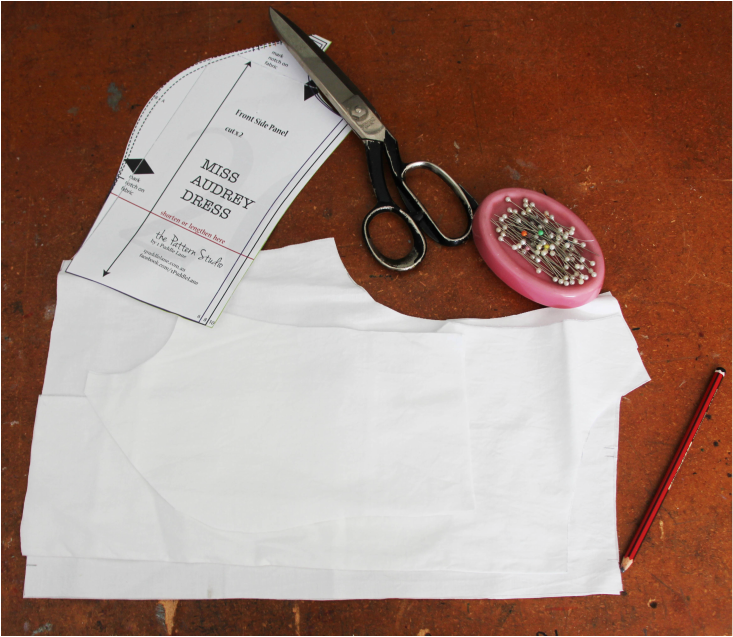 1. Make sure you cut out the following pieces for the Calico Toile:
2. Once you've cut out the pattern pieces and while the pattern is still pinned to the calico mark the notches either with tailors chalk, pencil or nick with scissors:
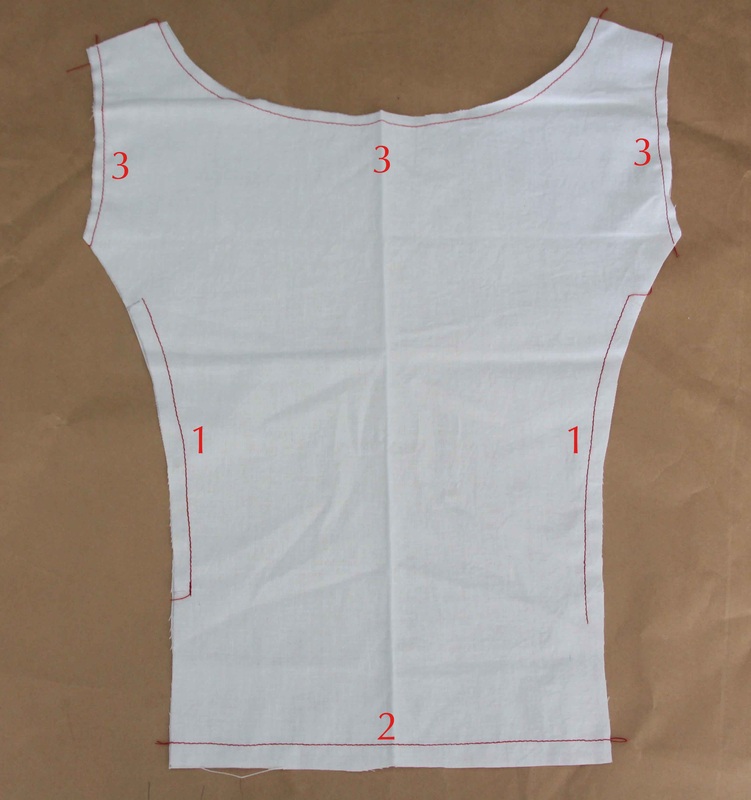 3. Starting with the CF panel, and sewing with a contrast thread, sew a stay stitch 6mm/1/4" in from edge on the outer seams from notch to notch. 4. Sew a stay stitch 12mm/1/2" up from the waist edge. 5. Sew a stay stitch 6mm/1/4" in from the neck and armhole edges. 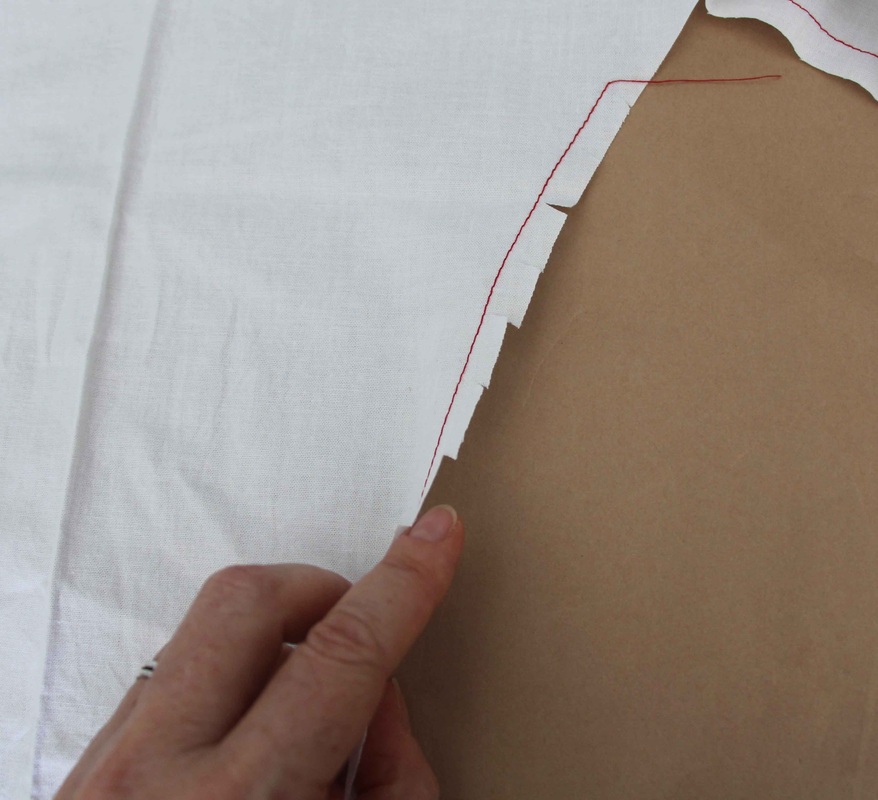 6. Then nick into the outer seam of the CF panel between the two notches making sure not to cut the stitching. 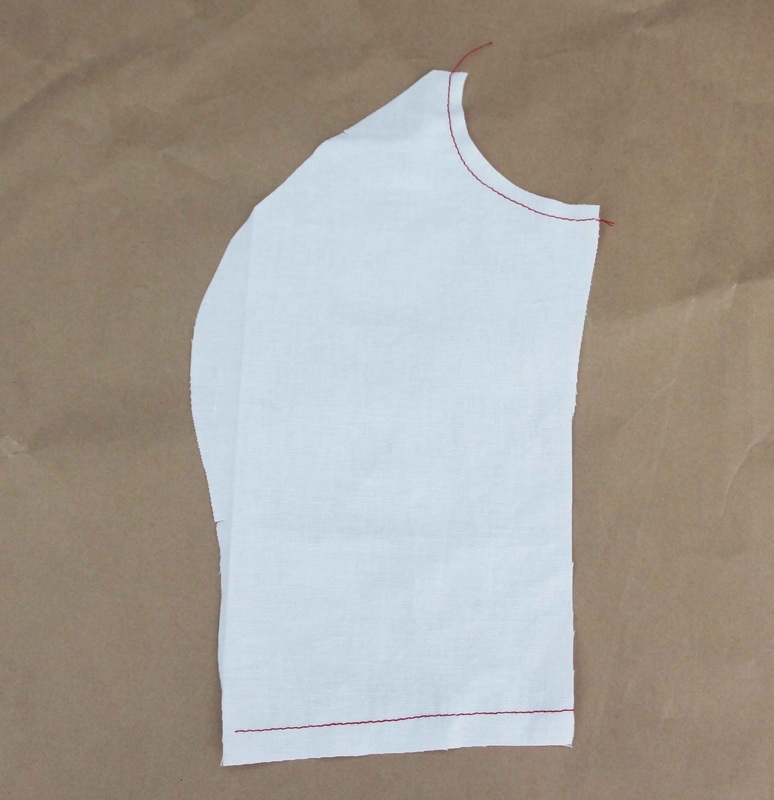 7. Sew a stay stitch 12mm/1/2" up from waist edge and 6mm/1/4" in from armhole edge. 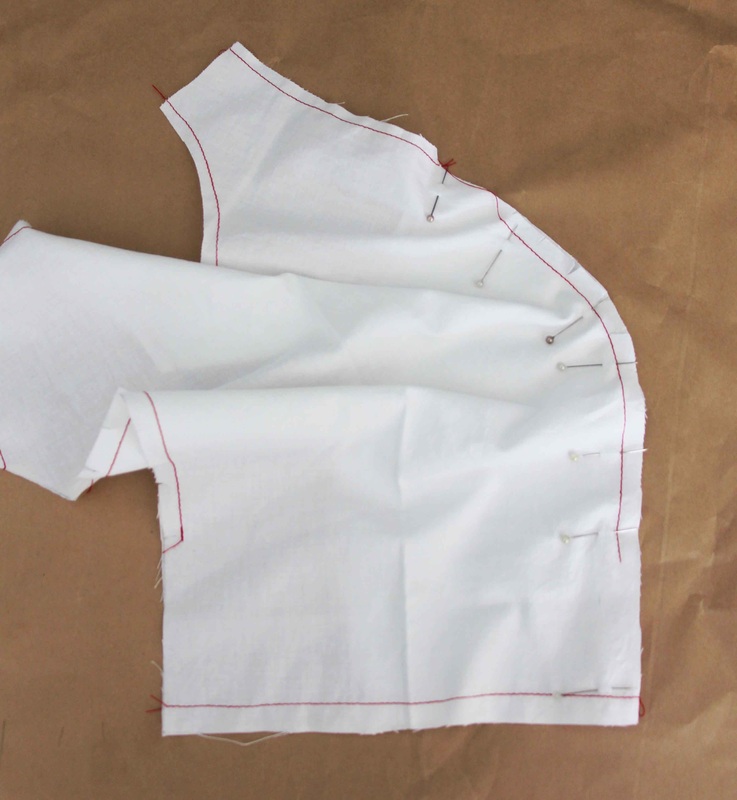 8. With the right sides together of the CF and Side front panel match up the notches and pin together and sew a seam 12mm/1/2" in from edge. Repeat this step for the other side of the bodice. Press seams to the CF. 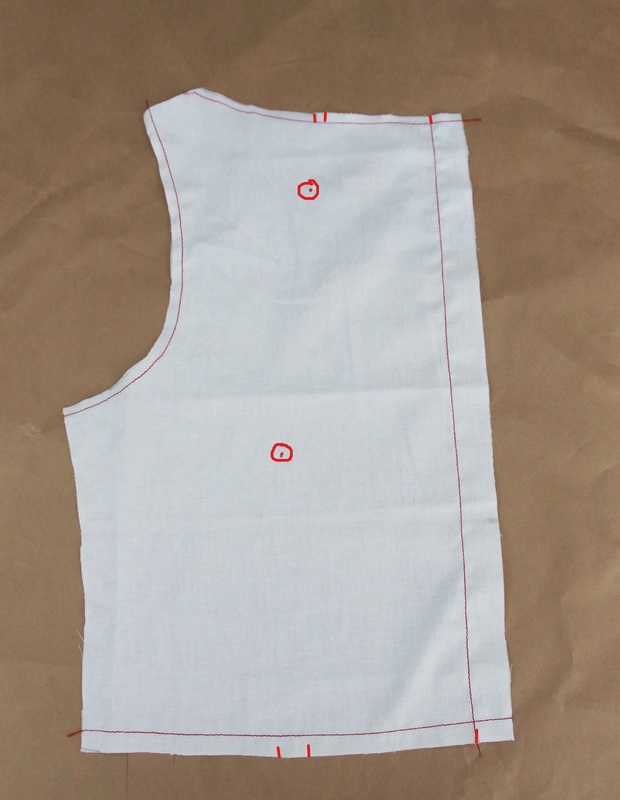 9. Make sure that you've marked the notches for the back and neck darts and the CB. 10. Sew a stay stitch down the CB from notch to notch. 11. Sew a stay stitch 12mm/1/2" up from the waist edge and 6mm/1/4" in from neck and armhole edges. Repeat these steps with the other side. 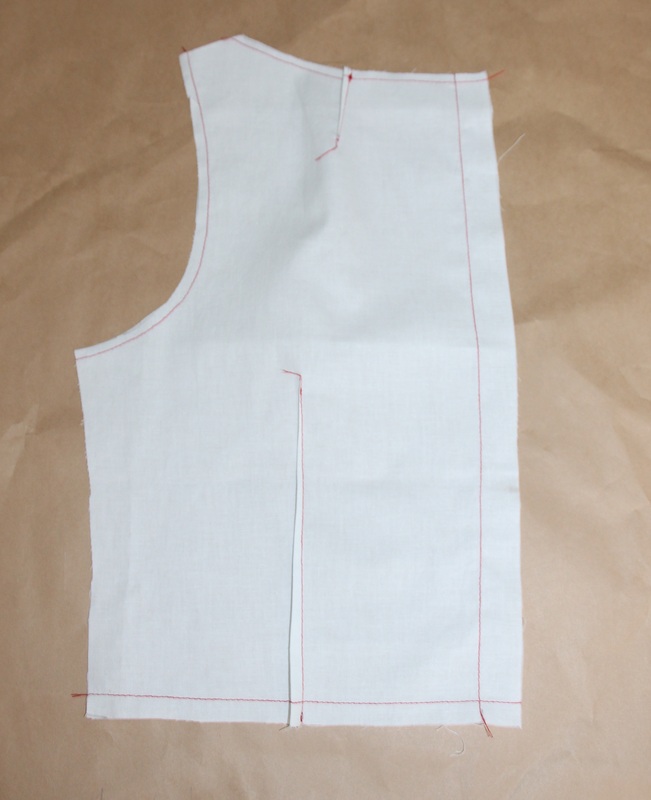 12. On the wrong side sew the neck and waist darts and press to the side seam. 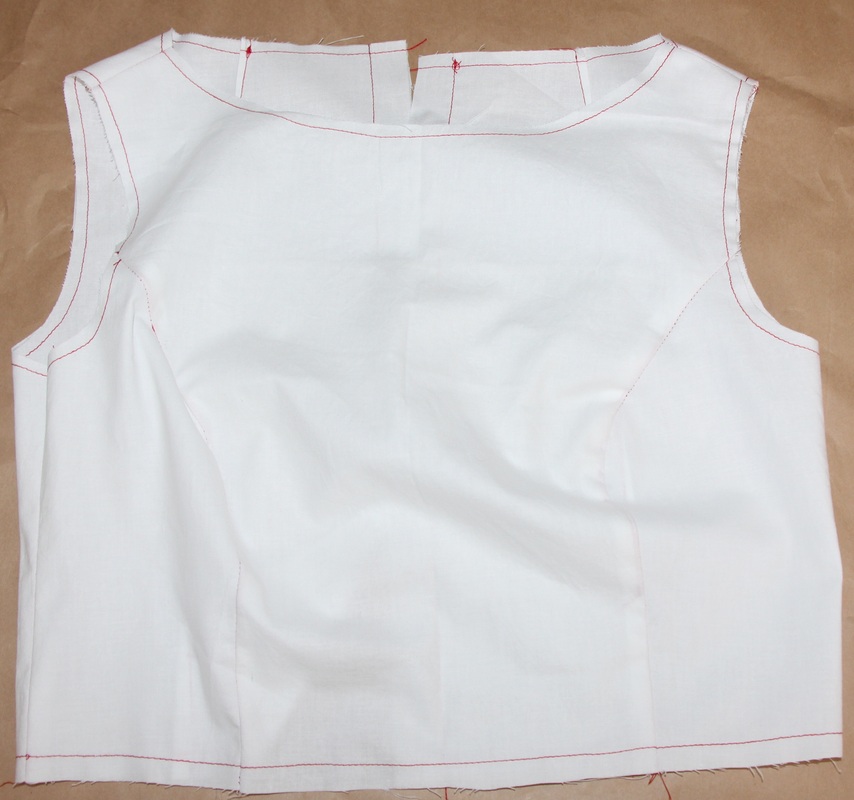 13. With right sides together sew the shoulder seams and side seams 12mm/1/2" in from edge. Press the seams open. 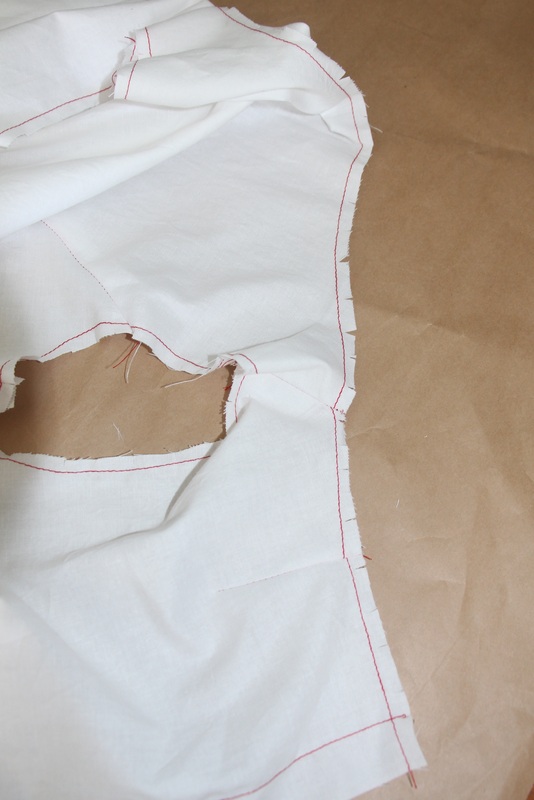 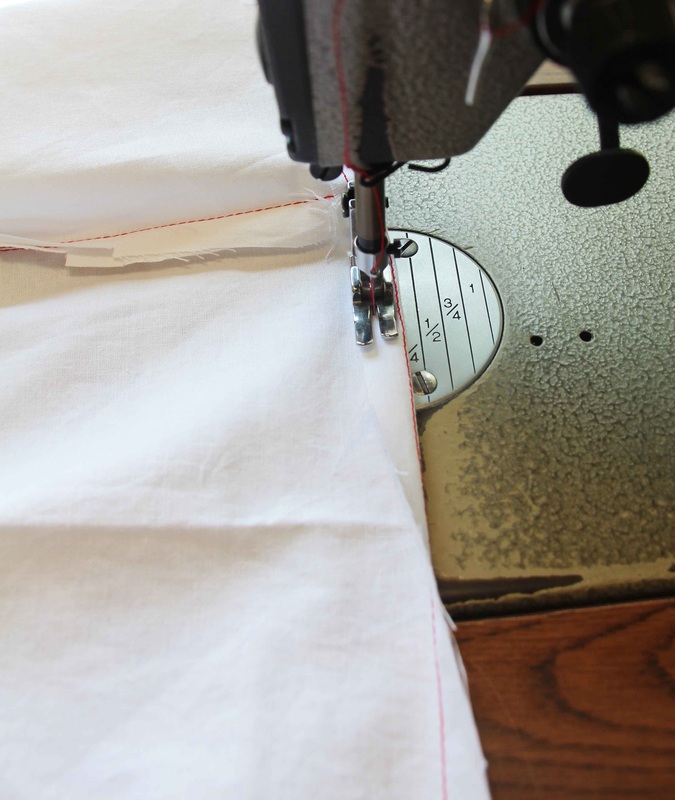 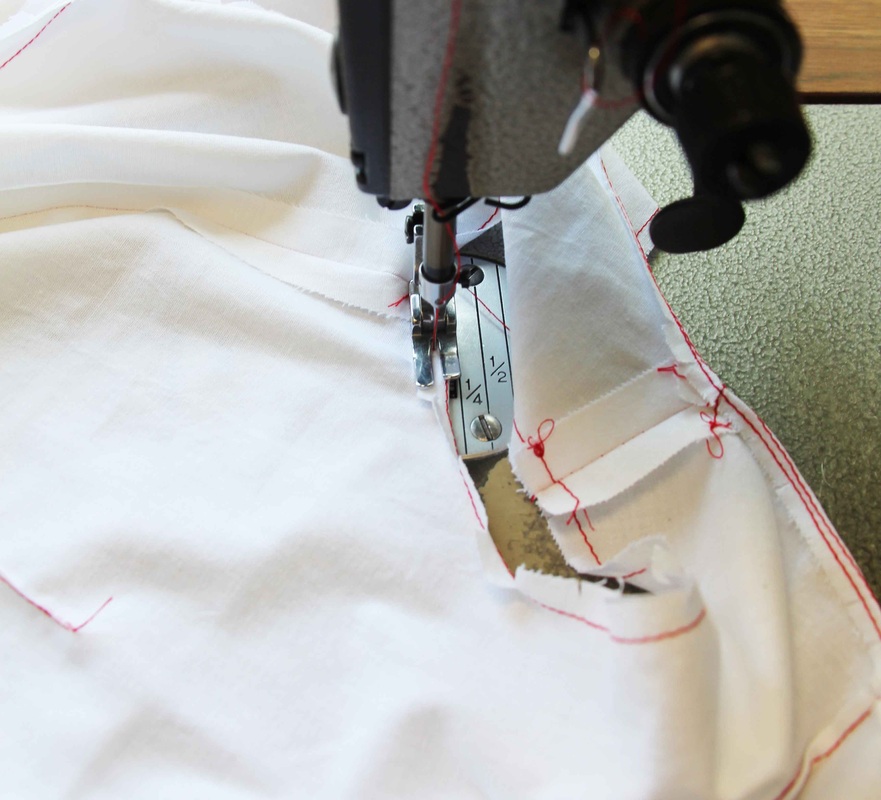 14. Nick into the curved edges eg. neck and armhole edges - every 12mm/1/2" making sure you don't cut the stitching. 15. Now fold the neck, armhole and waist edges in to the wrong side at the stay stitch and sew in place. 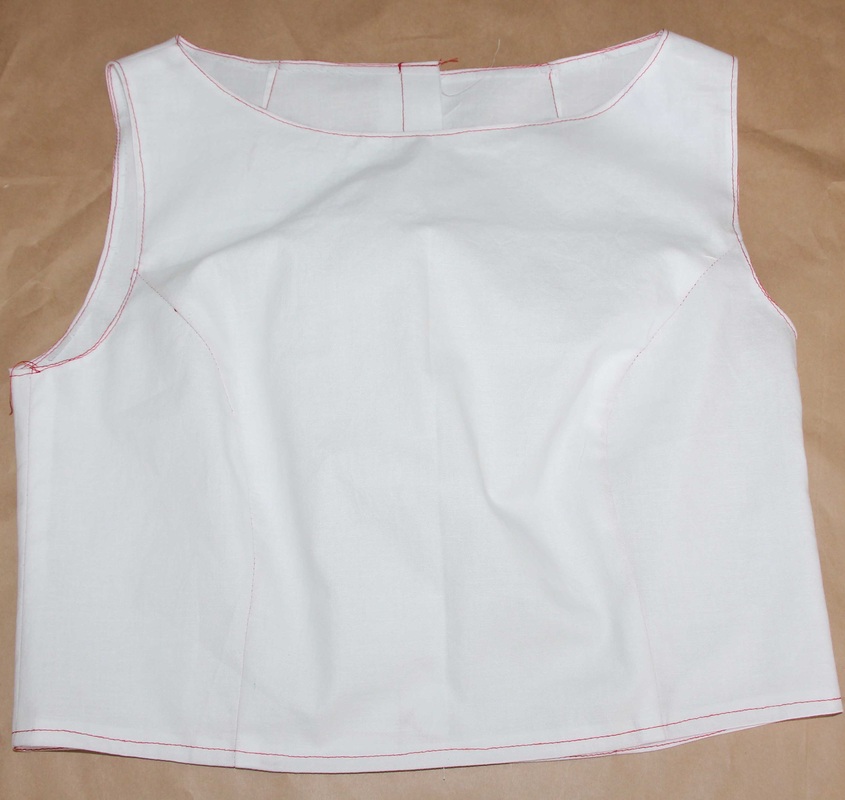 15. Now your Calico Toile is ready to fit. The reason why I turned all the edges in is so the Calico Toile mimic how the actual bodice will fit you when it's finished. You need to get the seam allowances out of the way when you are fitting. That way you will be able to see if the across chest and across back is too big or small and the front and back lengths are too long or short. Ok, that's it for today. You've done really well - celebrate with a beverage of your choice. The next lesson you are going to fit your Calico Toile and nut out the fitting problems you might have. This lesson in particular will help you if you take photos of your Calico Toile on you and post it in the facebook group so I can help you with any fitting issues you might be having.  The MiSS AUDREY DRESS SEW-A-LONG
0 Comments
Ok, you've done fantastic work so far..... so let's keep going! This is the lesson I would like you to take photos of yourself in your Toile and post it in the facebook group.......that's if you are having trouble fitting your bodice. Remember I said yesterday that you need to measure yourselves correctly....well this is why! Your fitting stage should just have a few tweaks. But don't worry if you have a lot of tweaks.....I'm here to help you. There might be quite a number of alterations that need to be done to your Toile so it's looking fab on you and below I'll be taking you through some examples to help you with the process. 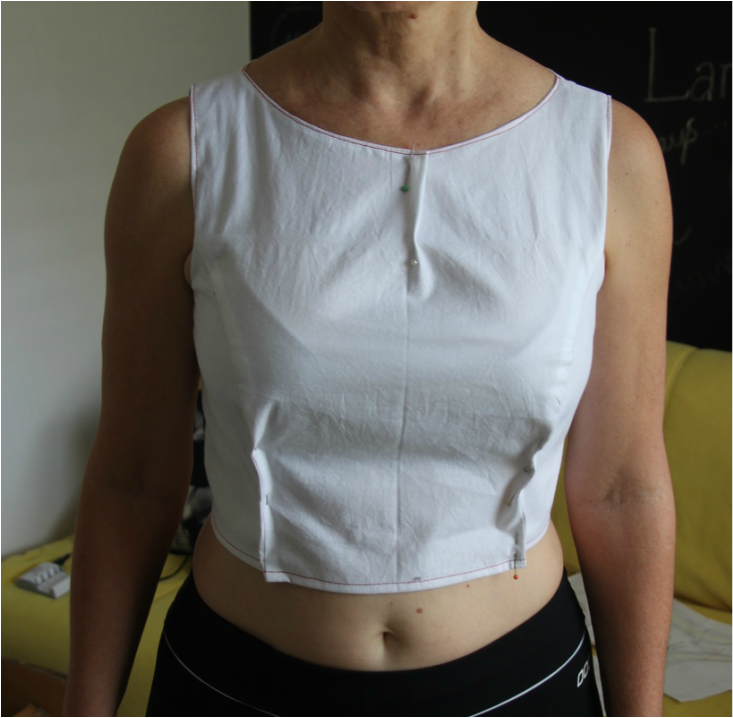 Here's what you'll achieve today
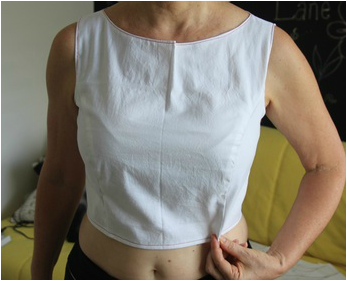
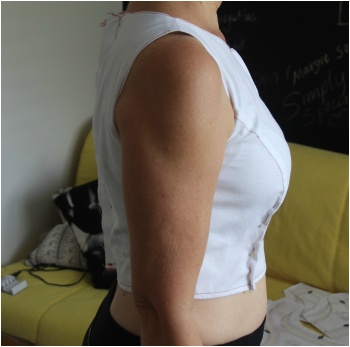
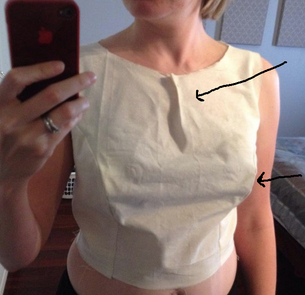
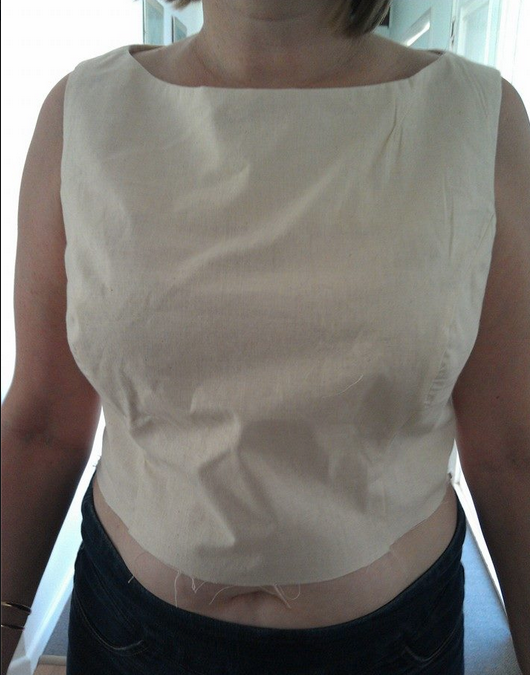
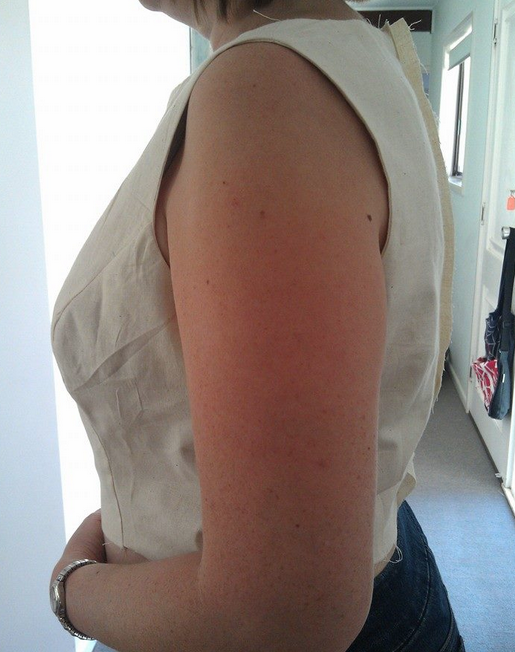
Fitting your Calico ToileI'll take you through the my fitting process and explain what I've done and at the end I'll show you examples of my Testers and what they did to get their Toile fitting like a glove. Now, fitting is a personal preference. Some like a very firm fit and some don't. Personally, I like a firm fit so don't thin that you need to do the same. Adjust your bodice the way that feels best for you. 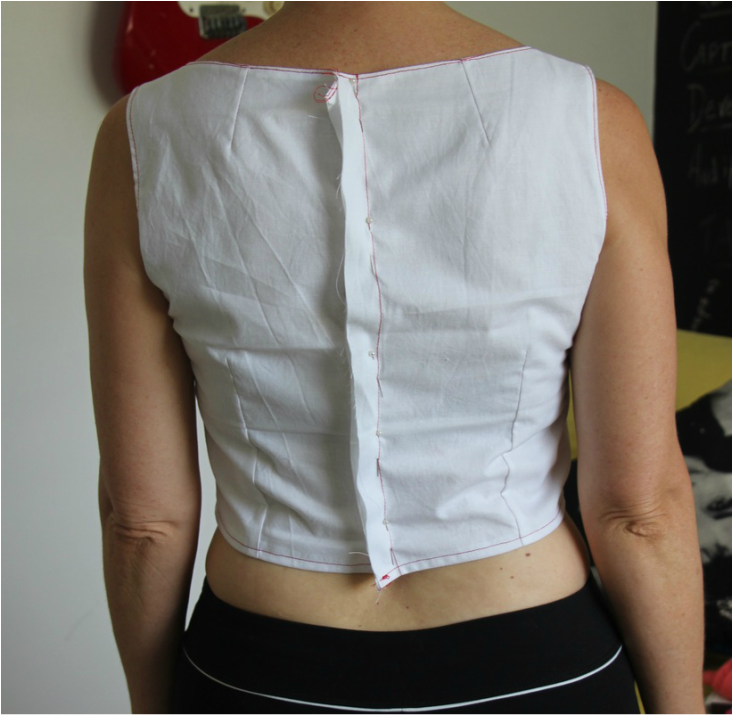 1. I got hubby to pin on the stitching line for me.......and might I say he did a good job. Now whilst the fit is good on the back bodice it could be taken in across the bodice just above the waist to get rid of the wrinkles. But I chose not to. Again, personal preference. 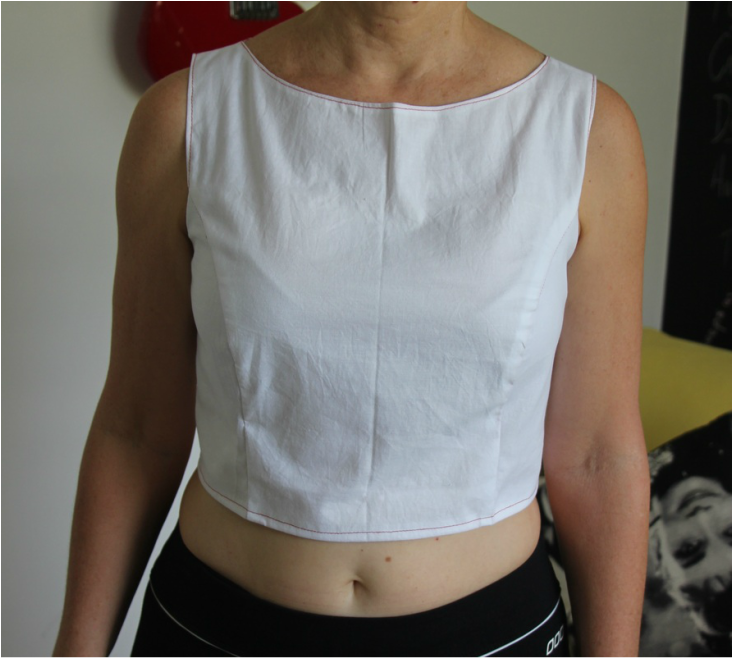 2. The front bodice look fine too but I chose to take in the front neck and also take in the waist.
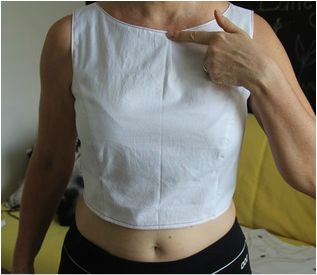
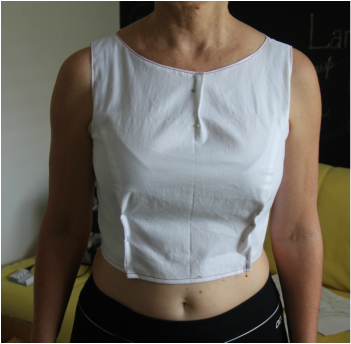
3. I pinned where I wanted to remove the excess fabric. Which was the Gaping Front Neck and removing excess fabric at the waist and up the panel line. When you pin in the excess make sure you pin right to the end of the excess fabric. It will look like a dart. You'll understand the reason for this a little later. So, for me that's all I'm going to alter for my Toile. Below are some of the Testers who I worked with during their fitting process for their Toiles. Tester Toiles
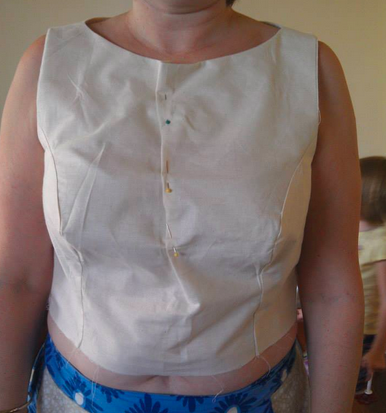
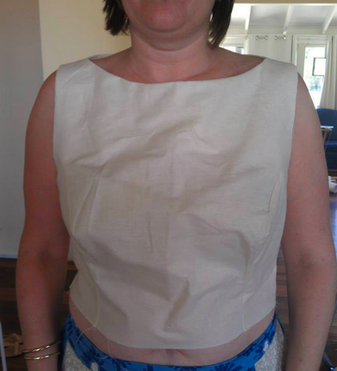
Here we have the lovely Nat who made the following alterations to her bodice: 1. Nat pinned in the neck and formed a dart and also the bust was pinned in but it's not shown here. 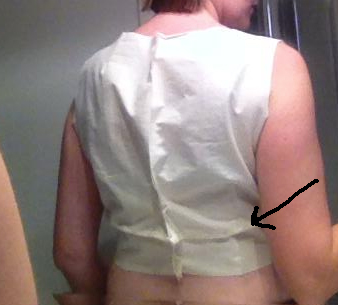 2. Nat pinned the excess fabric across the bodice just up from the waist. This is called a 'Sway Back' alteration. Here we have Abbie and these are the alterations to her Toile:
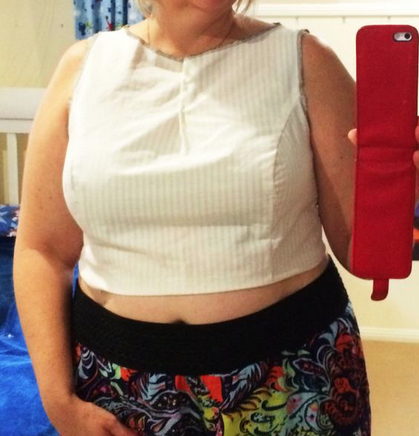
1. It seemed that Abbie's Toile was too big everywhere so I suggested that she just make another one and go down a size.
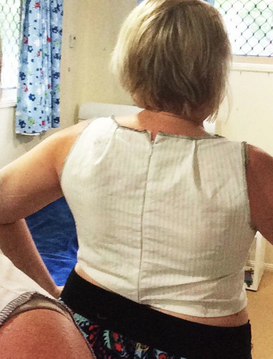
2. A much better fit for Abbie and really on a tweak at the slight gaping front neckline. Here we have Debbie and her alterations were:
Debbie's alterations were just the gaping front neck and the back neck dart needed taking in or you can take out the dart altogether by doing an 'Across Back' alteration. Types of Bodice AlterationsThe main bodice alterations that I've come across are:
Your Mission TodayStep 1 - So what you need to do now is to try on your Toile and get someone to pin the CB seam at the stitching and have a really good look at where it's baggy, tight, gaping and start pinning in the excess fabric. If you are having trouble working out what is going on take photos of your front, back and side on views and post them in the facebook group so I can help you. In Lesson 3 you'll learn how to transfer your Toile alterations to your pattern pieces.  The MiSS AUDREY DRESS SEW-A-LONG
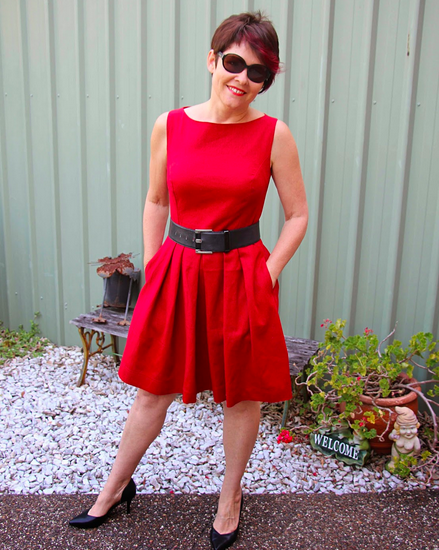 Welcome to the MiSS AUDREY Sew-A-Long. My name is Ann Martin (that's me above) and I'll be leading you through the sewing process of my beautiful new pattern and to make sure you learn as much as you can about making this pattern fit YOUR SHAPE! I've also got a facebook group so you can ask questions and get my support and others in the group. Hopefully it will be a fun experience for you. So if you haven't already joined click on the link HERE and request to join. The MiSS AUDREY DRESS is just the piece you need in your wardrobe to take you from school pickups, lunch with the gals, dinner with your loved one, boardroom meetings and off to the races. It is a very versatile dress and can be dressed up or down depending on the occasion. The Dress Features:
The Pattern Features:
Skill Level - Intermediate  How the SEW-A-LONG WorksI'll be sending out via email all the instructions in a step-by-step format every 2 to 3 days starting tomorrow. Follow along and then come over to the facebook group if you have any questions or need help with any step that you don't understand. Posting pics of where you are having problems will really help me to solve a problem for you. I also encourage you all to come into the facebook group and help each other out if you know of a solution for them. What You'll Need for the SEW-A-LONG
So pop out now and pick up all your supplies - if you haven't already done so - and join the facebook group and see you there bright and early tomorrow to get started on your Calico Toile.  The MiSS AUDREY LANE DRESS SEW-A-LONG
|


CategoriesArchives |

 RSS Feed
